4-49
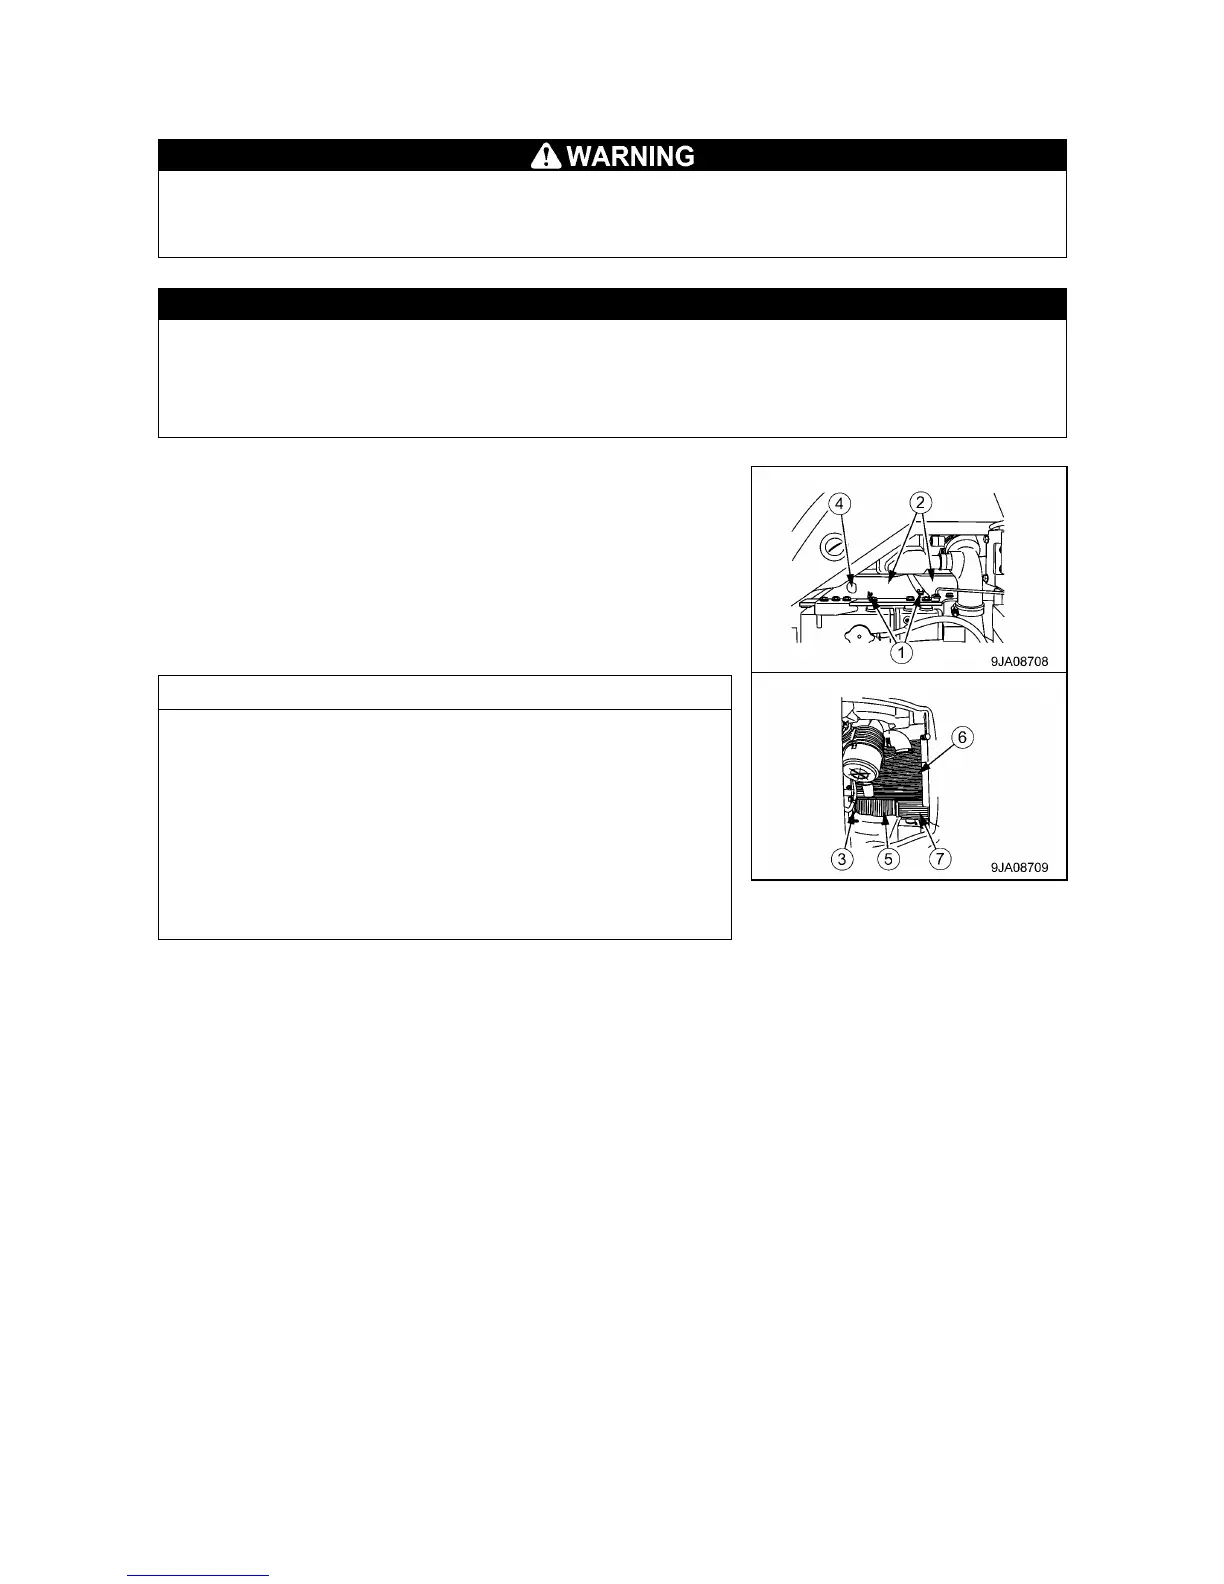
[6] CLEANING/CHECKING RADIATOR FINS, OIL COOLER FINS, FUEL COOLER FINS, AND
AIR CONDITIONER CONDENSER FINS
If compressed air, high-pressure water, or steam hits your body directly or dirt is sent flying by
the compressed air, high-pressure water, or steam, there is danger of personal injury. Always
wear protective glasses, dust mask, and other protective equipment.
When using compressed air, keep a distance from air nozzle, to prevent damage to the fins.
To prevent damage to the fins, apply compressed air from an appropriate distance. Damaged
fins may cause water leakage or overheating. In a dusty site, check the fins daily, irrespective of
the maintenance interval.
1. Open the cover at the rear of the cab and the battery room door
at the left side of the machine.
2. Remove 4 wing screws (1) and remove net (2).
3. Check the front and rear surfaces of oil cooler fins (3), radiator
fins (4), after cooler fins (5), air conditioner condenser fins (6),
and fuel cooler fins (7). If there is any mud, dirt, or leaves stuck
to the fins, blow the dirt off with compressed air.
Steam or water may be used instead of compressed air.
However, when carrying out powerful steam cleaning (high-
pressure machine wash) of the heat exchange equipment
(radiator, oil cooler, after cooler, fuel cooler, air conditioner
condenser), maintain sufficient distance from the machine when
carrying out the operation. If steam cleaning (high-pressure
machine wash) is carried out at close range, there is danger that
the internal fins of the heat exchange equipment may be
deformed, and this will cause early closing and breakage.
4. Check the rubber hose. Replace with a new one if the hose is
found to have cracks or has hardened. Also, check hose clamps
for looseness.
4. Check the rubber hose. Replace with a new one if the hose is
found to have cracks or to be hardened by again. Also, check
hose clamps for looseness.
5. After completing inspection and cleaning, install net (2) to its
original position.