PRO-2000 Installation and Operation Manual
7
• Centre-to-centre spacing between an entry hole for Power-Limited circuit cables and an entry hole for Non-
Power-Limited circuit cables must not be less than two (2) times the diameter of the larger entry hole.
• Sufficient clearance must be provided around each hole to allow for any required conduit fittings, cable-
clamps, lock nuts, washers or other hardware.
• Exclusive entry holes must be provided for the Primary AC Supply cable and for the External Standby Supply
(battery backup) cable.
• At no point inside the enclosure must the spacing between power-limited and non-power-limited circuit
conductors be less than 6.4mm (114 inch).
Wire length inside the enclosure should be kept to a minimum.
Cables must not interfere with, or touch any circuit card components other than the intended connector terminals.
Grounding and Bonding
All supply and device wiring must be grounded and bonded in accordance with applicable local regulations governing the wiring of
Fire Alarm Systems.
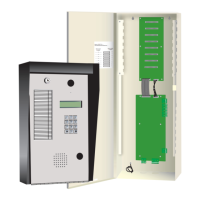
Enclosure Installation
All cable entry holes should be punched out prior to installation of base.
Ensure wall or structure to which the enclosure base is being mounted is capable of supporting a fully loaded unit.
Sufficient clearance must be provided around the unit to allow the enclosure cover door to be fully opened (180°)
without impediment. The enclosure box may be semi-flush mounted provided no less than 5 cm (2 inches) of the
box frame protrudes from the wall surface.
The top of the enclosure should be no more than 2.0 meters (6.7 feet) above the finished floor.
Recommended mounting hardware: four 1/4” pan head screws (if bolts are used, four suitable flat washers are
required).
1. Remove the ground strap (14 gauge, green) between the enclosure base and door by loosening and removing
the ground stud nut and star washer.
2. Disconnect the power harness connectors at J5 and J7 on the LCD card.
3. Remove the enclosure door from the slip hinges.
4. Remove the mounting plate, with attached power supply, from the enclosure base.
5. Secure the enclosure to wall using the for ¼“ panhead screws.
6. Align the mounting plate, with attached power supply, to the enclosure base threaded studs and secure with
attaching nut and washer.
7. Re-install the door and ground strap between the door and the enclosure base.
8. Reconnect the power harness connectors at J5 and J7 on the LCD card.