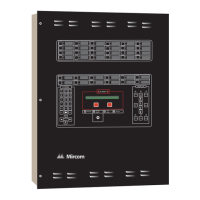
PRO-2000, X2 SERIES - S/E/M
12
Installing Batteries in the Enclosure
The following instructions apply only to systems requiring 42 Amp-Hours or less of battery back-up capacity.
1. Remove battery retaining hardware.
2. Place two new fully charged 12V batteries on the bottom of the enclosure. Use 12V sealed lead-acid batteries.
3. Connect jumper between the batteries 'A' and 'B' poles (see Figure 8).
4. Connect black wire terminal to battery 'A'.
5. Connect red wire terminal to battery 'B' (+).
6. Replace battery and secure with retaining hardware.
For the Calculation of Battery Requirements, refer to Appendix A.
S
.
F
E
.
F
U
F
E
U
E
.
F
U
S
GROUND
NEUTRAL
LINE
GROUND STUD
FUSE
NON POWER
LIMITED CIRCUIT
Figure 7: Terminal Connections