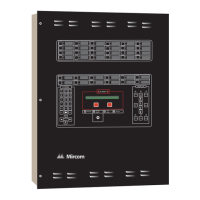
PRO-2000 Installation and Operation Manual
21
Hookup of AC Power and Batteries
The Power Supply provides a regulated 28 VDC to the PRO-2000 series and provides charge current to the optional
backup batteries. As the batteries are kept permanently charged, power is continuously provided (Uninterruptible Power
Supply or UPS). The power supply AC ratings are as follows:
120 VAC Version: V = 120 VAC nominal, 1 =1.5 A, Frequency 60Hz
220 VAC Version: V = 220 VAC nominal, 1 =0.8 A, Frequency 50Hz
LEDs are visible on the Power Supply indicating the functional status of the unit. As the Power Supply is convection
cooled, no fans or blowers are required. The transformer and power supply mount directly on the mounting plate.
A built-in battery charger maintains the batteries at full capacity. After extended power outages, the charger restores the
batteries to full capacity. Short circuit, over-voltage and brownout monitoring circuits protect all powered components by
switching to the batteries whenever a trouble condition exists in the power supply.
Alarm Supply
Power to the alarm devices in a system must be supplied from a separate battery backed-up Power Supply which is "UL
listed (ULC listed in Canada)” for fire protective signal system use.
AC Power Connection
CAUTION: Ensure all voltage sources are disconnected from the panels before installing or removing cards.
1. Remove terminal cover from terminal block, TB1, located on the transformer bracket.
2. Connect Primary supply Ground wire (green) to Ground stud.
3. Connect Primary supply Neutral wire (white) to TB1 NEUTRAL terminal.
4. Connect Primary supply Line wire (black) to TB1 LINE terminal.
5. Replace and secure terminal cover on TB1.
6. Maximum 150 V AC to Ground.
Installing Batteries in the Enclosure
The following instructions apply to stems requiring 42 Amp-Hours or less of battery back-up capacity.
1. Remove battery retaining hardware.
2. Place two new fully charged 12V batteries on the bottom of the enclosure. Use 12V sealed lead-acid batteries.
3. Connect jumper between the batteries ‘A’ (+) and ‘B' (-) poles (see Figure 15).
4. Connect black wire terminal to battery 'A'.
5. Connect red wire terminal to battery 'B' (+).
6. Replace battery and secure with retaining hardware.
For Calculation of Battery Requirements refer to Appendix A.