19.6 Backlight Replacement
19.6.2 Replacement procedure of backlight
19 - 10
17
ADDITION TIMES RESET
FOR MAINTENANCE TIME
NOTIFICATION
18
INSTALLATION OF
COREOS, BOOTOS AND
STANDARD MONITOR OS
19
MAINTENANCE AND
INSPECTION
20
TROUBLESHOOTING
APPENDICESINDEX
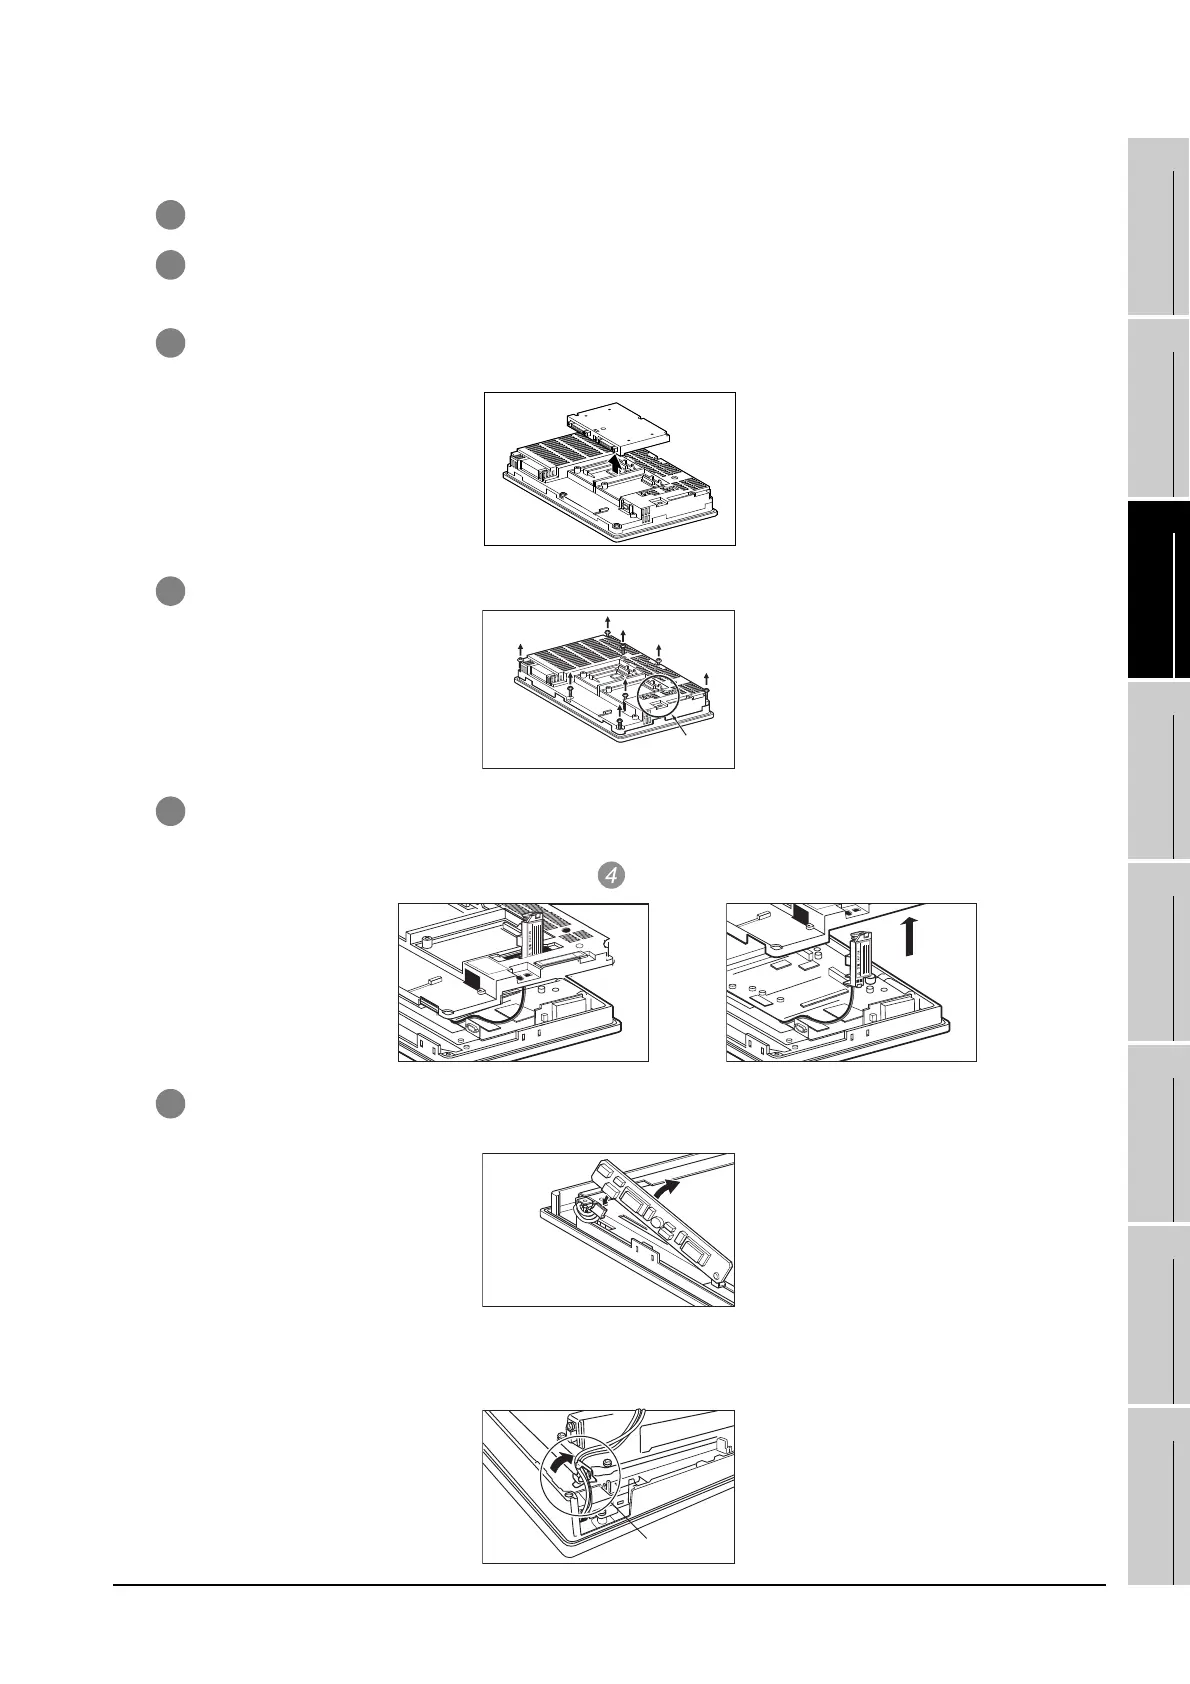
(1) Replacement 1
1 Power off the GOT.
2 Disconnect the power supply cable and communication cable.
Remove the GOT from the control panel.
3 Remove the extension unit cover from the right side of the GOT.
Remove the extension unit, e.g. bus connection unit, if it is mounted.
4 Remove the GOT rear fixing screws (8 pcs.) with a screwdriver.
5 Remove the case after passing the battery holder through the mounting hole. When removing, take care
of not cutting the cable of the battery holder.
6 Pull up the backlight drive board, and disconnect the cable connector of the backlight from the
connector of the backlight drive board.
When replacing GT15-80SLTT, remove the cable from the cable holder.
(When replacing GT15-80SLTT)
(Expanded figure of part A in )
A
Cable holder

 Loading...

