19.6 Backlight Replacement
19.6.2 Replacement procedure of backlight
19 - 12
17
ADDITION TIMES RESET
FOR MAINTENANCE TIME
NOTIFICATION
18
INSTALLATION OF
COREOS, BOOTOS AND
STANDARD MONITOR OS
19
MAINTENANCE AND
INSPECTION
20
TROUBLESHOOTING
APPENDICESINDEX
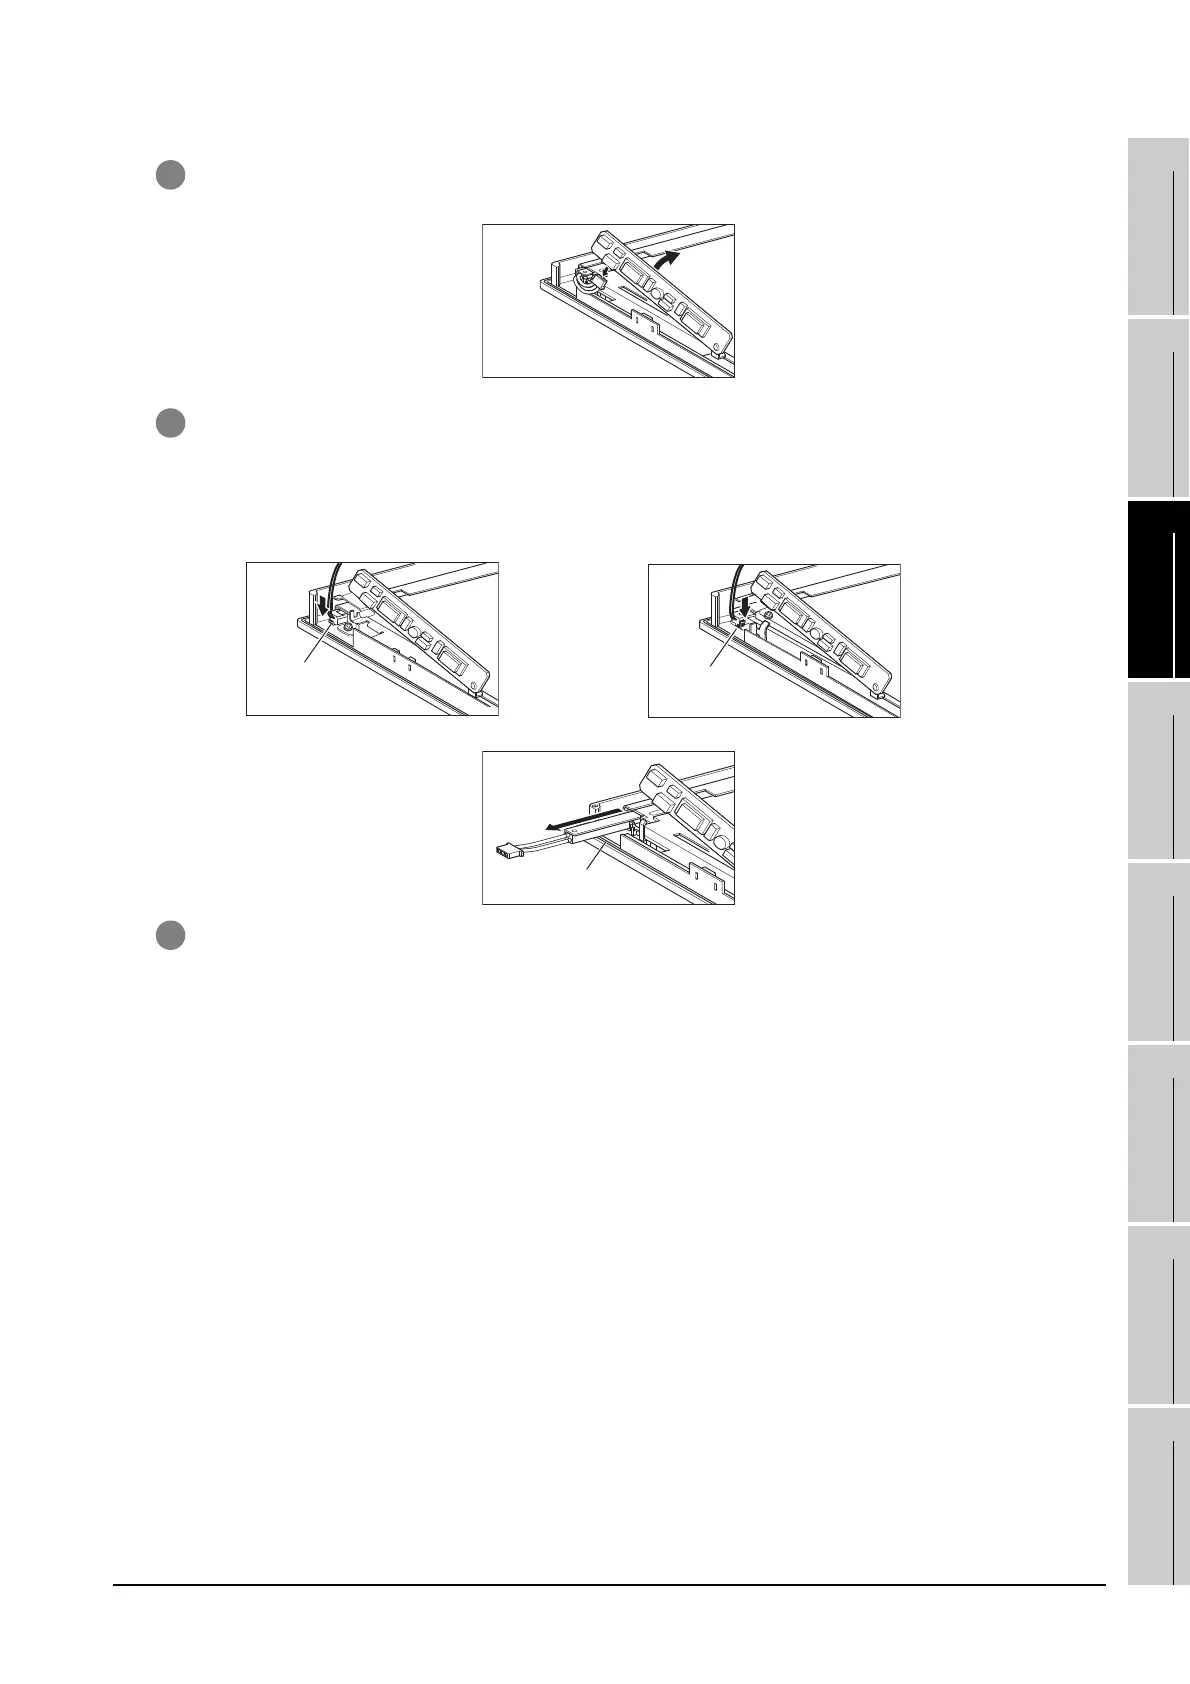
5 Pull up the backlight drive board, and disconnect the cable connector of the backlight from the
connector of the backlight drive board.
6 Press the backlight fixing latch (black) with your finger, and pull out the backlight to the left.
When pulling the backlight, press the packing with your finger so that the backlight will not be hit with the
packing.
7 Mount a new backlight in the reverse procedure of removal.
Also assemble the case in the reverse procedure of disassembly.
(Tighten the GOT rear fixing screws within the following torque range:
Screw A: 0.186 to 0.245 N·m, Other screws: 0.36 to 0.48 N·m).
When mounting the case, take care of not biting the cables between the case and the GOT.
(When replacing GT15-80SLTT) (When replacing GT15-70SLTT, GT15-70VLTT or GT15-
70VLTN)

 Loading...

