5 Mounting
© Maschinenfabrik Reinhausen 2012 2117246/02 EN TAPCON® 230 basic 57
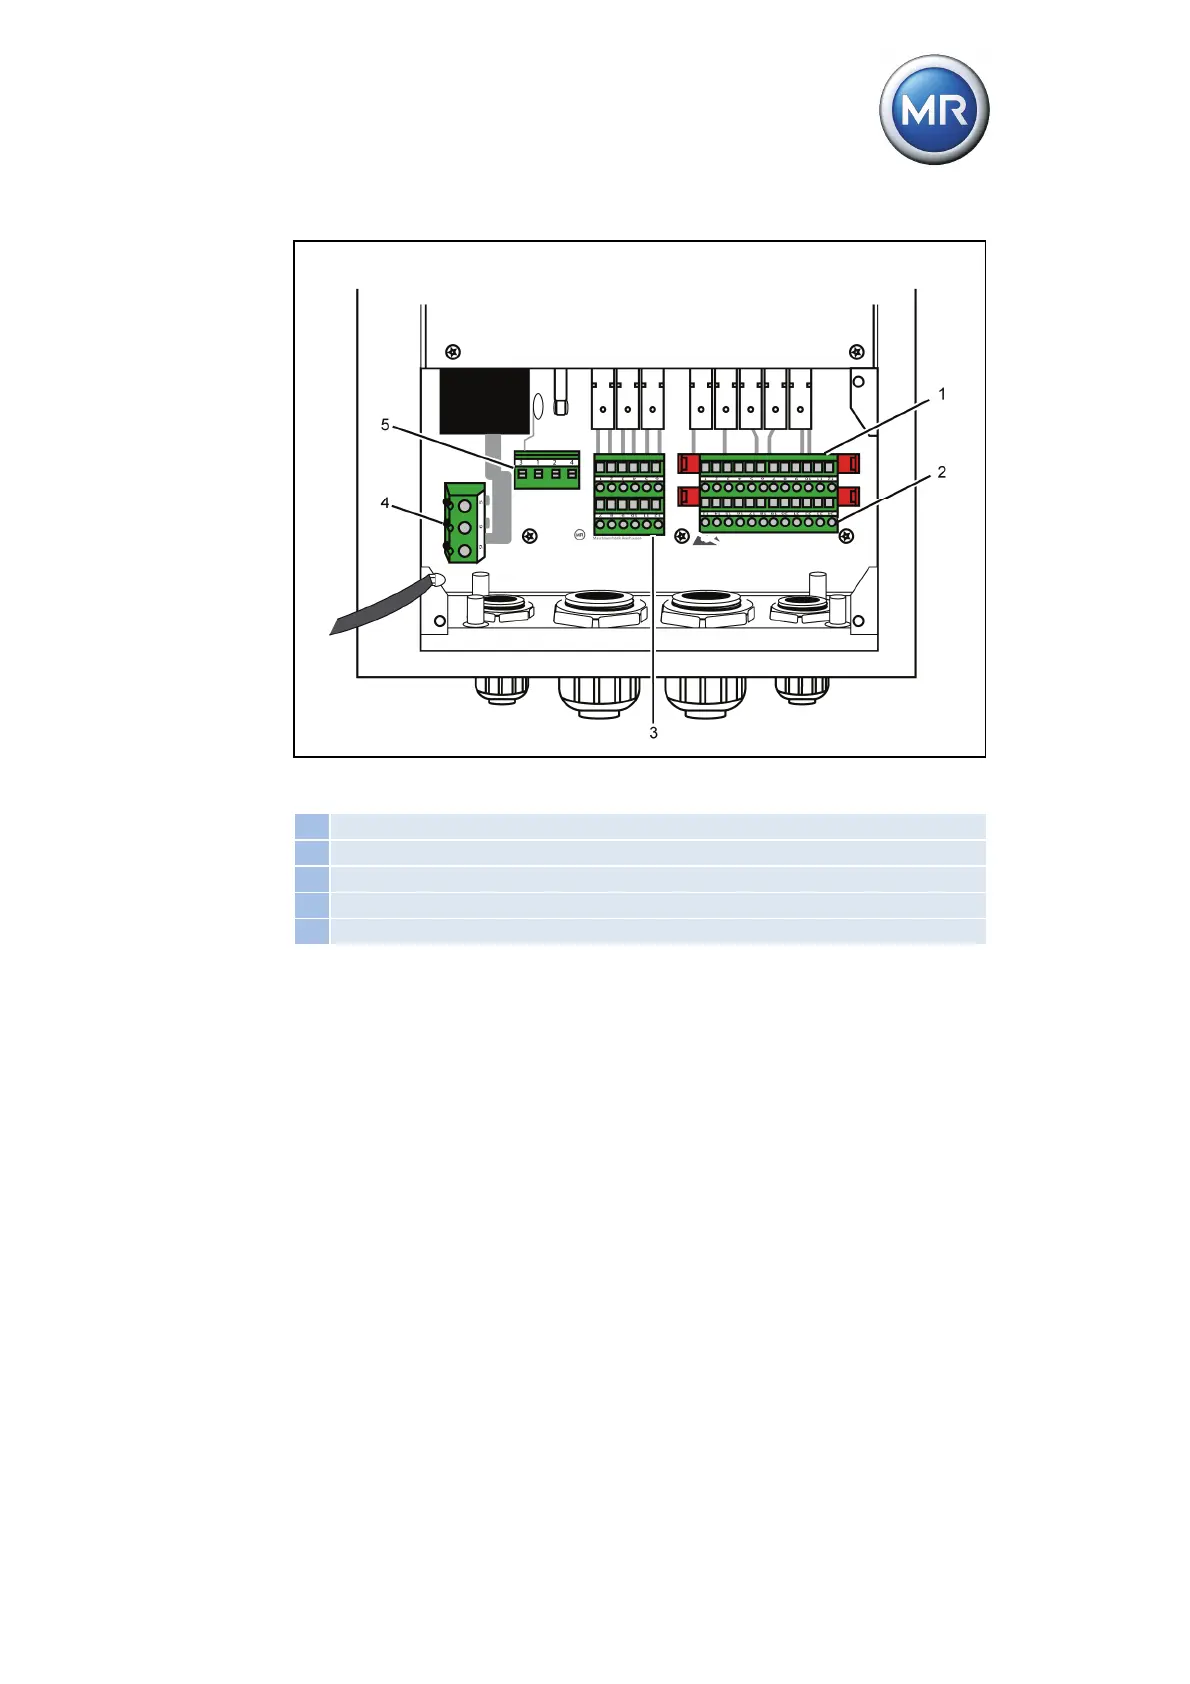
Figure 25 Connector (MIO card)
1 Relay outputs (terminal X4)
2 Signal inputs (terminal X4)
3 Relay outputs (terminal X3)
4 Current transformer connection (terminal X1)
5 Voltage transformer and power supply (terminal X2)
3. Remove 4 hexagon socket screws from the M screw connection plate and
remove the M screw connection plate.
4. Remove dummy plug of required M screw connections in order to guide
cables through. Note Maschinenfabrik Reinhausen's recommendation on
cable bushings (see diagram below).