Installing the printer 15
Centronics
Connection through the Centronics interface is direct and data transfer is fast.
You must set two parameters: the transmission type and the plot time-out.
▼
Connecting Centronics
1
Turn off the printer and host.
2
Connect one end of the Centronics cable to the computer’s Centronics parallel
port.
3
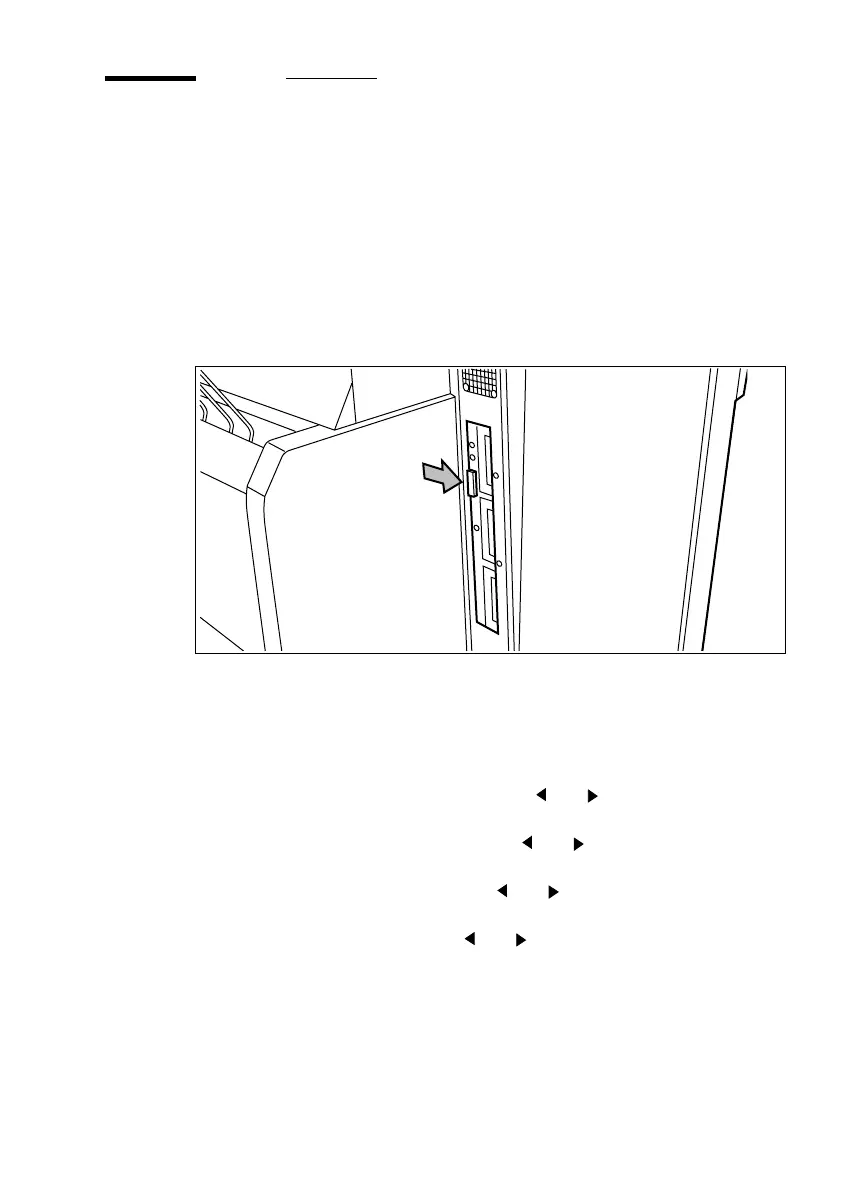
Connect the other end to the printer’s Centronics parallel port (see figure 3).
[3] Centronics port
4
Turn the printer on.
▼
Defining transmission speed
1
Press ‘Program’ to enter the main menu.
2
Select the ‘
CONFIGURATION
’
menu using the or button.
3
Press ‘next/select
’
to enter the ‘
CONFIGURATION
’
menu.
4
Select the ‘C
ONNECTIONS
’
menu using the or button.
5
Press ‘next/select’ to enter the ‘
CONNECTION
’
menu.
6
Select the ‘
CENTRONICS
’
item using the or button.
7
Press ‘next/select’ to enter the ‘
CENTRONICS
’ menu.
8
Select the required speed using the or button.
9
Press ‘next/select’ to confirm the selected speed.
10
Press ‘Program’ to exit the main menu.