Chapter 2 Getting Started — Setting up
40 - ENGLISH
Setting up
Usable outlet
This projector supports AC 100 V to AC 120 V, and AC 200 V to AC 240 V as the power supply. A grounded outlet
supporting 30 A is required when using the projector with AC 200 V to AC 240 V. A grounded outlet supporting
15 A is required when using the projector with AC 100 V to AC 120 V.
The shape of the usable outlet differs depending on the power supply. Following illustrations are examples.
2P/3W 30 A 250 V
NEMA L6-30
2P/3W 32 A 250 V
Clock position 6h
2P/3W 15 A 125 V
Attention
f Use the supplied power cord and ground at the outlet.
f Use the power cord matching the used power supply voltage and outlet shape.
Note
f The light output will decrease to approximately 1/3 when using the projector with AC 100 V to AC 120 V.
f The supplied power cords vary depending on the country or region where you purchased the product.
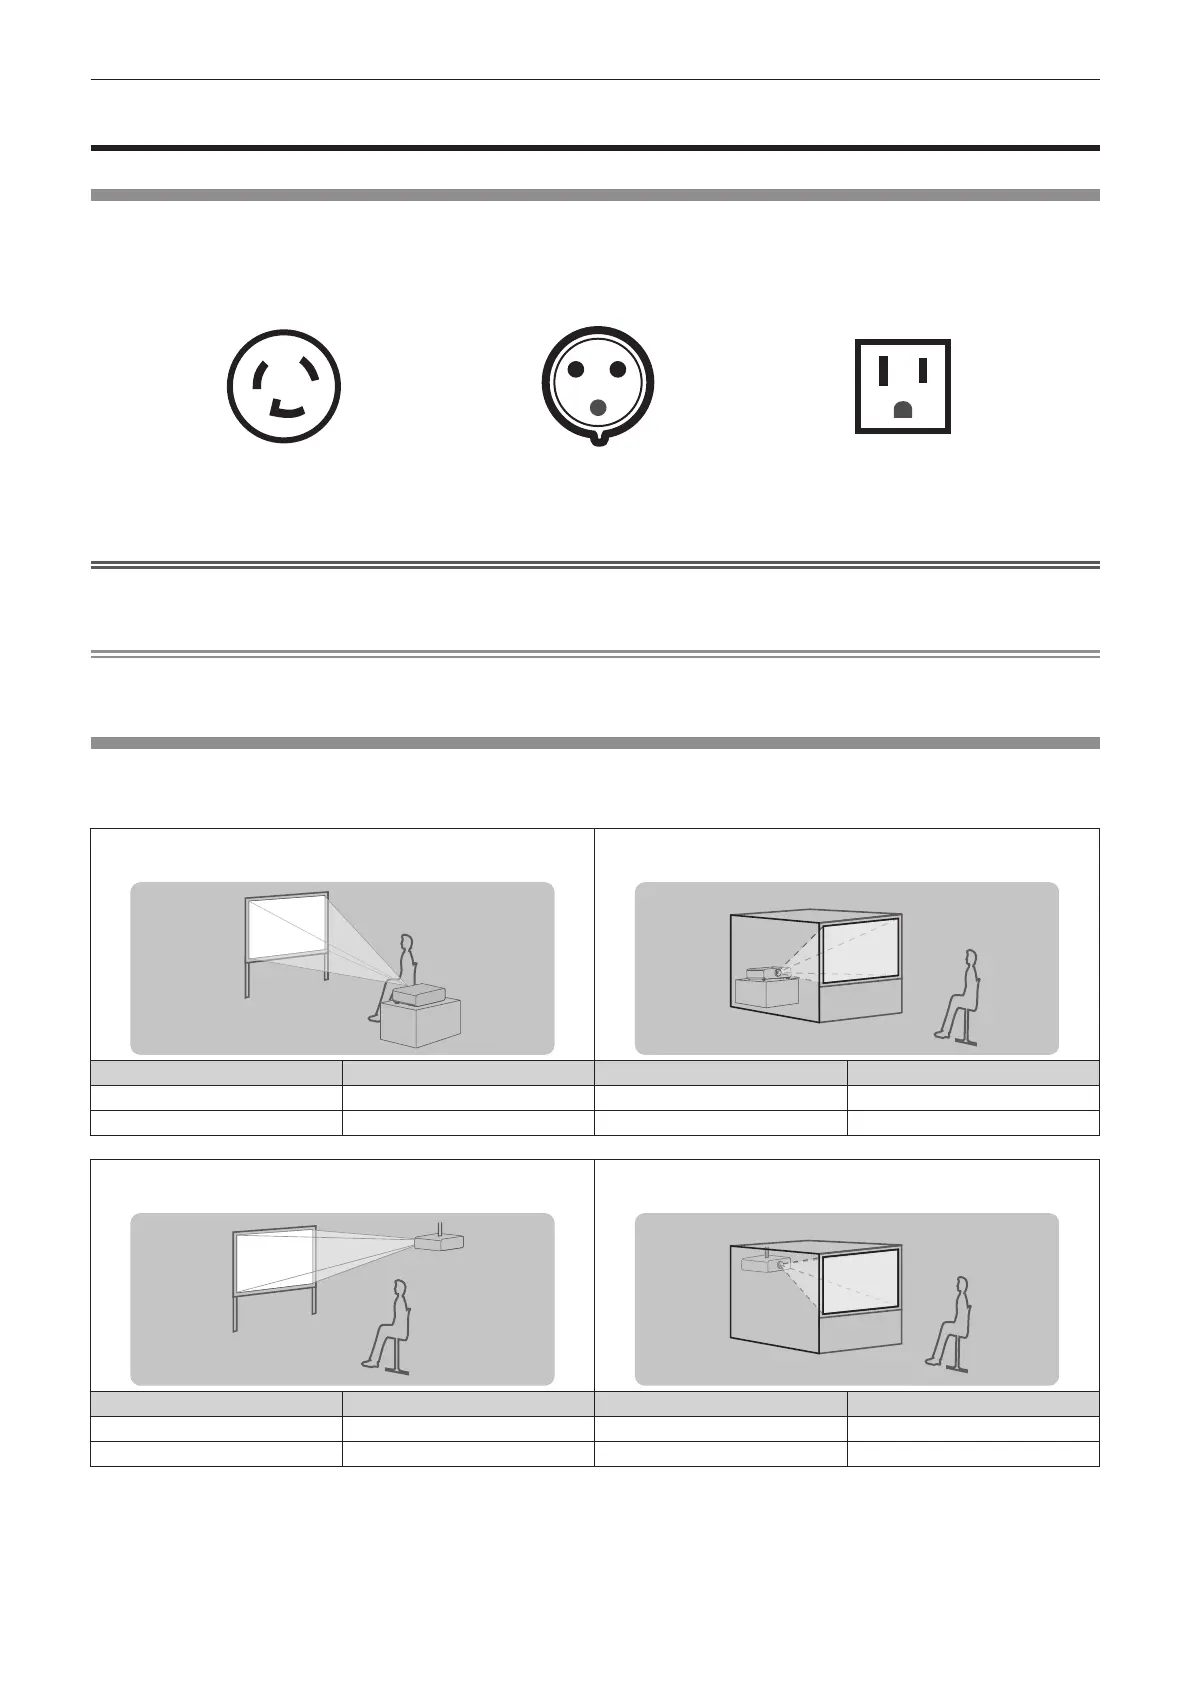
Installation mode
The installation modes of the projector are as follows. Set [FRONT/REAR]/[FLOOR/CEILING] in the
[PROJECTOR SETUP] menu → [PROJECTION METHOD] (x page 167) depending on the installation mode.
Setting on a desk/oor and projecting forward Setting on a desk/oor and projecting from rear
(Using the translucent screen)
Menu item Setting value Menu item Setting value
[FRONT/REAR] [FRONT] [FRONT/REAR] [REAR]
[FLOOR/CEILING] [AUTO] or [FLOOR] [FLOOR/CEILING] [AUTO] or [FLOOR]
Mounting on the ceiling and projecting forward Mounting on the ceiling and projecting from rear
(Using the translucent screen)
Menu item Setting value Menu item Setting value
[FRONT/REAR] [FRONT] [FRONT/REAR] [REAR]
[FLOOR/CEILING] [AUTO] or [CEILING] [FLOOR/CEILING] [AUTO] or [CEILING]

 Loading...