Chapter 3 Basic Operations — Switching on/off the projector
68 - ENGLISH
Switching on/off the projector
Connecting the power cord
Conrm that the <MAIN POWER> switch is on the <OFF> side before connecting the supplied power cord.
Use the power cord matching with the power supply voltage and the shape of the outlet.
For details of power cord handling, refer to “Read this rst!” (x page 5). For the shape of the outlet, refer to
“Usable outlet” (x page 40).
Attention
f The <AC IN> terminal on the side of the projector and the connector of the supplied power cord are not hot swapping compatible. Make
sure to attach the power cord to the projector rst, and then connect the power plug to the outlet. When removing the power cord from the
projector, make sure to remove the power plug from the outlet rst.
Note
f The light output will decrease to approximately 1/3 when using the projector with AC 100 V to AC 120 V.
f The supplied power cords vary depending on the country or region where you purchased the product.
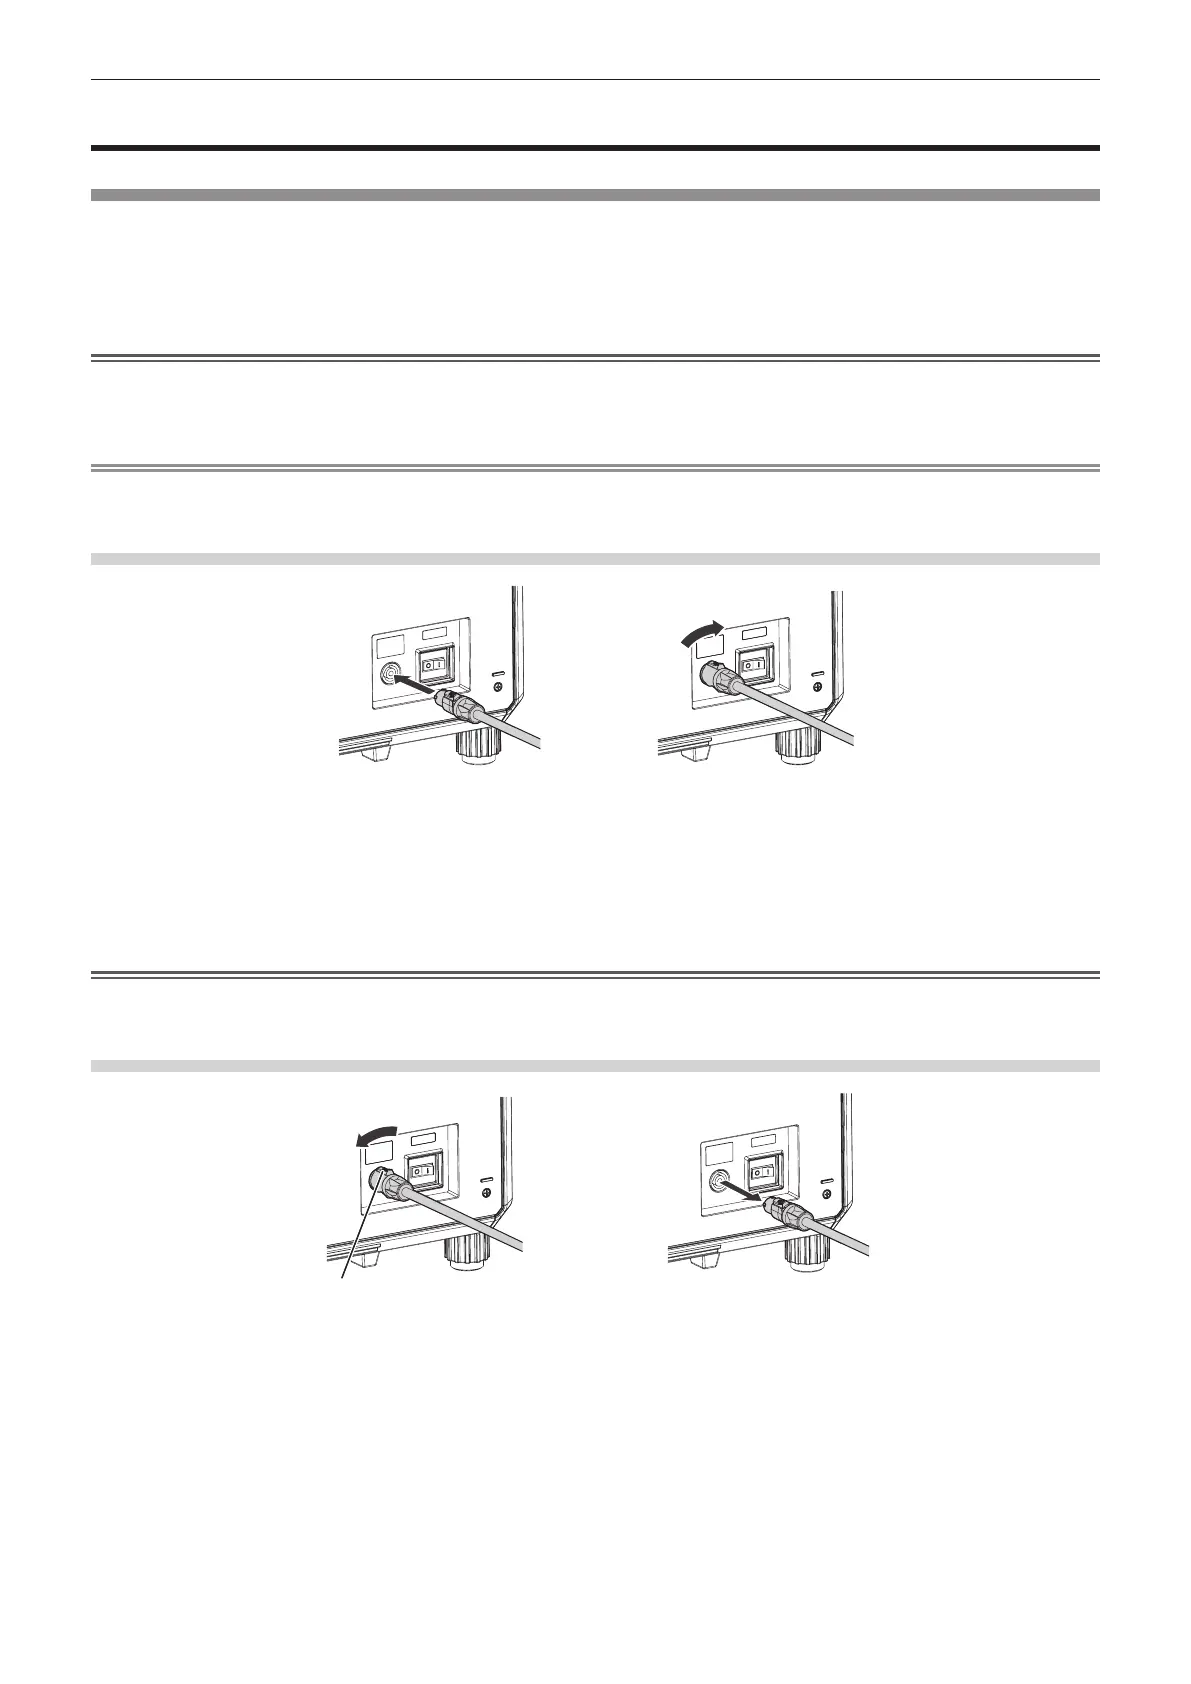
How to attach the power cord
Fig. 2Fig. 1
1) Check the shapes of the <AC IN> terminal on the side of the projector and the power cord connector,
then insert the connector completely in the correct direction. (Fig. 1)
2) While inserting the power cord connector into the projector, turn clockwise until it clicks. (Fig. 2)
Attention
f If you do not hear a “click” when the power cord connector is turned clockwise, the connector may be damaged. Please stop using the
projector and consult your dealer.
How to remove the power cord
Fig. 1 Fig. 2
Lock lever
1) Confirm that the <MAIN POWER> switch on the side of the projector is on the <OFF> side, and
remove the power plug from the outlet.
2) Turn the power cord connector counterclockwise while sliding the lock lever forward (Fig. 1), and
remove the connector from the <AC IN> terminal on the projector (Fig. 2).

 Loading...