Chapter 2 Getting Started — Attaching/removing the projection lens (optional)
58 - ENGLISH
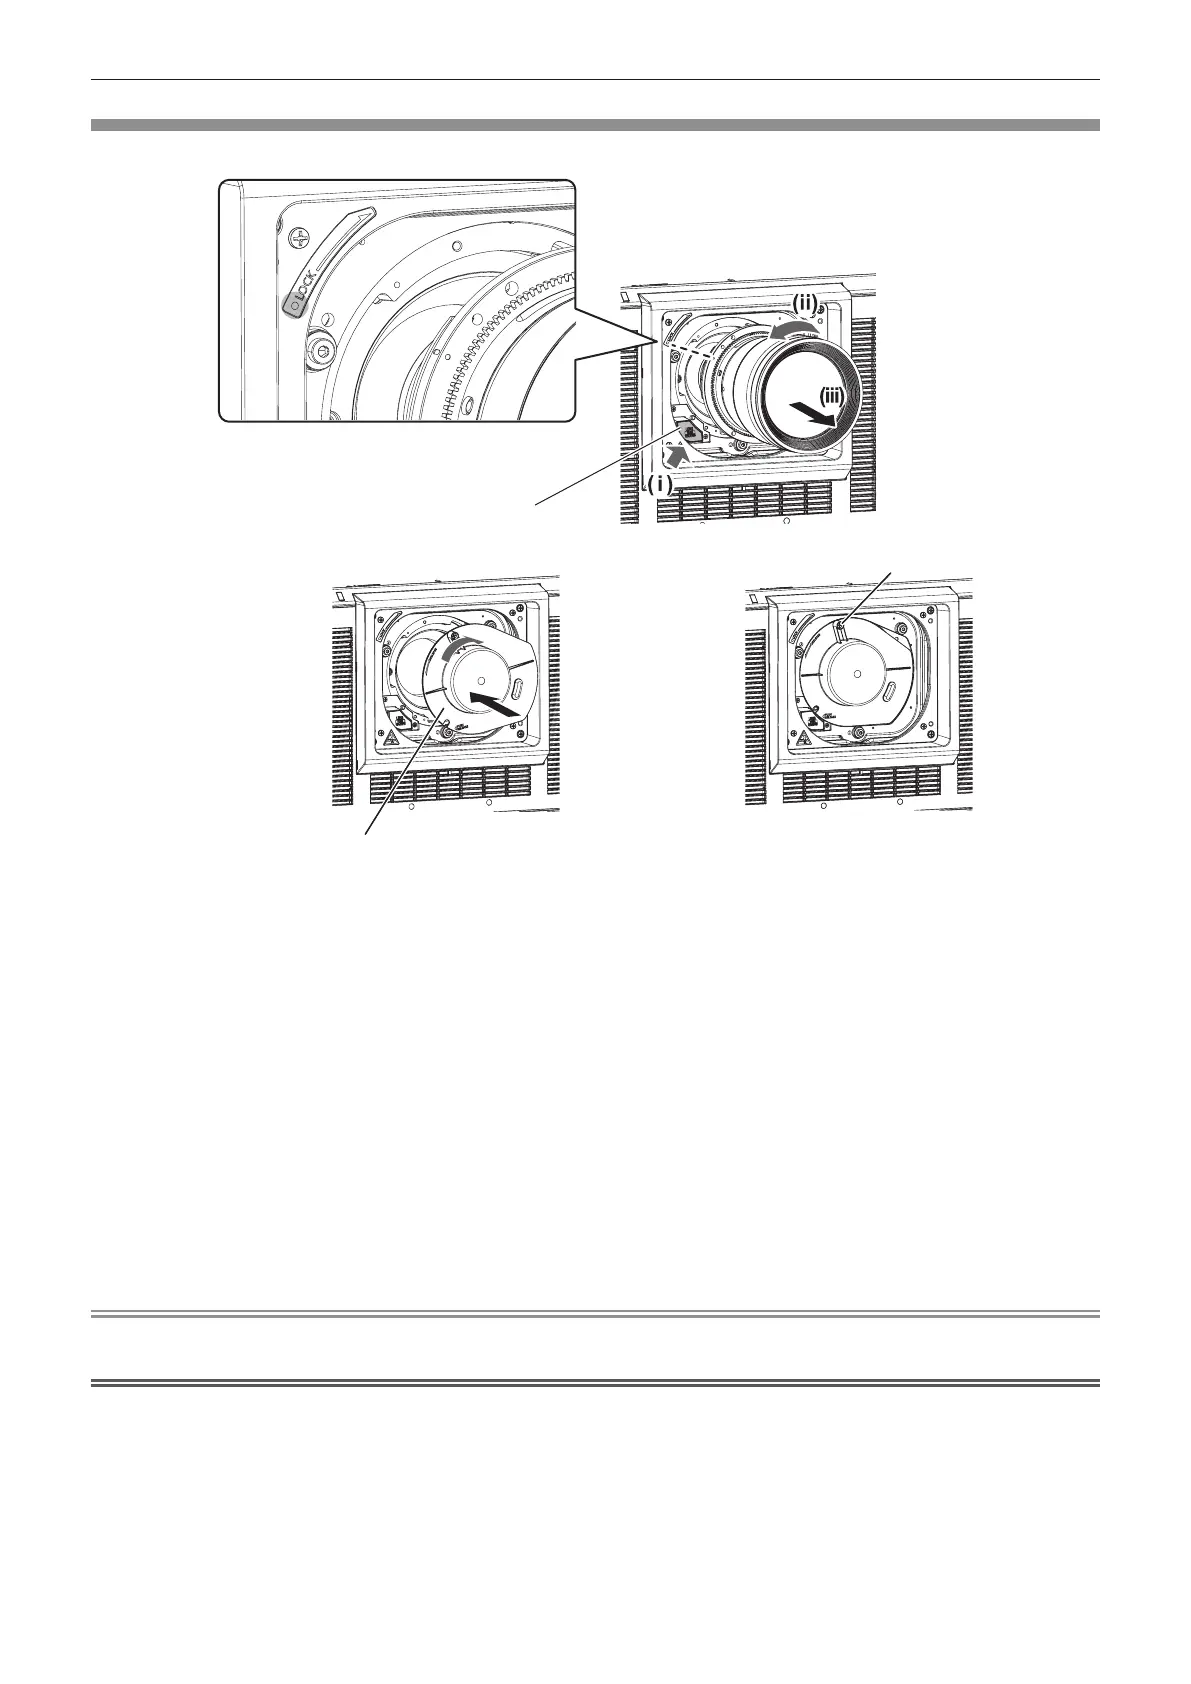
Removing the projection lens
Remove the projection lens using the following procedure.
Lens release button
Fig. 1
Screw
Lens hole cover
Fig. 3Fig. 2
1) Remove the lens fixing screw.
f Use a Phillips screwdriver to remove the rst screw to the right of the mark on the projection lens (orange).
2) Remove the projection lens by turning it counterclockwise while pressing the lens release button.
(Fig. 1)
f Turn the projection lens counterclockwise until the mark on the projection lens (orange) is aligned with the
mark on the projector (E on the left side of LOCK).
f Proceed to Step 3) when carrying or storing the projector.
3) Attach the supplied lens hole cover. (Fig. 2)
f Insert the lens hole cover by aligning the mark on the lens hole cover (E) with the mark on the projector (E
on the left side of LOCK) and turn clockwise until it clicks.
4) Secure the lens hole cover. (Fig. 3)
f Use a Phillips screwdriver to tighten the screw xing the lens hole cover.
Note
f Some projection lenses may not have a screw hole for securing the projection lens.
Attention
f Store the removed projection lens where it will be free from vibration and impact.
f Store the removed lens xing screw in a safe place.

 Loading...