131
Maintenance and Care
E
E
Luer Lock
Syringe barrel
Bottom screw connecting
plunger to syringe module
Figure 83: Syringe
5.2 Assembling and Installing the Syringe
Rinse a new syringe with 70% alcohol and then with distilled or de-ionized water before installing it.
Follow the instructions below:
1
Gently press the plunger into the syringe barrel.
2
Insert the syringe back onto the syringe module.
3
Hold the syringe barrel by the Luer lock and turn it clockwise into the port of the 8-way valve.
4
Secure the plunger to the syringe module with the screw at the bottom. Ensure that the syringe barrel and
plunger do not get jammed.
5
If the Syringe Maintenance window has not been opened yet, select Syringe Maintenance in the
Functions menu on the Control Center.
6
Click on the Install button. The plunger will be correctly positioned and the syringe module initialized.
7
Ensure that there are no leaks in the Liquid Management system. This can be done with one of the cleaning
routines in the Cleaning window. Interrupt the cleaning procedure immediately with the EMERGENCY
STOP button if there are any leaks in the syringe module.
8
Put the protective cover back on with the use of a philips head screwdriver. Turn the screws 90 degrees
clockwise to lock the screw.
■
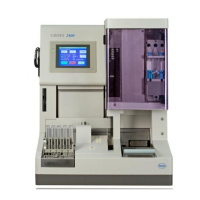
Never use the Cedex HiRes Analyzer without the protective cover on the Multi Sampler
and Syringe Module.
Syringe Maintenance
Assembling and Installing the Syringe
 Loading...


