39
System Description
B
B
5
The Cedex2 folder will be copied:
Figure 36
6
Verify that the backup Cedex2 folder is placed in the location where the folder deleted in step 1 was located
(the directory should usually be C:\Cedex2).
7
(optional) If the active database fi le is located in a folder different from the DB sub
folder contained within
the Cedex2 folder, locate the database fi le (name: CEDEX.FDB)
in the folder where the backup of the Cedex2
folder and the database has been stored.
Copy it to the location of the original database fi le, overwriting
the existing one.
8
Verify that the Cedex HiRes Software 2 installation is working as expected.
■
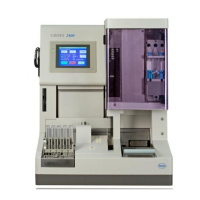
5 Starting the Cedex HiRes System after Installation
The hardware components of the Cedex HiRes System must be switched on before the analysis software can be
started, otherwise the software will not be properly initialized.
After the initial installation, switch on the individual devices in the order given below:
1
Switch on the Cedex HiRes Analyzer.
2
Switch on the monitor and the PC. The fi rst time the computer is started, a registration window for access at
the operating system level will appear. Follow the instructions to register with Windows.
■
In order to ensure that the Cedex HiRes Analyzer is fully operational, an Intensive Clean must be carried
out once per week even if the system is not yet in use for measurements. Therefore, a Reagent Kit must be
installed directly after the installation of the Cedex HiRes System to allow for the required cleaning routines
(see “Preparing the Reagent Kit” and “Cleaning Routines Carried out by the Liquid Management”).
Starting the Cedex HiRes System after Installation
 Loading...


