15
Video Input/Output Settings
Assigning Video Sources
Here’s how to assign the video sources (input video, still images and video
player) to the VIDEO SWITCHER [1]–[6] buttons.
1. Press the PANEL [SETUP] button.
2. Touch <MODE>.
3. Touch <INPUT SELECT>.
The setup screen appears.
4. Touch the screen to select the video source.
Video Source Explanation
VIDEO 1–6 Video from VIDEO IN 1–6 connectors
STILL 1–16 Still images 1–16
V. PLAYER Video from video player
N/A No video source
* You can’t switch the video to a channel to which “N/A” is assigned. If
you switch the assignment to “N/A” for one of the VIDEO SWITCHER
[1]–[6] buttons that are now outputting, the output video switches to
a black screen.
MEMO
You can import still images by using the following methods.
Ø
“Loading a Still Image from a Storage” (p. 25)
Ø
“Capturing a Still Image from Input/Output Video” (p. 26)
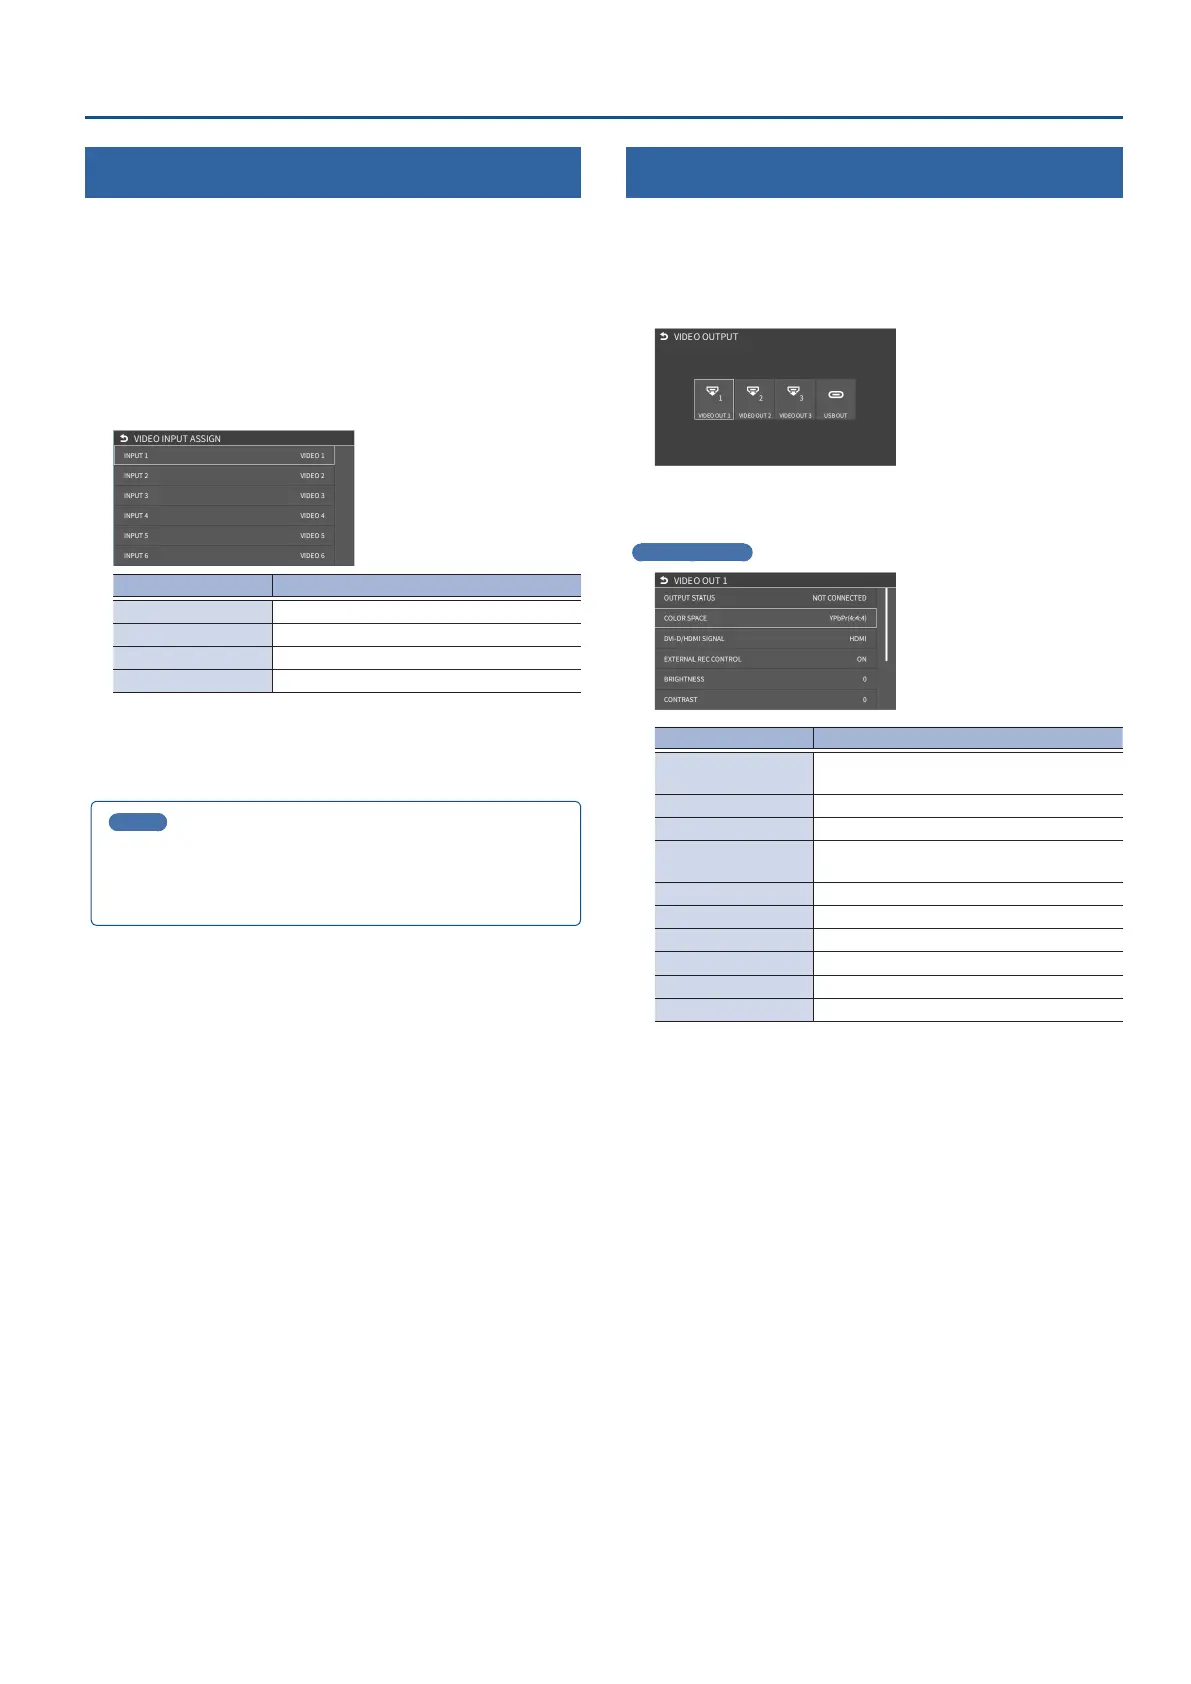
Adjusting Output Video
Here’s how to adjust the output image appropriately for the device that’s
receiving the VR-6HD’s output.
1. [MENU] button
Ó
“VIDEO”
Ó
“OUTPUT”
Ó
select “VIDEO
OUT 1–3”, or “USB OUT” and press the [VALUE] knob.
2. Use the [VALUE] knob to select a menu item shown below,
and press the [VALUE] knob.
VIDEO OUT 1–3
Menu item Explanation
OUTPUT STATUS
Shows the format and an HDCP signal
presence.
COLOR SPACE Species the color space.
DVI-D/HDMI SIGNAL Species the type of output signal.
EXTERNAL REC
CONTROL
Sets the control of an externally connected
recording device.
BRIGHTNESS Adjusts the brightness.
CONTRAST Adjusts the contrast.
SATURATION Adjusts the saturation.
RED Adjusts the red level.
GREEN Adjusts the green level.
BLUE Adjusts the blue level.
 Loading...