54
Audio Operations
Setting an Audio Clip
1. Press the AUDIO PLAYER [SETUP] button.
The Audio Player setup screen appears.
2. Touch the number you want to set in the audio clip area.
Bank selector
The menu screen appears.
3. Touch <EDIT>.
The setting screen appears.
4. Touch the screen to access the settings.
Parameter Explanation
NAME
Sets the name for an audio clip.
Touch here to bring up the software keyboard and
enter a clip name.
DURATION Shows the length of an audio clip.
OFFSET TIME Sets the playback start position of the audio clip.
LEVEL Sets the volume of the audio clip.
FADE IN TIME Sets the fade-in time.
FADE OUT TIME Sets the fade-out time.
PAD MODE Sets what happens when the audio clip plays back.
PAD COLOR
Species the color of the corresponding pad when
it lights up.
PLAYING MODE Species how the audio clip plays back.
* For details on the parameter, refer to “7: AUDIO PLAYER” (p. 126).
5. Press the lit [SETUP] button to close the setup screen.
Swapping, copying and deleting clips
You can copy and swap clips, and you can also initialize and delete the
audio clips you no longer need.
1. Press the AUDIO PLAYER [SETUP] button.
The Audio Player setup screen appears.
2. Touch the number you want to set in the audio clip area.
The menu screen appears.
3. Touch <COPY>, <SWAP> or <INITIALIZE> to make the
settings.
Function Operation
COPY Touch the area where you want to copy the audio clip.
SWAP Touch the area of the audio clip you want to swap.
INITIALIZE —
A conrmation message appears.
4. Select “OK” and press the [VALUE] knob.
5. Press the lit [SETUP] button to close the setup screen.
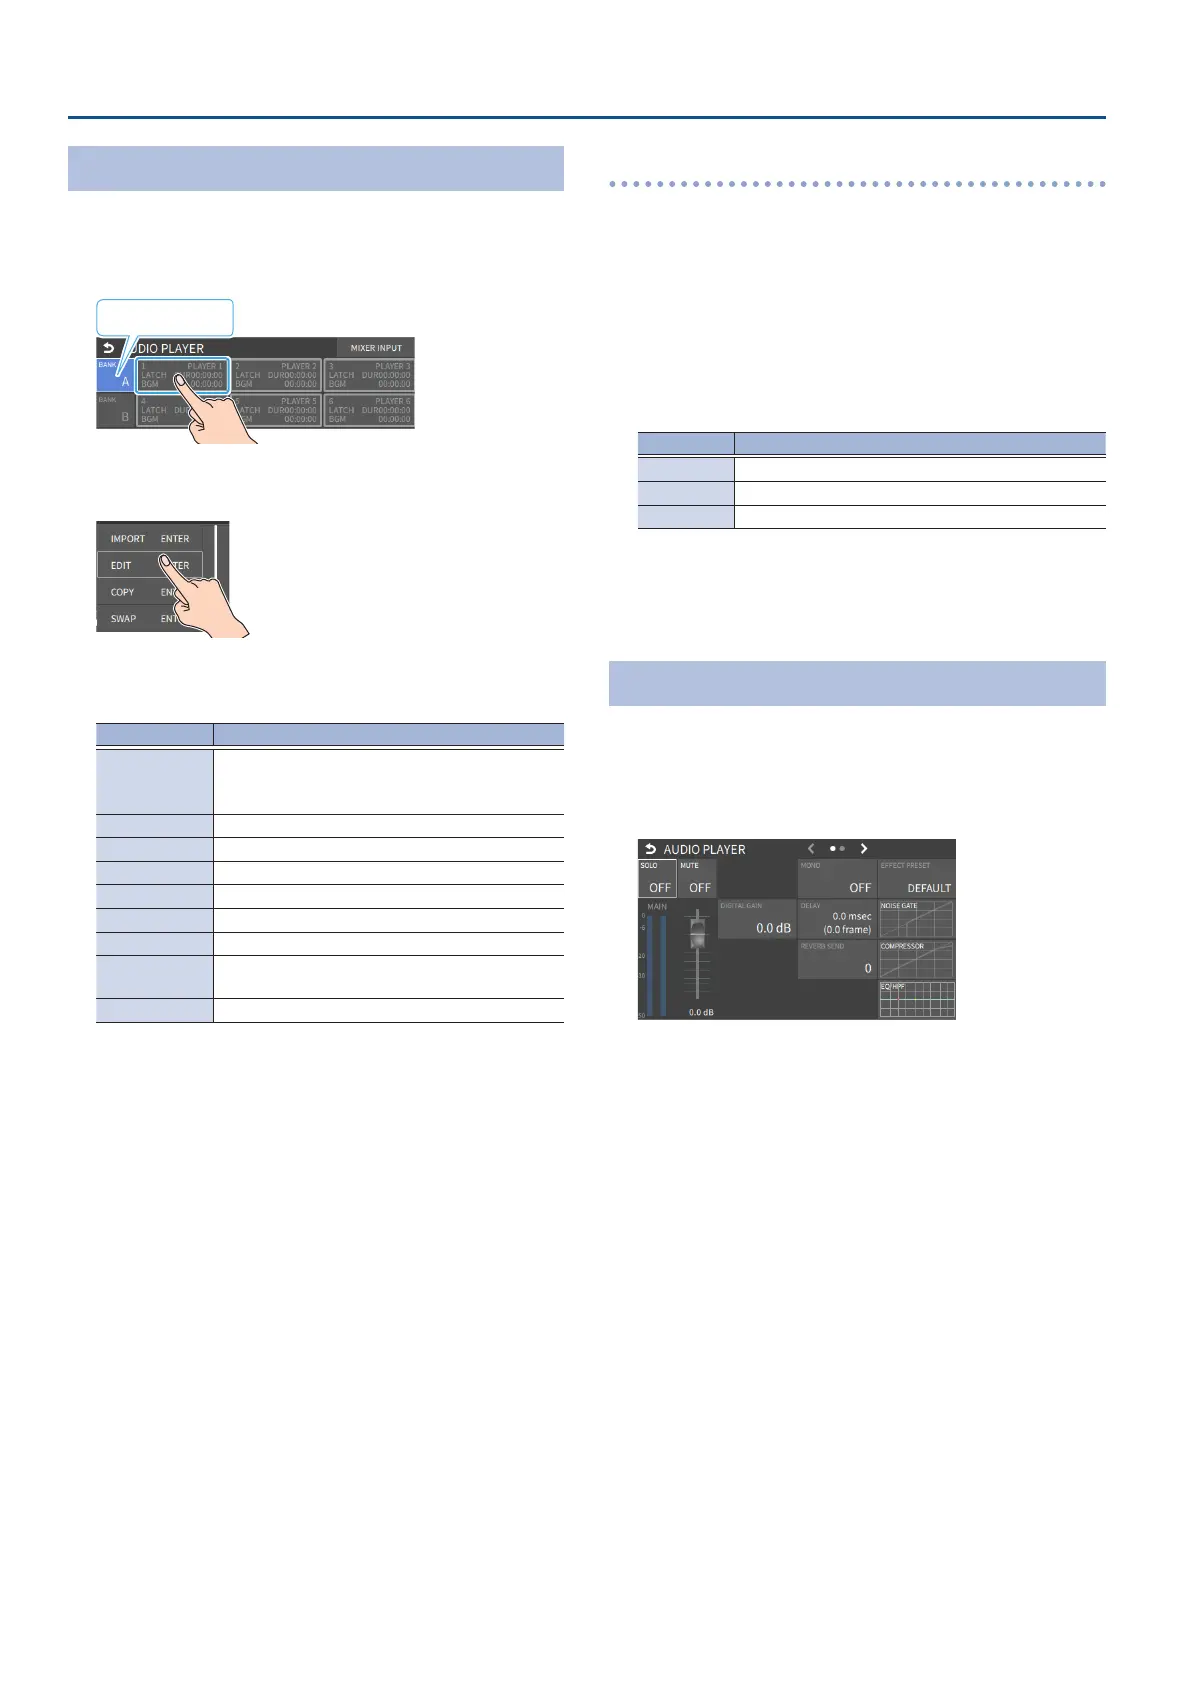
Mixer Settings for the Audio Player
1. Press the AUDIO PLAYER [SETUP] button.
The Audio Player setup screen appears.
2. Touch <MIXER INPUT>.
The Audio Player mixer screen appears.
3. Touch the screen to congure the send amount for each bus.
4. Press the lit [SETUP] button to close the setup screen.
 Loading...