10
Panel Descriptions
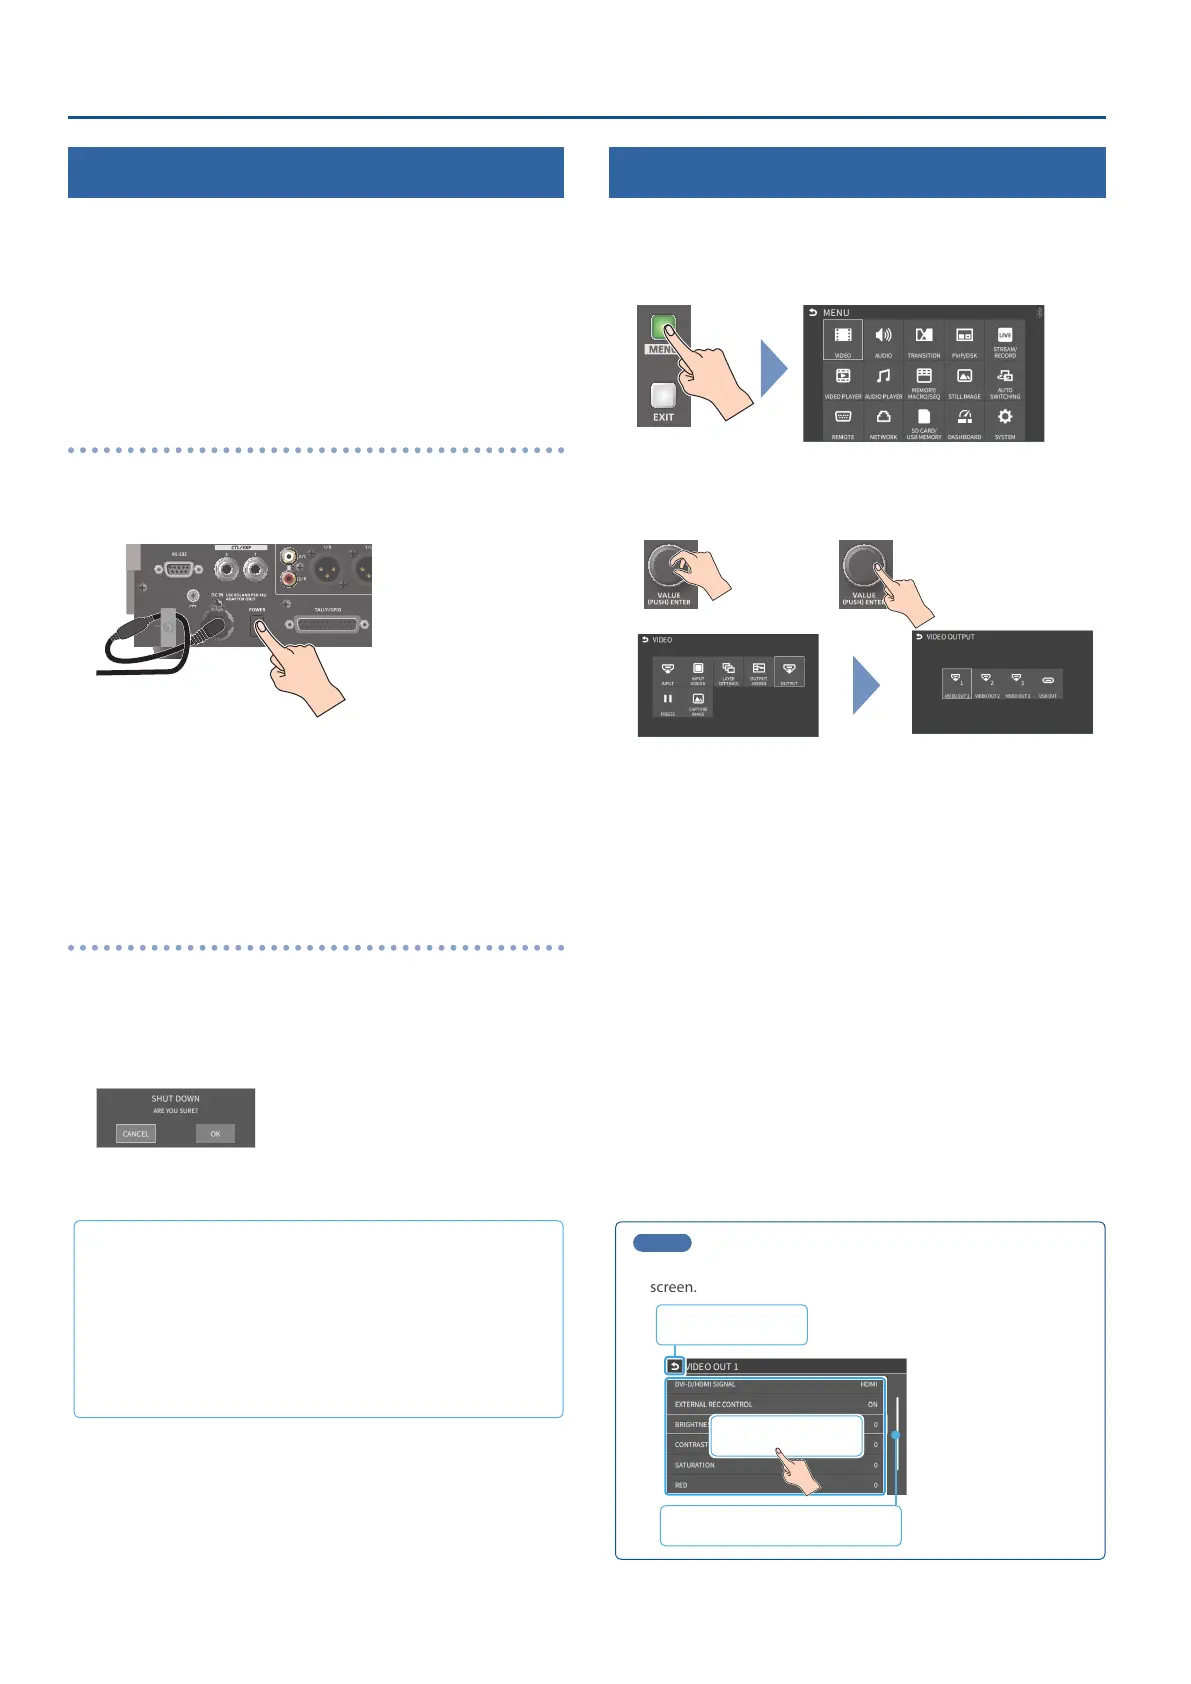
Turning the Power On/O
* Before turning the unit on/o, always be sure to turn the volume
down. Even with the volume turned down, you might hear some
sound when switching the unit on/o. However, this is normal and
does not indicate a malfunction.
* Never turn o the power or remove the USB ash drive or SD card
while the USB ash drive or SD card is being accessed.
* This unit is not designed for continuous operation over long periods
of time (one month or longer). If you want to use this unit over long
periods of time, cycle the power periodically.
Turning the Power On
1. Make sure that all devices are powered-o.
2. Turn on the [POWER] switch of the VR-6HD.
3. Turn on the power of the source devices.
Turn on the power of the source devices that are connected to the
VR-6HD’s input connectors, such as video cameras.
4. Turn on the power of the output devices.
Turn on the power of the devices that are connected to the VR-6HD’s
output connectors, such as projectors.
Turning the power o
1. Turn o the power of the output devices rst, and then the
source devices.
2. Turn o the [POWER] switch of the VR-6HD.
The following message appears.
3. Press the [VALUE] knob to nish shutting down.
If you wish to cancel, press the [POWER] switch again.
About the auto-o function
The power to this unit will be turned o automatically after a
predetermined amount of time has passed (Auto O function).
If you do not want the power to be turned o automatically,
disengage the Auto O function (p. 141).
¹ Note that any unsaved data is lost when the power turns o.
You must save any data in advance that you want to keep.
¹ To restore power, turn the power on again.
Operating the Menu
Here’s how to access the menu, and make video/audio settings and
settings for this unit.
1. Press the [MENU] button to display the menu.
The menu is organized into functions.
2. Turn the [VALUE] knob to select the menu item to edit, and
press the [VALUE] knob to conrm.
3. Repeat step 2 as needed.
Press the [EXIT] button to go back up one level.
4. Turn the [VALUE] knob to select a parameter, and press the
[VALUE] knob.
When the cursor is shown as a white border, you can select a
parameter with the [VALUE] knob. When you select a parameter and
press the [VALUE] knob, the cursor changes to a blue border and you
can now edit the parameter’s value.
5. Turn the [VALUE] knob to change the setting value, and then
press the [VALUE] knob to conrm.
The cursor changes back to a white border, and you can now select a
dierent parameter.
¹ By turning the [VALUE] knob while pressing it, you can make larger
changes to the value.
¹ Long-pressing the [VALUE] knob returns the current menu item you’re
setting to its default value.
6. Repeat steps 4–5 as needed.
7. Press the [MENU] button to close the menu.
MEMO
You can also operate this unit by touching the icons on the menu
screen.
Select a menu item
Scroll through the menu items
Go back up one level
 Loading...