Installing the Instrument
PR 5220 Instrument Manual
EN-20 Sartorius
3 Installing the Instrument
• Before starting work, please read Chapter 1 and follow all instructions.
Further procedures:
• Check the consignment: unpack the components specific to the application.
• Safety check: inspect all components for damage.
• Make sure the on-site installation is correct and complete including cables, e.g. power cable fuse
protection, load cells, cable junction box, data cable, console/cabinet, etc.
• Follow the instructions for installation of the unit relating to application, safety, ventilation, sealing and
environmental influences.
• Connect the cable from cable junction box or platform/load cell.
• If applicable: connect other data cables, network cables, etc.
• Connect the instrument to the supply voltage.
• Check the installation.
3.1 Connections
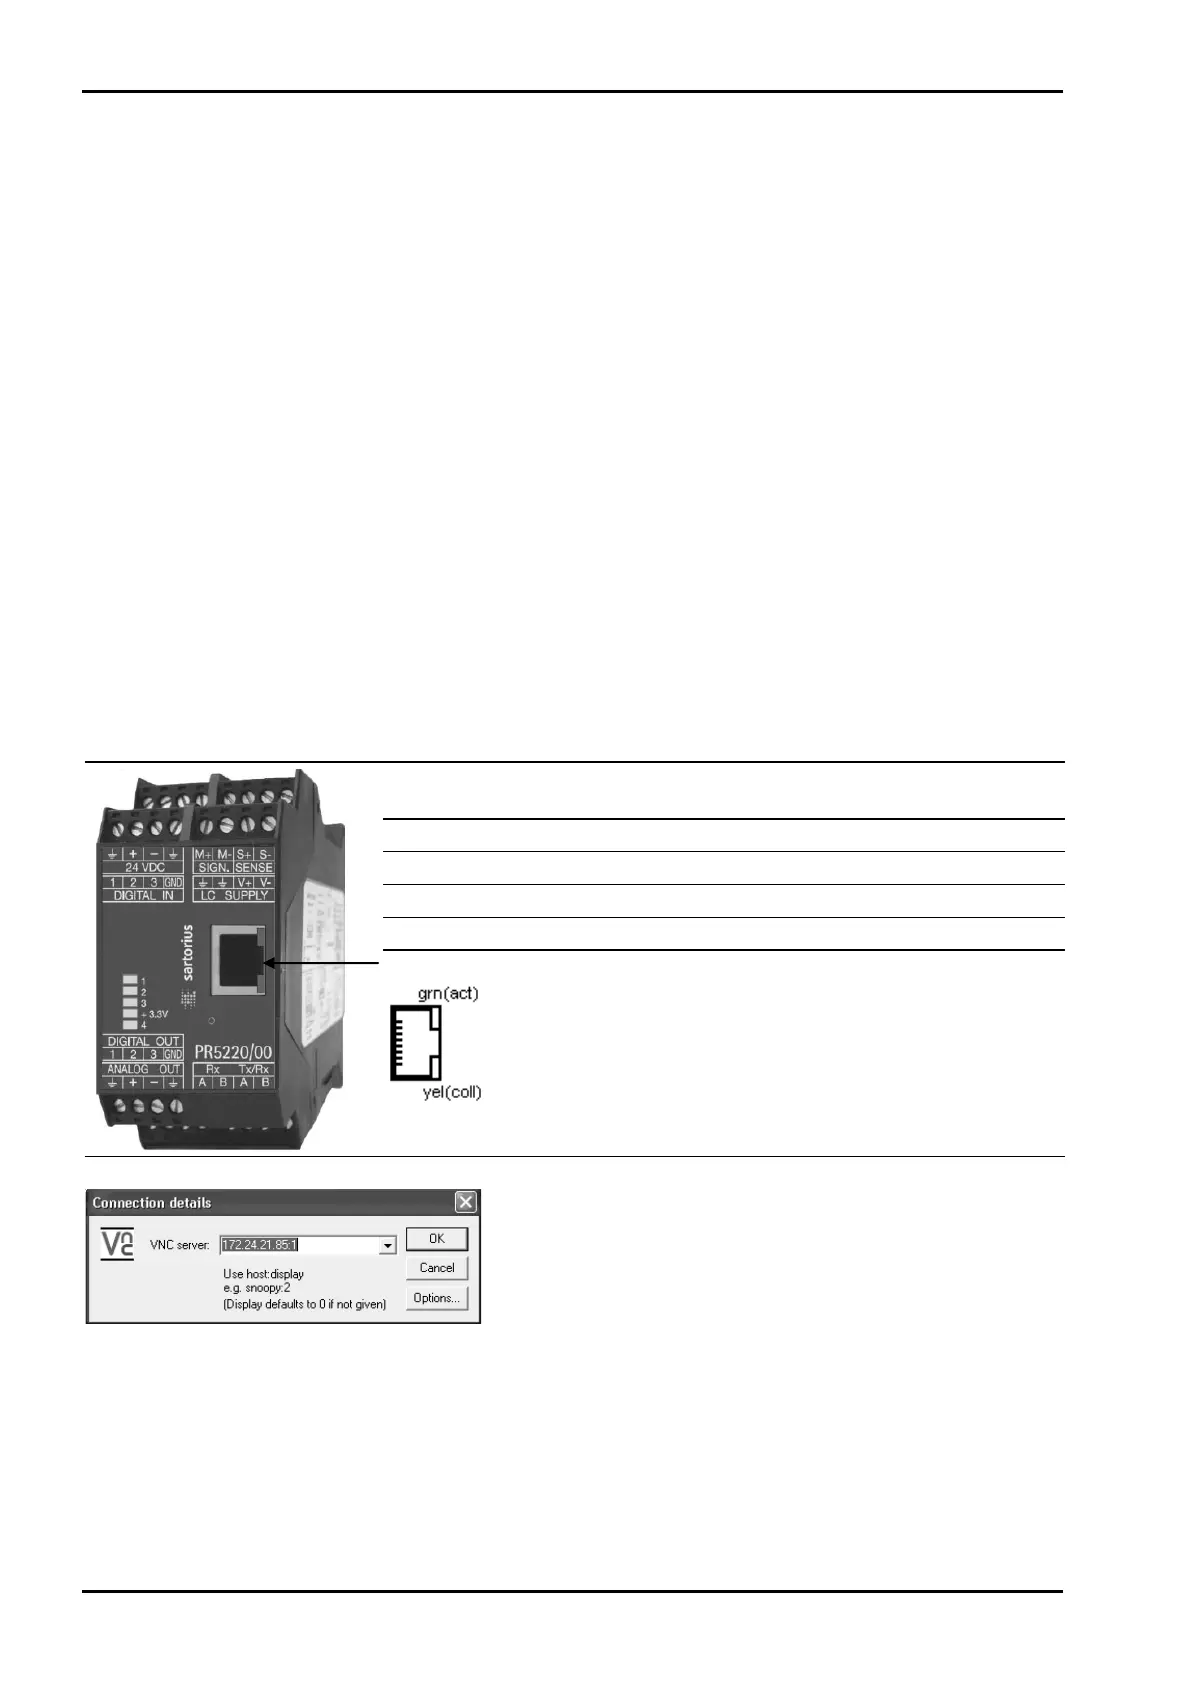
3.1.1 Network Port
The network port is built in as standard equipment. The port contains powerful TCP/IP connection circuitry
with transfer rates of 10 or 100 Mbit/sec. The LEDs on the connector (RJ-45) indicate whether the port is
functioning.
Transfer rate
10 Mbit/sec, 100 Mbit/sec,
full/half duplex, auto-detection
Connection method
Point to point
Cable
CAT 5 patch cable, shielded twisted pair
Cable impedance
150 ¥
Electrical isolation
yes
RJ-45 socket on top of housing
Remote operation of the instrument from the notebook/PC is
possible; install VNC program version 3.3.7* on the
notebook/PC. For setting the network address, see
Chapter
4.3.3.
* Sartorius guarantees the functionality only if this version is
used!
 Loading...