SLT12 User Manual
13
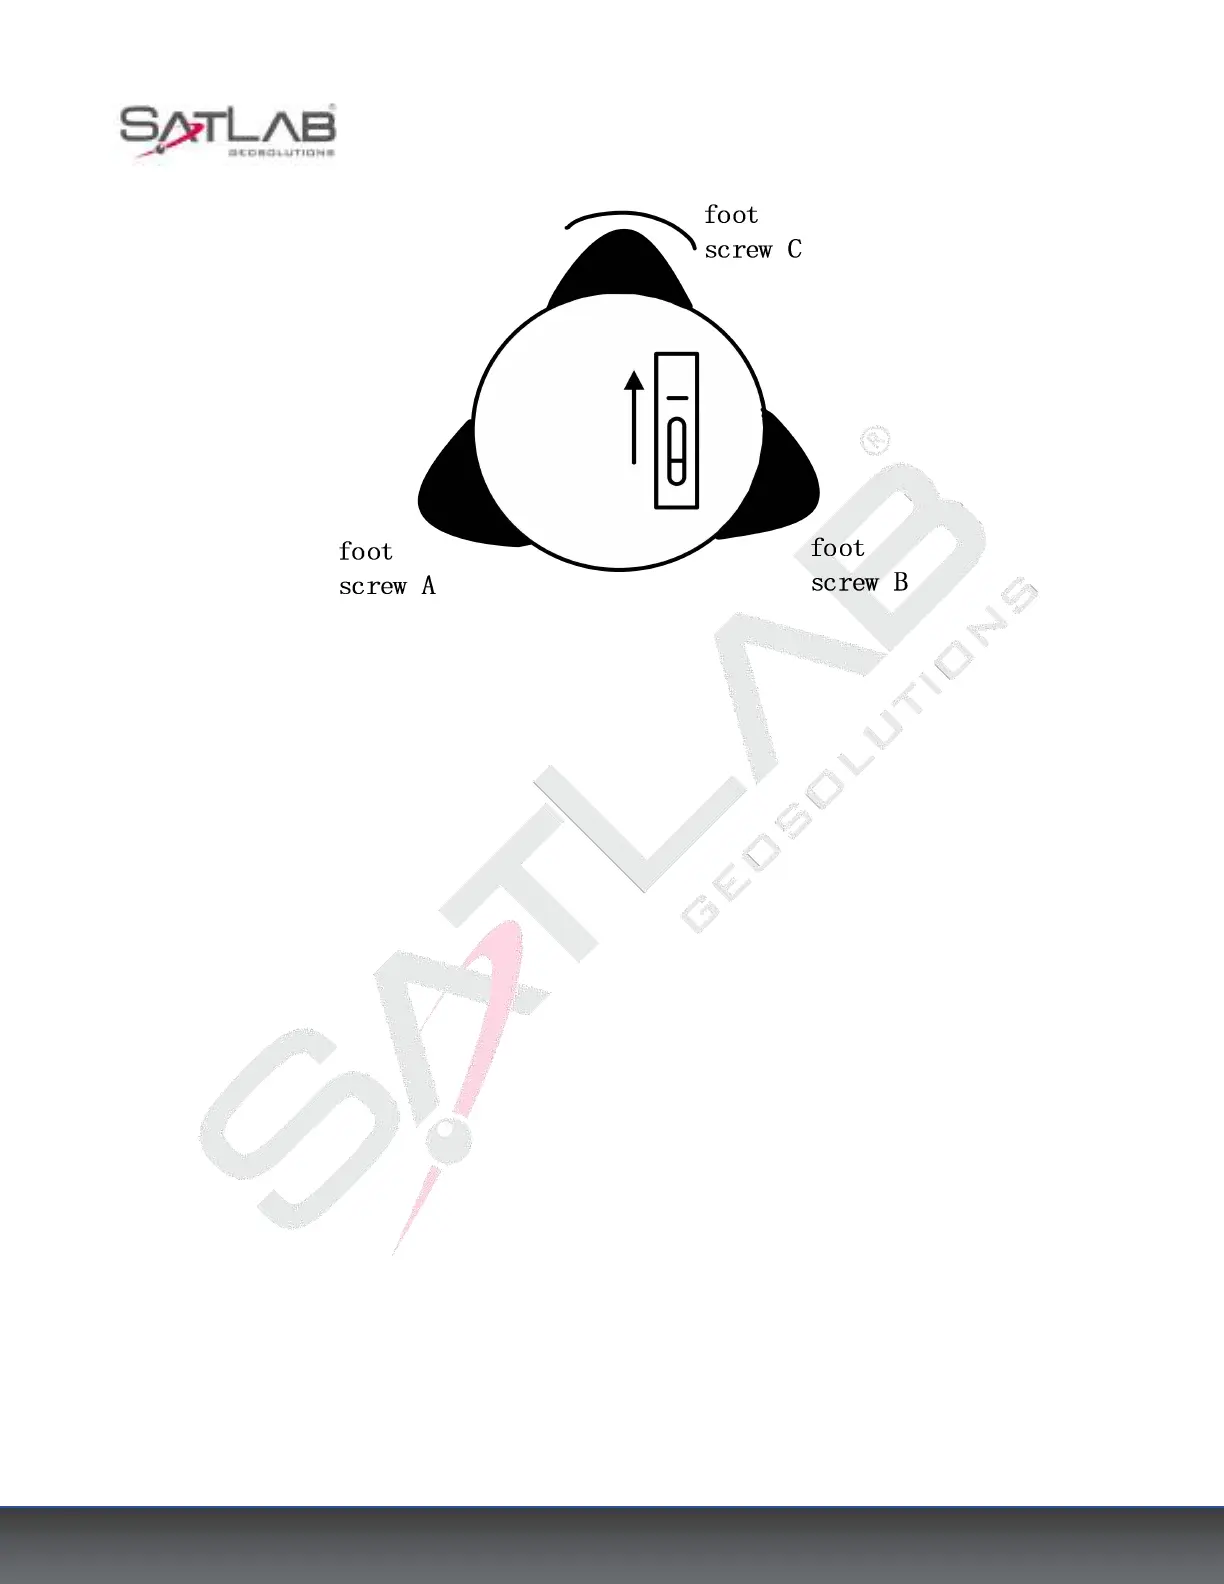
Figure 3- 3
③ Turn around the instrument 90° again. Repeat the above steps until the bubble remains in the center of the
plate level even when the instrument is rotated to any position.
Using a centering device to center
1) Set up the tripod
Open the tripod and make sure that the three feet of the tripod are approximately equal in distance from the
center and that the top is level. Tighten the three locking screws. Make sure that the center of the top of the
tripod is right above the station. Stamp one foot on the ground with your feet.
2) Install the instrument and counterpoints
Place the instrument carefully on the tripod, tighten the center connecting screw, and adjust the optical pointing
device until the cross-wire imaging is clear (if it is a laser plummet device, then open the laser plummet device
in the compensation interface).
Hold the other two unfixed legs of the rack with both hands and adjust their position by observing the optical
pointing device. When the pointing device is roughly aligned with the survey site, fix all three legs of the tripod
to the ground. Adjust the three leg screws of the total station to align the pointing device precisely with the
survey site.
3) Using a circular level to level the instrument coarsely
Adjust the length of the three legs of the tripod so that the total station round-level bubble is centered.