4
Part II Installing the Receiver
This chapter explains how to connect the receiver to a display such as an HDTV or projector.
Make sure you have all the contents from the receiver’s package available before starting.
2.1 Connecting the Receiver to an HDTV
It is quite easy and fast to set up the receiver. You can complete the setup by your own.
To connect the Receiver to an HDTV:
1. Get the Receiver, AC power adapter, and HDMI cable from the receiver’s package.
2. Plug one end of the HDMI cable into the HDMI port (“HDMI-OUT”) on the receiver, and
the other end into an available HDMI port on the HDTV.
3. (Optional) If the display has USB HID touch capability, insert the HID USB connector
into a USB port on the ScreenBeam receiver. (USB cable is not included).
4. (Optional) Connect one end of the Ethernet cable to the receiver’s Ethernet port and
connect the other end to the network switch with DHCP IP. (Ethernet cable is not
included).
Note: Refer to Section 2.2 for more information on setting up a network connection.
5. Plug the connector of the power cord to the receiver’s power input port labeled
“POWER”, and plug the power adapter to a power outlet.
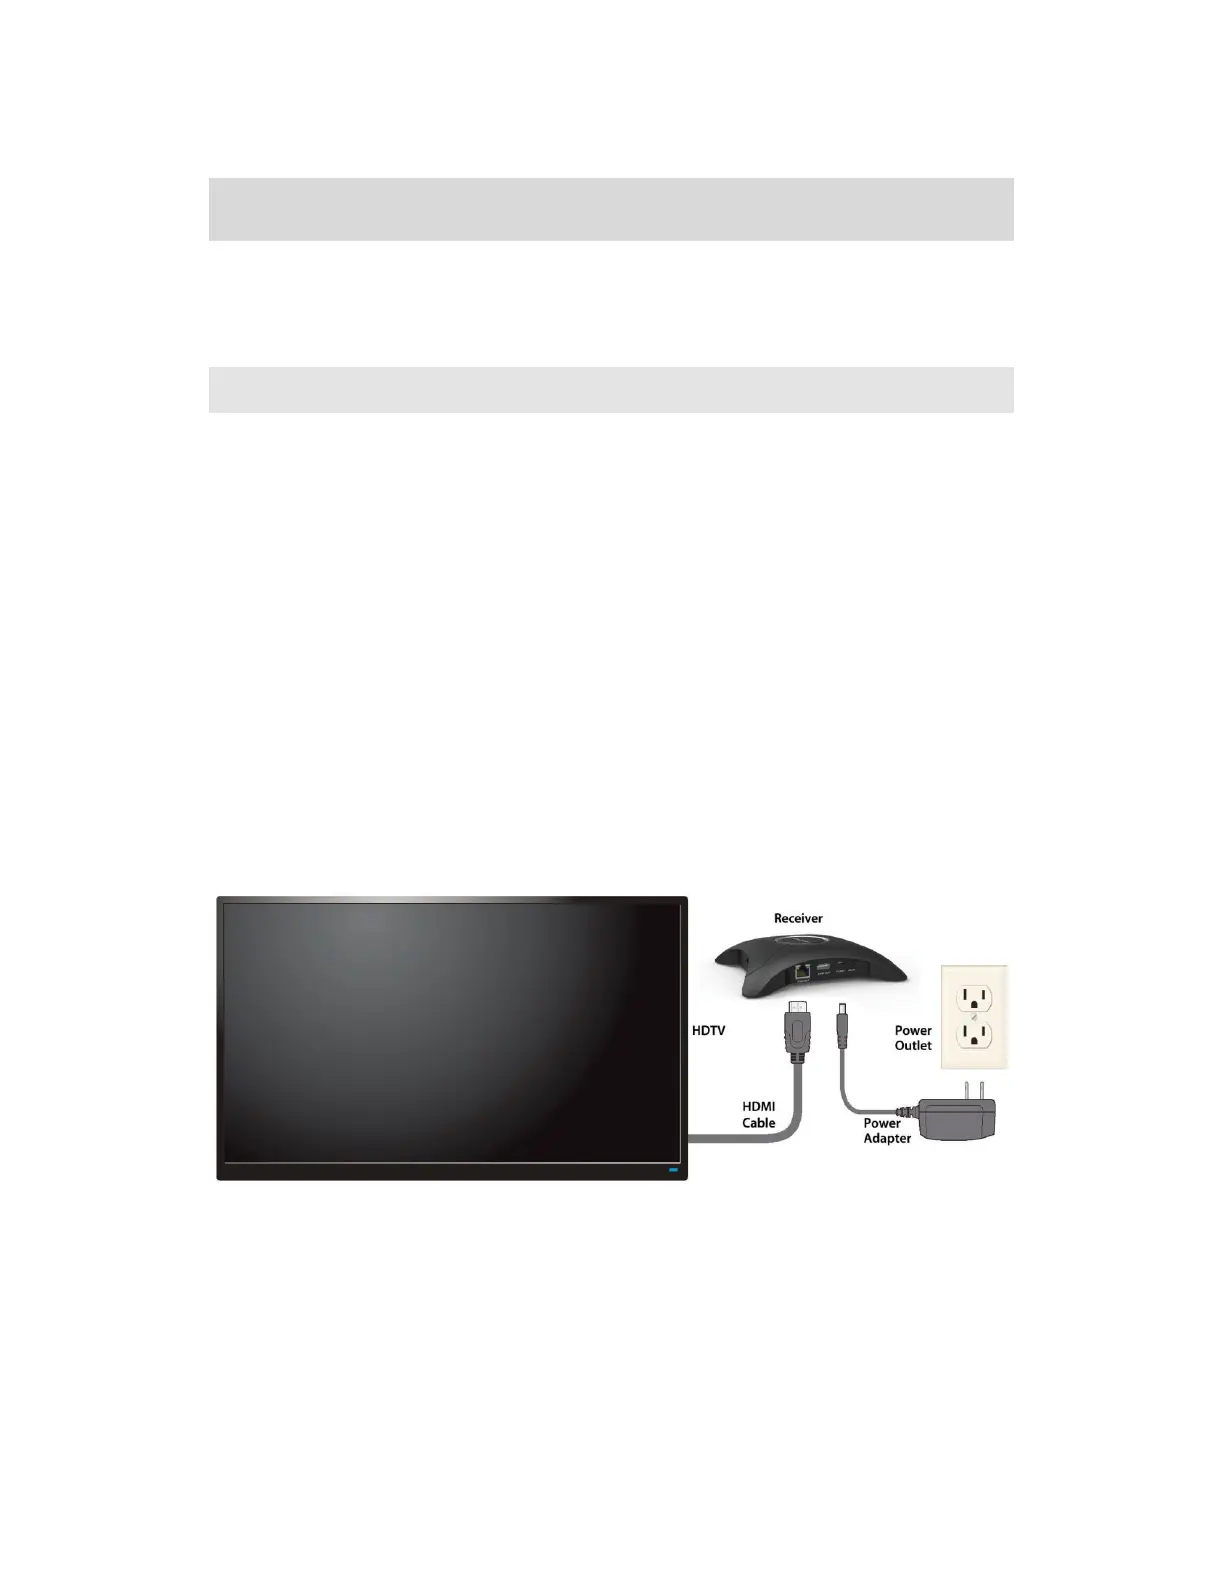
When the above steps are complete, the hardware should be connected as shown in
the figure below:
Note: Power adapter may vary in different region.
6. Turn on the HDTV and set it to display the input from the correct HDMI port (the one you
have plugged into in Step 2).