13
.
Fitting the blanking plate
1. Using the four screws, t the blank plate to the side of the
Terminal Housing.
2. Ensure that no cables or components are trapped between
the blanking plate and the Terminal Housing seal, as this
would adversely aect the IP rating of the Terminal Housing.
Note:
Screws tightening torque: 1.5 Nm.
14
.
Fitting the Control Module
1. Ensuring that no wiring is trapped by the Control Module,
place the module on the four supporting posts of the Termi‐
nal Housing.
2. Using the four screws (self-retaining), secure the Control
Module into place.
Note:
Screws tightening torque: 1.5 Nm.
15
.
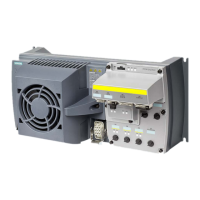
Fitting the Communications and Power Interface (CPI)
1. Using the four screws, t the CPI to the side of the Terminal
Housing.
2. Ensure that no cables or components are trapped between
the CPI and the Terminal Housing seal, as this would adverse‐
ly aect the IP rating of the Terminal Housing.
Notes:
• Screws tightening torque: 1.5 Nm.
• The Communications and Power Interface (CPI) can be tted
on the left or right side of the Terminal Housing, but must
always be tted on the opposite side of the Terminal Housing
from the internal braking resistor.
16
.
Final connection and adjustments
1. Connect the temperature sensor connector into the connec‐
tor at the top edge of the CPI.
2. Connect the small communications connector into the con‐
nector at the top of the CPI.
3. Connect the large communications connector into the con‐
nector on the top of the Control Module.
4. Connect the CPI ribbon cable to the connector on the top of
the Control Module.
5. Congure the DIP switches to the requirements of the appli‐
cation (see Step 17 below).
Note:
The PROFIBUS/PROFINET communications cable is not pre-tted
to the Control Module, it is part of the accessories supplied in the
product packaging.
Installation
4.2 System Installation
Distributed converter for SIMOGEAR geared motors
52 Operating Instructions, 10/2020, FW V4.7 SP13, A5E31298649B AL
 Loading...
