3-7
Set up, install, and configure
3
❖
Using the Embedded Web Server
1 Open a web browser, and then type the printer IP address in the address field.
Settings→Device→Preferences→RunInitialSetup
Note
-
ViewtheprinterIPaddressonthehomescreen.TheIPaddressappearsasfoursetsofnumbersseparatedby
periods, such as 123.123.123.123.
-
Ifyouareusingaproxyserver,thentemporarilydisableittoloadthewebpagecorrectly.
2 ClickSettings→Fax→FaxSetup→GeneralFaxSettings.
3 Configure the settings.
4 Apply the changes.
Setting up fax using a standard telephone line
CAUTION : SHOCK HAZARD
To avoid the risk of electrical shock, do not set up this product or make any electrical or cabling
connections,suchasthepowercord,faxfeature,ortelephone,duringalightningstorm.
CAUTION : SHOCK HAZARD
Toavoidtheriskofelectricalshock,donotusethefaxfeatureduringalightningstorm.
CAUTION : POTENTIAL INJURY
Toreducetheriskoffire,useonlya26AWGorlargertelecommunications(RJ-11)cordwhen
connectingthisproducttothepublicswitchedtelephonenetwork.ForusersinAustralia,thecord
must be approved by the Australian Communications and Media Authority.
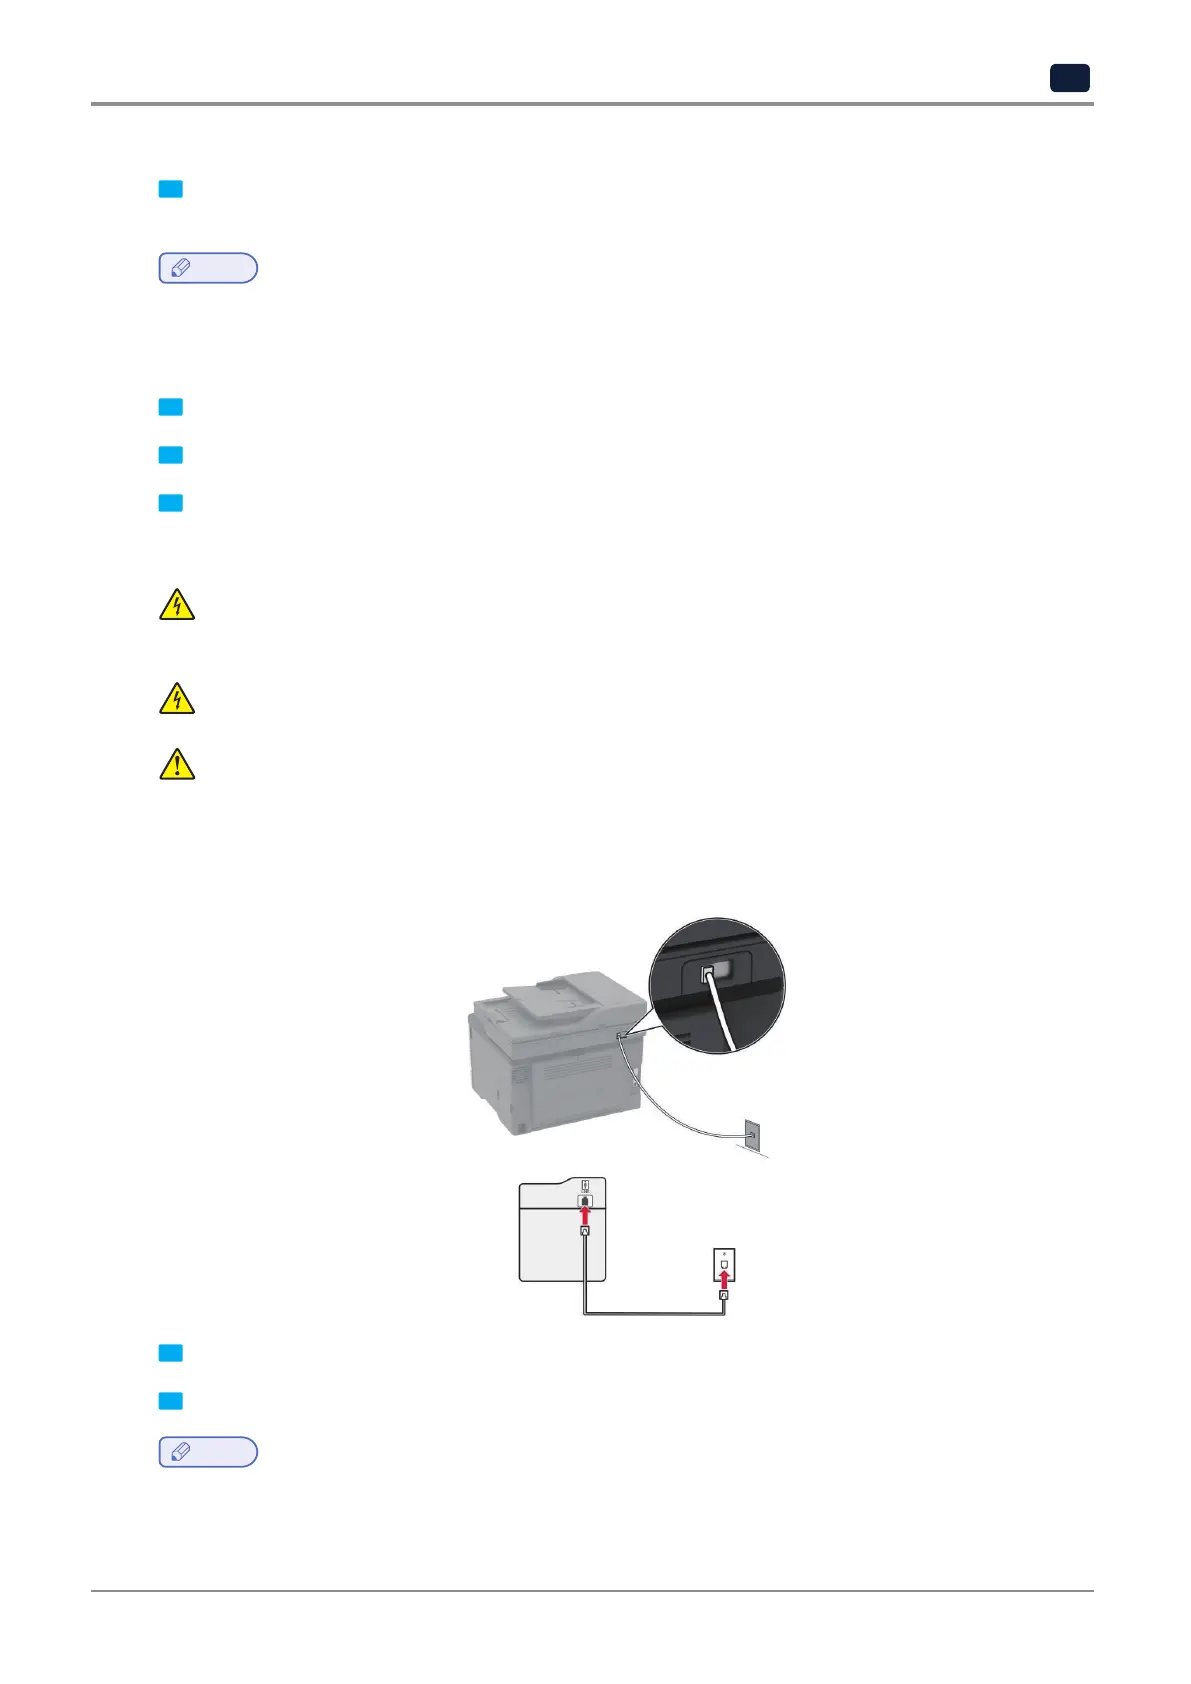
❖ Setup 1: Printer is connected to a dedicated fax line
1 Connect one end of the telephone cable to the line port of the printer.
2 Connect the other end of the cable to an active analog wall jack.
Note
-
Youcansettheprintertoreceivefaxesautomatically(setAutoAnswertoOn)ormanually(setAutoAnswer
toOff).
-
Ifyouwanttoreceivefaxesautomatically,thensettheprintertopickuponaspecifiednumberofrings.