Set up, install, and configure
3-8
3
❖
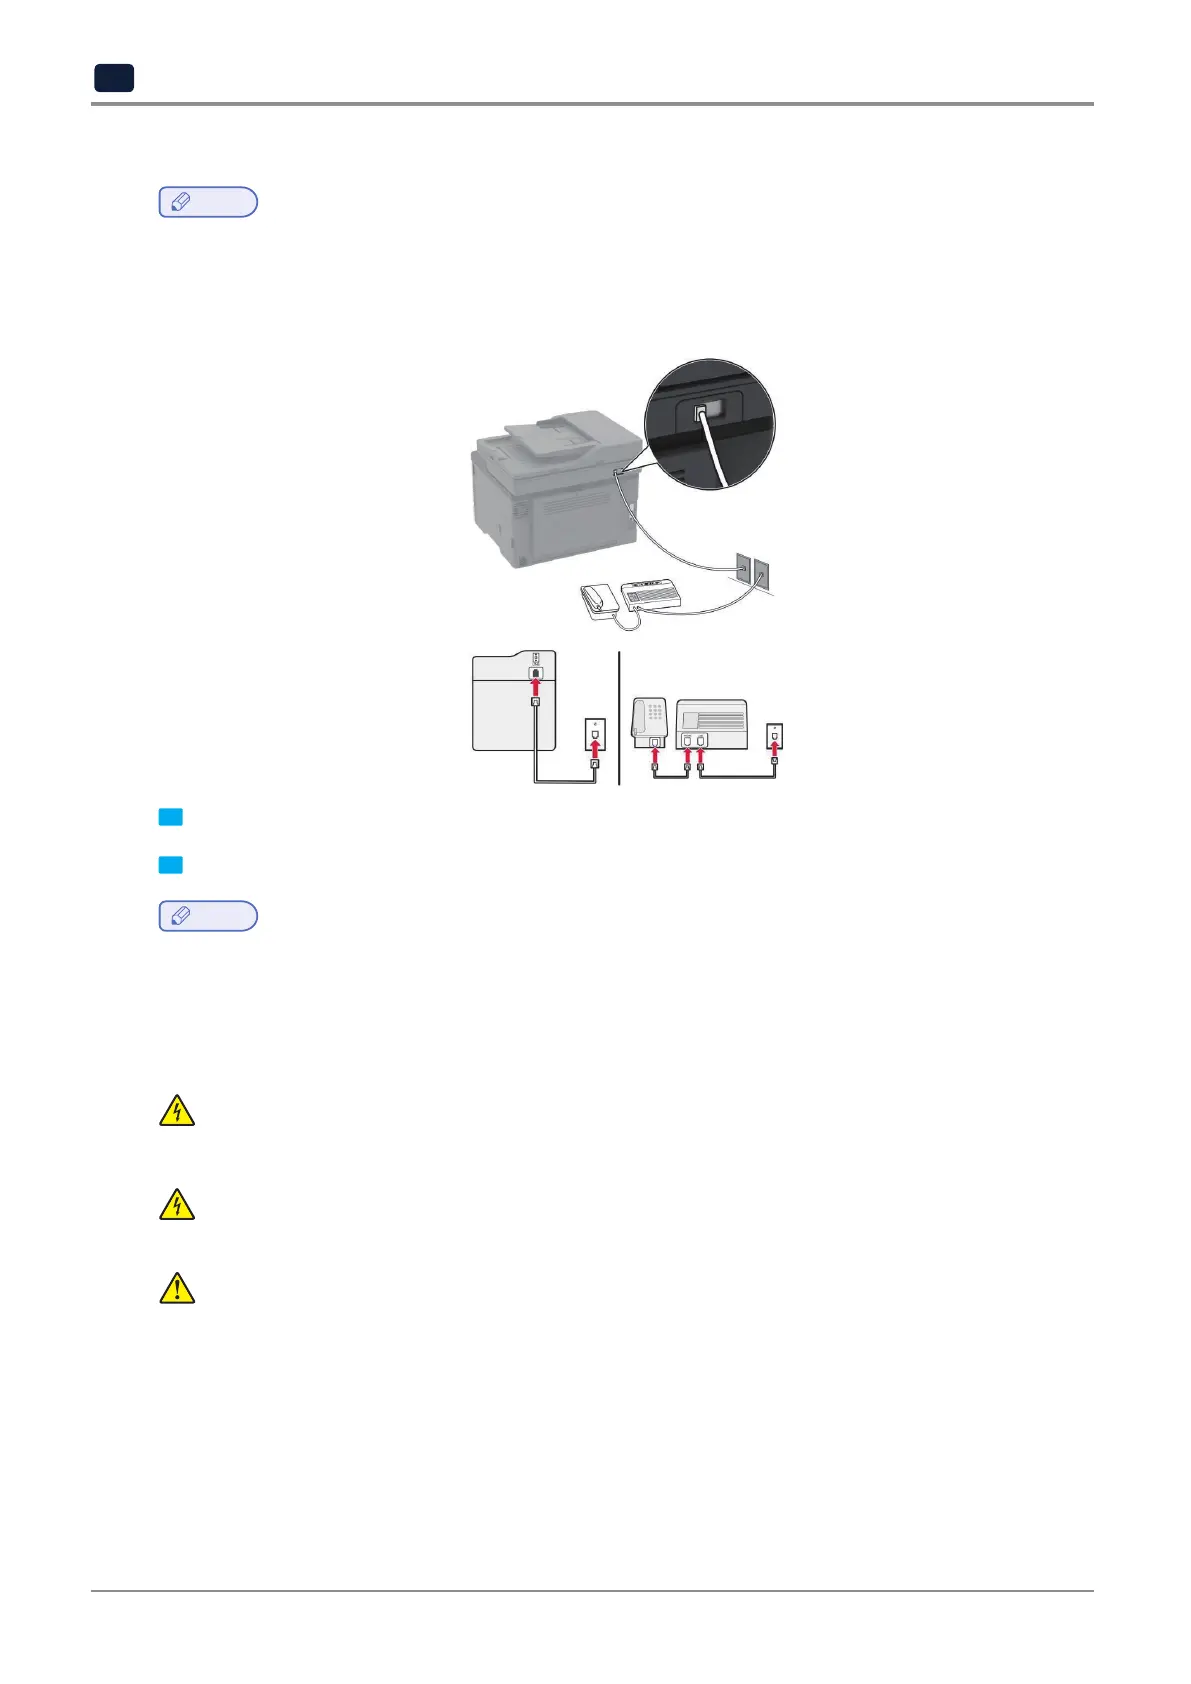
Setup 2: Printer is sharing the line with an answering machine
Note
-
If you subscribe to a distinctive ring service, then make sure that you set the correct ring pattern for the printer.
Otherwise,theprinterdoesnotreceivefaxesevenifyouhavesetittoreceivefaxesautomatically.
Connected to different wall jacks
1 Connect one end of the telephone cable to the line port of the printer.
2 Connect the other end of the cable to an active analog wall jack.
Note
-
Ifyouhaveonlyonetelephonenumberonyourline,thensettheprintertoreceivefaxesautomatically.
-
Settheprintertopickupcallstworingsaftertheansweringmachine.Forexample,iftheansweringmachine
picks up calls after four rings, then set the printer Rings to Answer setting to 6.
Setting up fax in countries or regions with different telephone wall jacks and plugs
CAUTION : SHOCK HAZARD
To avoid the risk of electrical shock, do not set up this product or make any electrical or cabling
connections,suchasthepowercord,faxfeature,ortelephone,duringalightningstorm.
CAUTION : SHOCK HAZARD
Toavoidtheriskofelectricalshock,donotusethefaxfeatureduringalightningstorm.
CAUTION : POTENTIAL INJURY
Toreducetheriskoffire,useonlya26AWGorlargertelecommunications(RJ-11)cordwhen
connectingthisproducttothepublicswitchedtelephonenetwork.ForusersinAustralia,thecord
must be approved by the Australian Communications and Media Authority.
ThestandardwalljackadoptedbymostcountriesorregionsisRJ11.Ifthewalljackorequipmentinyourfacility
is not compatible with this type of connection, then use a telephone adapter. An adapter for your country or
region may not come with your printer, and you may need to purchase it separately.
Theremaybeanadapterpluginstalledinthetelephoneportoftheprinter.Donotremovetheadapterplug
from the telephone port of the printer if you are connecting to a serial or cascaded telephone system.