Tsunami Mode-Locked Ti:sapphire Laser
5-4
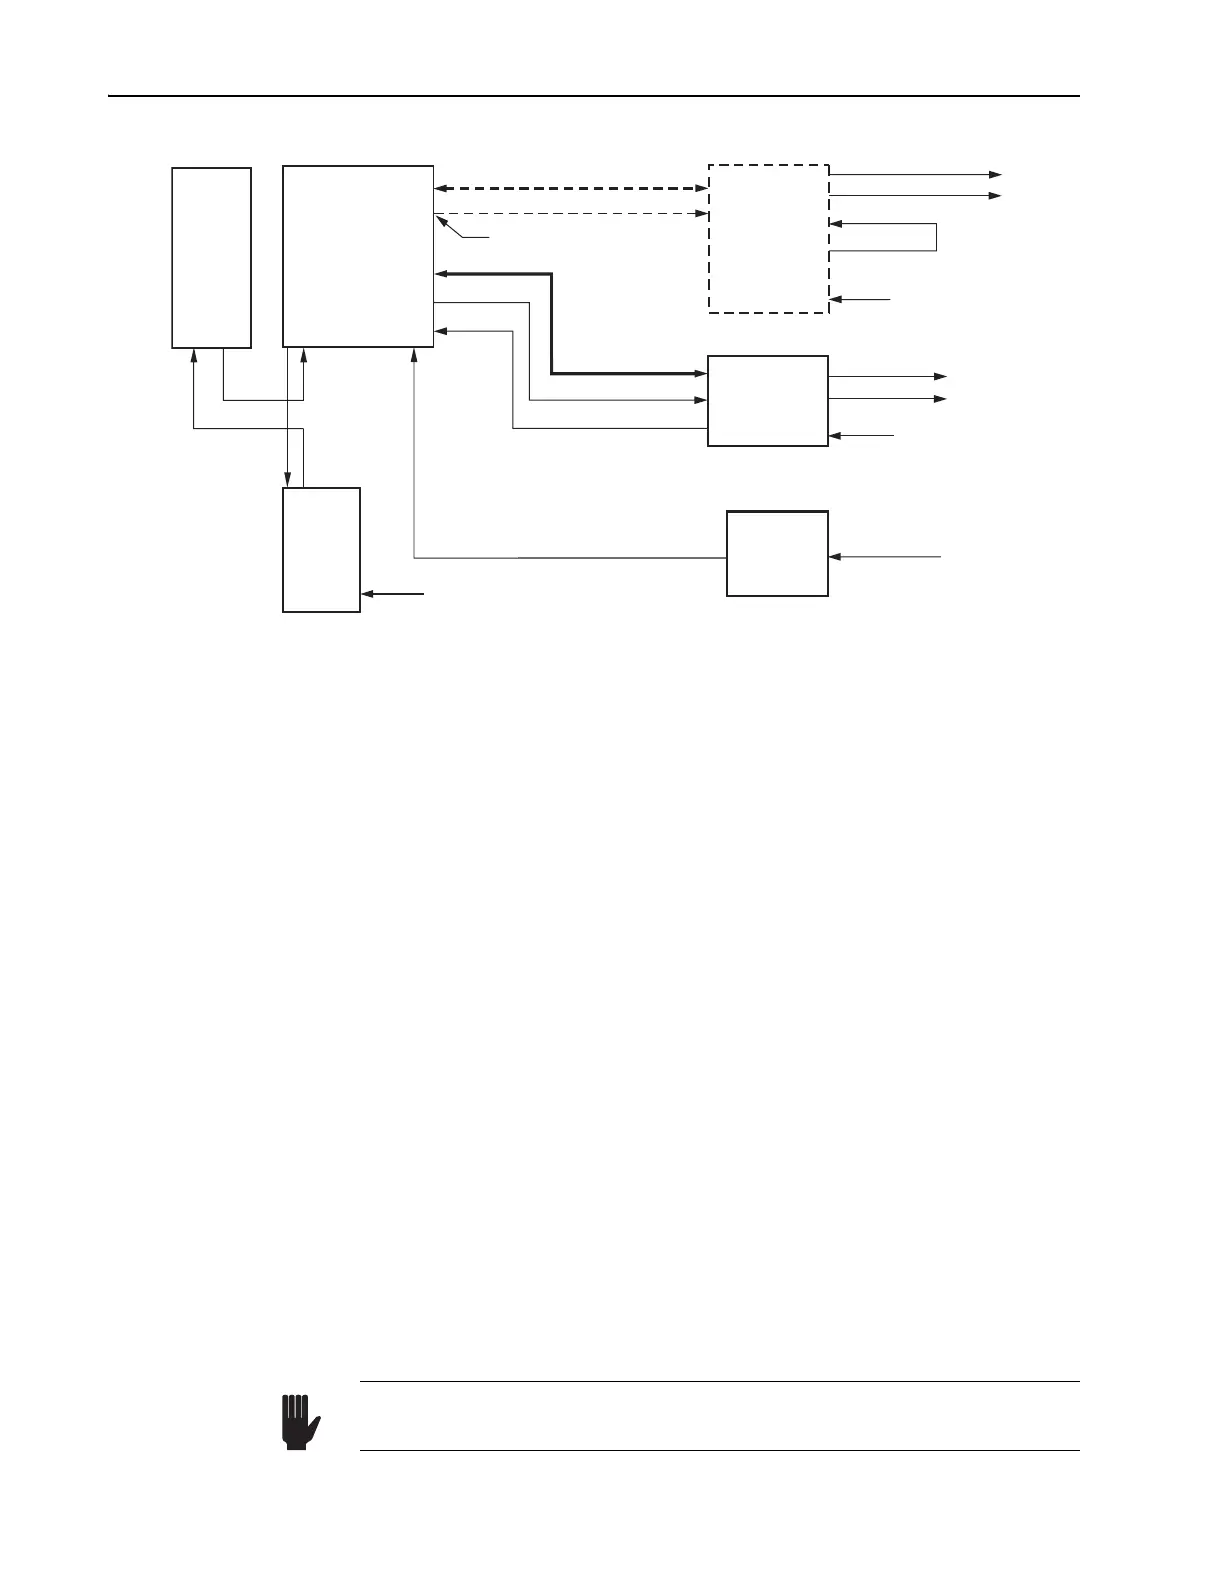
Figure 5-2: Typical System Interconnect Diagram
2. Unscrew the knurled nuts holding the large barbed hose fittings to the
back of the chiller and remove the barbed fittings.
3. Find the two hoses in the accessory kit and locate the ends without fit-
tings. Slide one of the knurled nuts just removed over each hose end
with the threads facing the end of the hose.
One end of each hose has a quick-disconnect fitting already attached.
4. Find the two small, barbed hose fittings in the accessory kit and push
them into the ends of the two hoses.
It may be a tight fit. The polyurethane hose can be stretched either
using long-nosed pliers or by warming the ends a little with a flame
less heater. Note: overheating the hose will damage it and can result in
leaks later.
5. Screw both hoses onto the chiller and tighten.
The hose connections are not polarized. Finger tight is enough: do not
overtighten.
Water should first flow to the Millennia laser, then to the Tsunami. To do
this, a third hose with quick-disconnects on each end is required in order to
bring water from the Millennia to the Tsunami laser.
6. Push the quick-disconnect fittings of the hose(s) into either of the two
water fittings on the Tsunami or Millennia input bezel (refer to Figure
4-3). When seated, the connectors will fasten with a click.
7. Turn on the chiller and verify water is flowing.
Refer to the chiller manual for instructions.
TO 3930
LTC PD
TO 3955
TO HEAD
PHOTODIODE IN
PHOTODIODE OUT
REF OUT
REF IN
80 MHz OUT
AC In
TO HEAD
PHOTODIODE
MODE LOCKER
Nitrogen Gas
Tsunami
Laser Head
AC In
Purge Gas
Model 3910
Purge
Unit
Model 3955
Electronic
Module
Lok-to-Clock
Model 3930
Electronic
Module
(Optional)
Coolant
Lines
Chiller
ML PD
ML
MONITOR
SYNC
AC In
Millennia
Or 50 Ω terminator
Setting the chiller pressure higher than 275 kPa (40 psi) can lead to cat-
astrophic damage and will void the warranty.
Warning!