Chapter 4 Replacing Motherboard Assembly Components 4-25
2. Remove the FB-DIMM/CPU duct.
See Section 4.4.1, “Removing the Air Duct” on page 4-17.
3. If you are replacing a faulty FB-DIMM, locate the FB-DIMMs that you want to
replace.
Press the DBDIMM DIAG button on the motherboard to activate the DB-DIMM
status LEDs. Any faulty FB-DIMMs will be indicated with a corresponding amber
fault LED on the motherboard.
Tip – Make a note of the faulty FB-DIMM location so that you can install the
replacement FB-DIMM in the same location.
Note – For memory configuration information see Section 4.5, “FB-DIMM Layout”
on page 4-19.
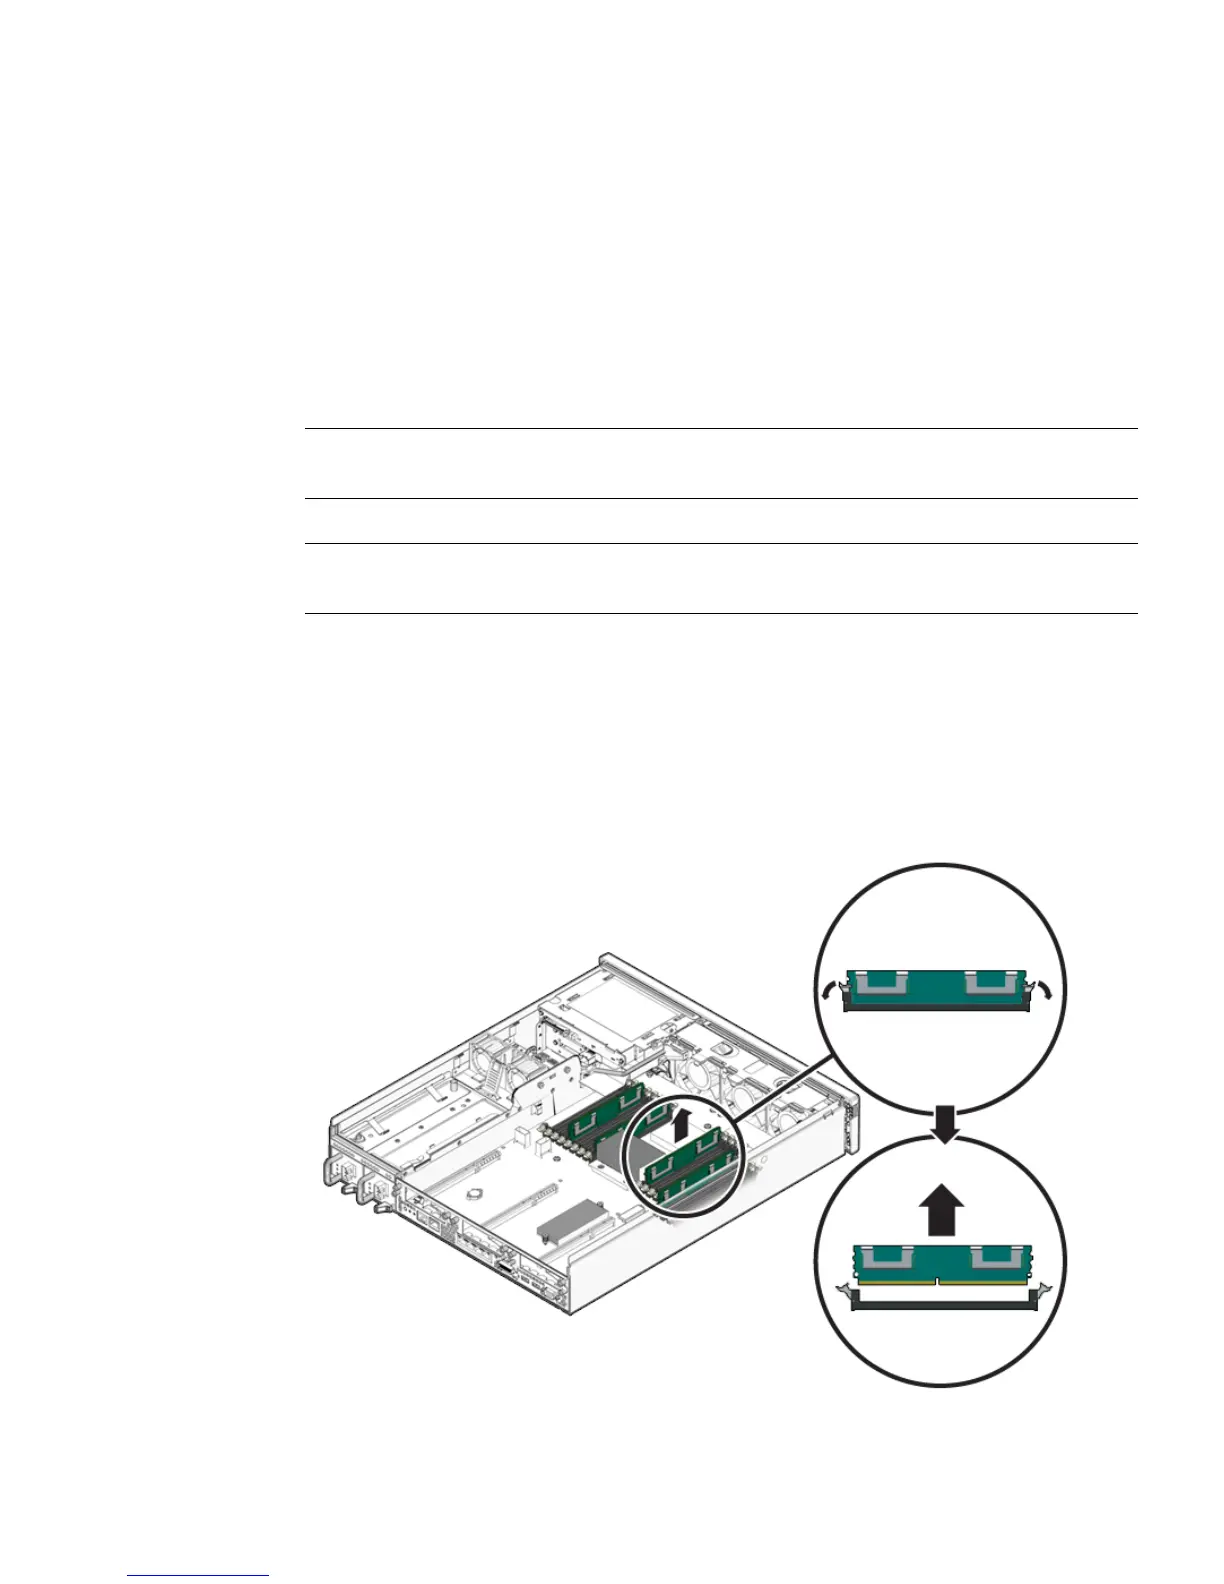
4. Push down on the ejector tabs on each side of the FB-DIMM until the
FB-DIMM is released (
FIGURE 4-15).
5. Grasp the top corners of the faulty FB-DIMM and remove it from the server.
FIGURE 4-15 Removing FB-DIMMs