50 Sun Server X4-2 Service Manual • May 2014
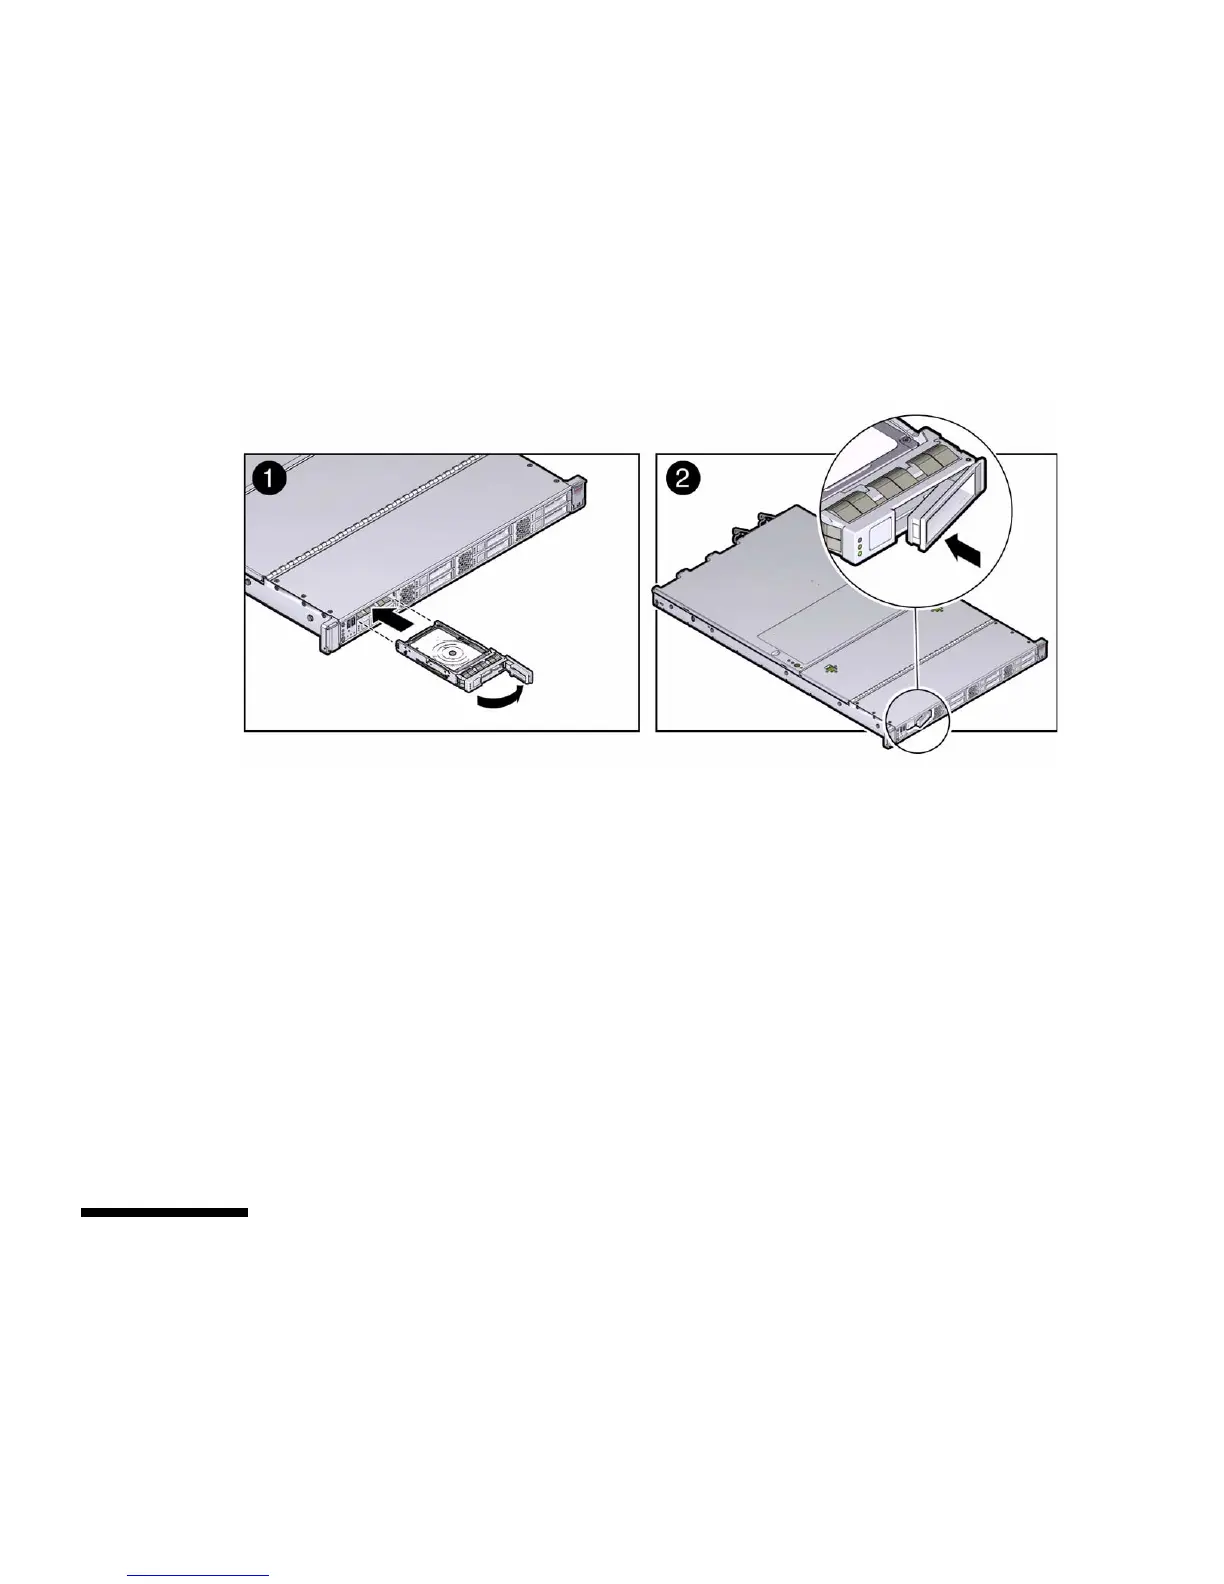
2. If necessary, remove the drive filler panel.
3. Align the replacement drive with the drive slot.
The drive is physically addressed according to the slot in which it is installed. It is
important to install a replacement drive in the same slot as the drive that was
removed.
4. Slide the drive into the slot until the drive is fully seated [1].
5. Close the drive latch to lock the drive in place [2].
6. Perform administrative tasks to reconfigure the drive.
The procedures that you perform at this point depend on how your data is
configured. You might need to partition the drive, create file systems, load data
from backups, or have the drive updated from a RAID configuration.
Related Information
■ “Storage Drive Status Indicators” on page 47
■ “Storage Drives Hot-Plug Conditions” on page 46
■ “HDD or SSD Failure and RAID” on page 46
■ “Remove a Storage Drive” on page 47
Servicing Fan Modules (CRU)
The fan modules are located in the front of the server.