Home
Tektronix
Test Equipment
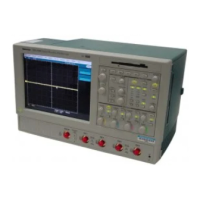
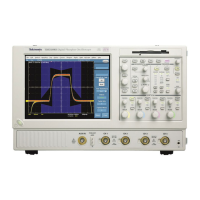
TDS5052
Tektronix TDS5052 User Manual
4
of 1
of 1 rating
361 pages
Give review
Manual
Specs
To Next Page
To Next Page
To Previous Page
To Previous Page
Loading...
Data
Input
and
Output
3
-
208
TDS5000
Series
User
Manual
For
informa
tion
on
connecting
the
oscilloscope
to
a
network
to
enable
printing,
file
sharing,
Interne
t
acces
s,
and
other
communica
tion
functions,
see
C
onnecting
to
a
Network
on
page
1
-
-
12.
Other
C
ommuni
cation
274
276
Table of Contents
Table of Contents
6
List of Tables
14
General Safety Summary
16
About this Manual
18
Preface
18
Related Manuals and Online Documents
19
Contacting Tektronix
20
Key Features
22
Models
22
Product Description
22
Product Software
23
Firmware Upgrade
24
Probes Supported
25
Table 1- 1: Recommended Probe Cross Reference
25
Installation
26
Unpacking
26
Checking the Environment Requirements
27
Connecting Peripherals
27
Figure 1- 1: Locations of Connectors on Side and Rear Panels
28
Table 1- 2: Additional Accessory Connection Information
28
Figure 1- 2: On/Standby Switch Location
29
Powering on the Oscilloscope
29
Creating an Emergency Startup Disk
30
Shutting down the Oscilloscope
30
Backing up User Files
31
Installing Software
31
Connecting to a Network
33
Setting up a Dual Display
34
Figure 1- 3: Drag Area for Windows Task Bar
37
Adjusting Display Contrast
38
Assemble Equipment
40
Incoming Inspection
40
Self Tests
41
Functional Tests
42
Figure 1- 4: Universal Test Hookup for Functional Tests, CH 1 Shown
43
Figure 1- 5: Channel Button Location
43
Figure 1- 6: Location of Vertical and Horizontal Scale Readouts
44
Figure 1- 7: Setup for Time Base Test
46
Figure 1- 8: Setup for Trigger Test
48
Figure 1- 9: Setup for the File System Test
50
Perform the Extended Diagnostics
51
Accessories and Options
52
Options
52
Table 1- 3: Instrument Options
52
Table 1- 4: Instrument Upgrades
53
Accessories 1
53
Accessories
54
Table 1- 5: Standard Accessories
54
Table 1- 6: Optional Accessories
55
Operational Maps
58
Documentation Map
59
Front Panel I/O Map
60
Control Panel Map: Quick Access to most Often Used Features
61
User Interface Map - - Complete Control and Display
62
Display Map - - Single Graticule
63
Left Side
64
Rear
64
Side and Rear Panel I/O & Connectors Map
64
Functional Model Map
65
System Overview Maps
65
Process Overview Map
67
Overview
68
Acquiring Waveforms
70
Figure 3- 1: Oscilloscope System Overview: Signal Acquisition
70
Figure 3- 2: Input and Acquisition Systems and Controls
71
Connecting and Conditioning Your Signals 3
72
Setting up Signal Input
75
Autosetting the Oscilloscope 3
79
Resetting the Oscilloscope
80
Input Conditioning Background
81
Figure 3- 3: Setting Vertical Range and Position of Input Channels
83
Figure 3- 4: Varying Offset Moves the Vertical Acquisition Window on the Waveform
84
Figure 3- 5: Horizontal Acquisition Window Definition
85
Figure 3- 6: Common Trigger, Record Length, and Acquisition Rate for All Channels
87
Signal Connection and Conditioning
71
Setting Acquisition Controls
88
Acquisition Modes
88
Table 3- 1: Additional Resolution Bits
88
Controlling Acquisitions
89
Roll Mode
89
Preventing Aliasing
90
Figure 3- 7: Roll Modes
90
Incompatible Modes
91
Figure 3- 8: Aliasing
91
Setting Acquisition Modes
92
Starting and Stopping Acquisition
93
Using Roll Mode
95
Acquisition Control Background
96
Acquisition Hardware
97
Sampling Process
97
Figure 3- 9: Digitizer Configuration
97
Figure 3- 10: Digital Acquisition - Sampling and Digitizing
97
Sampling Modes
98
Waveform Record
98
Real-Time Sampling
99
Figure 3- -11: the Waveform Record and Its Defining Parameters (Horizontal Delay
99
Figure 3- 12: Real-Time Sampling
99
Equivalent-Time Sampling
100
Figure 3- -13: Equivalent-Time Sampling
100
Interpolation
101
Table 3- 2: Sampling Mode Selection
101
Interleaving
102
Table 3- 3: How Interleaving Affects Sample Rate
102
Using Fast Acquisitions
103
Figure 3- 14: Normal DSO and Fast Acquisitions Displays
103
Figure 3- -15: Normal DSO Acquisition and Display Mode Versus
105
Turning Fast Acquisitions on and off 3
106
Setting the Display Format
108
Figure 3- 16: Fast Acquisitions XY Display
108
Using Fast Acquisitions Mode
102
Figure 3- 17: Fastframe
109
Table 3- 4: XY Format Pairs
109
Using Fastframe Acquisitions
110
To Set Fastframe Mode
111
Time Stamping Frames
112
Figure 3- 18: Fastframe Time Stamp
115
Using Fastframe
109
Figure 3- 19: Oscilloscope System Overview: Triggering
116
Triggering
116
Triggering Concepts
117
Trigger Event
117
Trigger Sources
117
Figure 3- 20: Triggered Versus Untriggered Displays
117
Trigger Types
118
Trigger Modes
118
Trigger Holdoff
119
Trigger Coupling
119
Figure 3- 21: Holdoff Adjustment Can Prevent Unwanted Triggers
119
Horizontal Position
120
Slope and Level
120
Delayed Trigger System
120
Triggering from the Front Panel
121
Setting up Triggers
121
Checking Trigger Status
124
Additional Trigger Parameters
126
Advanced Triggering
129
Table 3- 5: Pattern and State Logic
131
Figure 3- -24: Violation Zones for Setup/Hold Triggering 3
133
Triggering on a Glitch
135
Triggering on a Runt Pulse
137
Triggering on the Pulse Width
140
Triggering on Transition Time 3
142
Triggering on Pulse Timeout 3
144
Triggering on a Pattern
146
Triggering on Logic State
149
Triggering on Setup/Hold Time Violations 3
151
Figure 3- -25: Triggering on a Setup/Hold Time Violation 3
153
Triggering on Window Threshold Violations 3
154
Triggering on a Video Signal
156
Sequential Triggering
158
Figure 3- -26: Triggering with Horizontal Delay off 3
159
Figure 3- -27: Triggering with Horizontal Delay on 3
160
Figure 3- -28: Trigger and Horizontal Delay Summary 3
161
Triggering on a Sequence
162
Displaying Waveforms
166
Using the Waveform Display
167
Display Elements
167
Acquisition Preview
168
Display Methods
168
Table 3- 6: Defining and Displaying Waveforms
168
Figure 3- -31: Horizontal Position Includes Time to Horizontal Reference Point 3
170
Displaying Waveforms in the Main Graticule 3
171
Customizing the Waveform Display
173
Using Display Controls
173
Table 3- 7: Customizable Display Elements
173
Using the Zoom Feature
177
Measuring Waveforms
182
Taking Automatic Measurements
182
Using Automatic Measurements
183
Figure 3- -33: High/Low Tracking Methods 3
184
Figure 3- -34: Reference Level Calculation Methods 3
185
Taking Automatic Measurements 3
186
Localizing a Measurement
189
Taking Cursor Measurements
191
Cursor Types
191
Table 3- 8: Cursor Types
191
Using Cursors
192
Table 3- 9: Cursor Units
193
Figure 3- -35: Components Determining Time Cursor Readout Values 3
193
Setting Cursor Sources
195
Using Histograms (Optional)
197
Figure 3- -36: Horizontal Histogram View and Measurement Data 3
198
Starting and Resetting Histogram Counting
199
Histogram Measurements
200
Creating and Using Math Waveforms
202
About Math Waveforms
203
Purpose
203
Table 3- 10: Functions Available in Standard Math and Advanced Math
204
Other Uses for Math Waveforms
205
Using Math
205
Table 3- 11: Math Expressions and the Math Waveforms Produced
205
Figure 3- -40: Derivative Math Waveform 3
208
Figure 3- -41: Peak-Peak Amplitude Measurement of a Derivative Waveform 3
209
Creating a Math Waveform
212
Operations on Math Waveforms
214
Displaying and Measuring Math Waveforms 3
215
Defining Spectral Math Waveforms
218
Using Spectral Math Controls
219
Table 3- 12: Spectral Analyzer Controls
219
Figure 3- -42: Duration and Resolution Control Effects 3
220
Figure 3- -43: Definition of Gate Parameters 3
221
Figure 3- -44: Effects of Frequency Domain Control Adjustments 3
223
Figure 3- -45: Effects of Adjusting the Reference Level 3
224
Figure 3- -46: Effects of Adjusting the Reference Level Offset Control . 3
225
Figure 3- -47: Example of the Effects of Setting the Phase Suppression Threshold 3
226
Table 3- 13: Window Characteristics
228
Figure 3- -48: Windowing the Time Domain Record 3
228
Figure 3- -49: Example of Scallop Loss for a Hanning Window Without Zero Fill 3
230
Figure 3- -50: Time and Frequency Graphs for the Gaussian Window 3
231
Figure 3- -51: Time and Frequency Domain Graphs for the Rectangular Window 3
232
Figure 3- -52: Time and Frequency Graphs of the Hamming Window 3
233
Window 3
234
Figure 3- -54: Time and Frequency Graphs for the Kaiser-Bessel Window 3
235
Figure 3- -55: Time and Frequency Graphs of the Blackman-Harris Window 3
236
Figure 3- -56: Time and Frequency Domain Graphs for the Flattop2 Window 3
237
Figure 3- -57: Tek Exponential Window in the Time and the Frequency Domains 3
238
Recognizing Aliasing
239
Figure 3- -58: How Aliased Frequencies Appear in a Spectral Waveform 3
240
Selecting a Predefined Spectral Math Function (Optional)
241
Defining a Spectral Math Waveform 3
242
Defining a Spectral Math Waveform (Optional) 3
243
Data Input/Output
250
Saving and Recalling Setups
250
Figure 3- -59: Auto-Increment File Name Feature 3
251
Saving a Setup 3
252
Recalling a Setup 3
254
Saving and Recalling Waveforms
256
Saving a Waveform 3
257
Recalling a Waveform 3
259
Clearing References 3
261
Exporting and Copying Waveform Data
263
Exporting Waveform Data
263
Using an Exported Waveform 3
267
Copying Waveform Data
269
Printing Waveforms
272
Printing from the Front Panel
272
Printing from the Menu Bar
272
Setting up the Page
272
Previewing the Page
272
Printing Banners
273
Using Print Screen
274
Remote Communication
274
Gpib
274
Other Communication 3
275
Accessing Online Help
276
Using Online Help
276
Appendix A: Specifications
280
Product and Feature Description
280
Table A- 1: TDS5000 Models
280
Acquisition Features
281
Display Features
282
Specification Tables
284
Table A- 2: Channel Input and Vertical Specifications
284
Table A- 3: Horizontal and Acquisition System Specifications
290
Table A- 4: Trigger Specifications
292
Table A- 5: Display Specifications
295
Table A- 6: Input/Output Port Specifications
296
Table A- 7: Data Storage Specifications
297
Table A- 8: Power Source Specifications
298
Table A- 9: Mechanical Specifications
298
Table A- 10: Environmental Specifications
299
Table A- 11: Certifications and Compliances
300
Appendix B: Automatic Measurements Supported
302
Table B- 1: Supported Measurements and Their Definitions
302
Appendix C: Cleaning
306
Appendix D: Menu Bar Commands
308
File Commands
308
Edit Commands
309
Vertical Commands
310
Horizontal and Acquisition Commands
311
Trigger Commands
312
Display Commands
313
Cursors Commands
314
Measure Commands
314
Standard Math Commands
315
Advanced Math Commands (Optional)
316
Help Commands
317
Utilities Commands
317
Appendix E: Optimizing Measurement Accuracy
320
Connecting Probes for Calibration
322
Calibrating Probes
322
Compensating Low Frequency Probes
324
Deskewing Channels
325
Glossary
328
Fast Acquisitions Mode
330
Other manuals for Tektronix TDS5052
Quick Start User Manual
94 pages
4
Based on 1 rating
Ask a question
Give review
Questions and Answers:
Need help?
Do you have a question about the Tektronix TDS5052 and is the answer not in the manual?
Ask a question
Tektronix TDS5052 Specifications
General
Brand
Tektronix
Model
TDS5052
Category
Test Equipment
Language
English
Related product manuals
Tektronix TDS5054B
94 pages
Tektronix TDS5000B Series
126 pages
Tektronix TDS5104B
94 pages
Tektronix TDS7104
254 pages
Tektronix TDS2012
207 pages
Tektronix TDS2024
207 pages
Tektronix TDS 340
65 pages
Tektronix TDS2014
207 pages
Tektronix TDS 224
120 pages
Tektronix TDS3054
140 pages
Tektronix TDS1002
207 pages
Tektronix TDS 220
120 pages