Other Operation Procedures
6. Keep clamping the blood line with forceps. Turn the motor
speed knob to adjust the motor speed to a speed that does
not cause back flow. Gradually release the clamp of the
blood line.
The status lamp is lit in green, and the alarm sound stops.
“Air Bubble: Pump Stop” on the message area is turned off.
7. While monitoring the flow, adjust the motor speed to
achieve the necessary flow.
Setup of the Controller
1. Turn the Fast Clamp on.
For details about how to set, refer to “Setting the Fast Clamp” (page 90).
2. Set the safety connection of the Back Flow Alarm to
“Clamp+Pump stop”.
For details about how to set, refer to “Setting the Safety Connection”
(page 91).
• When activating the safety connection, be sure to set the Fast Clamp on.
The safety connection is not activated without the Fast Clamp function.
Actions after activating the safety connection
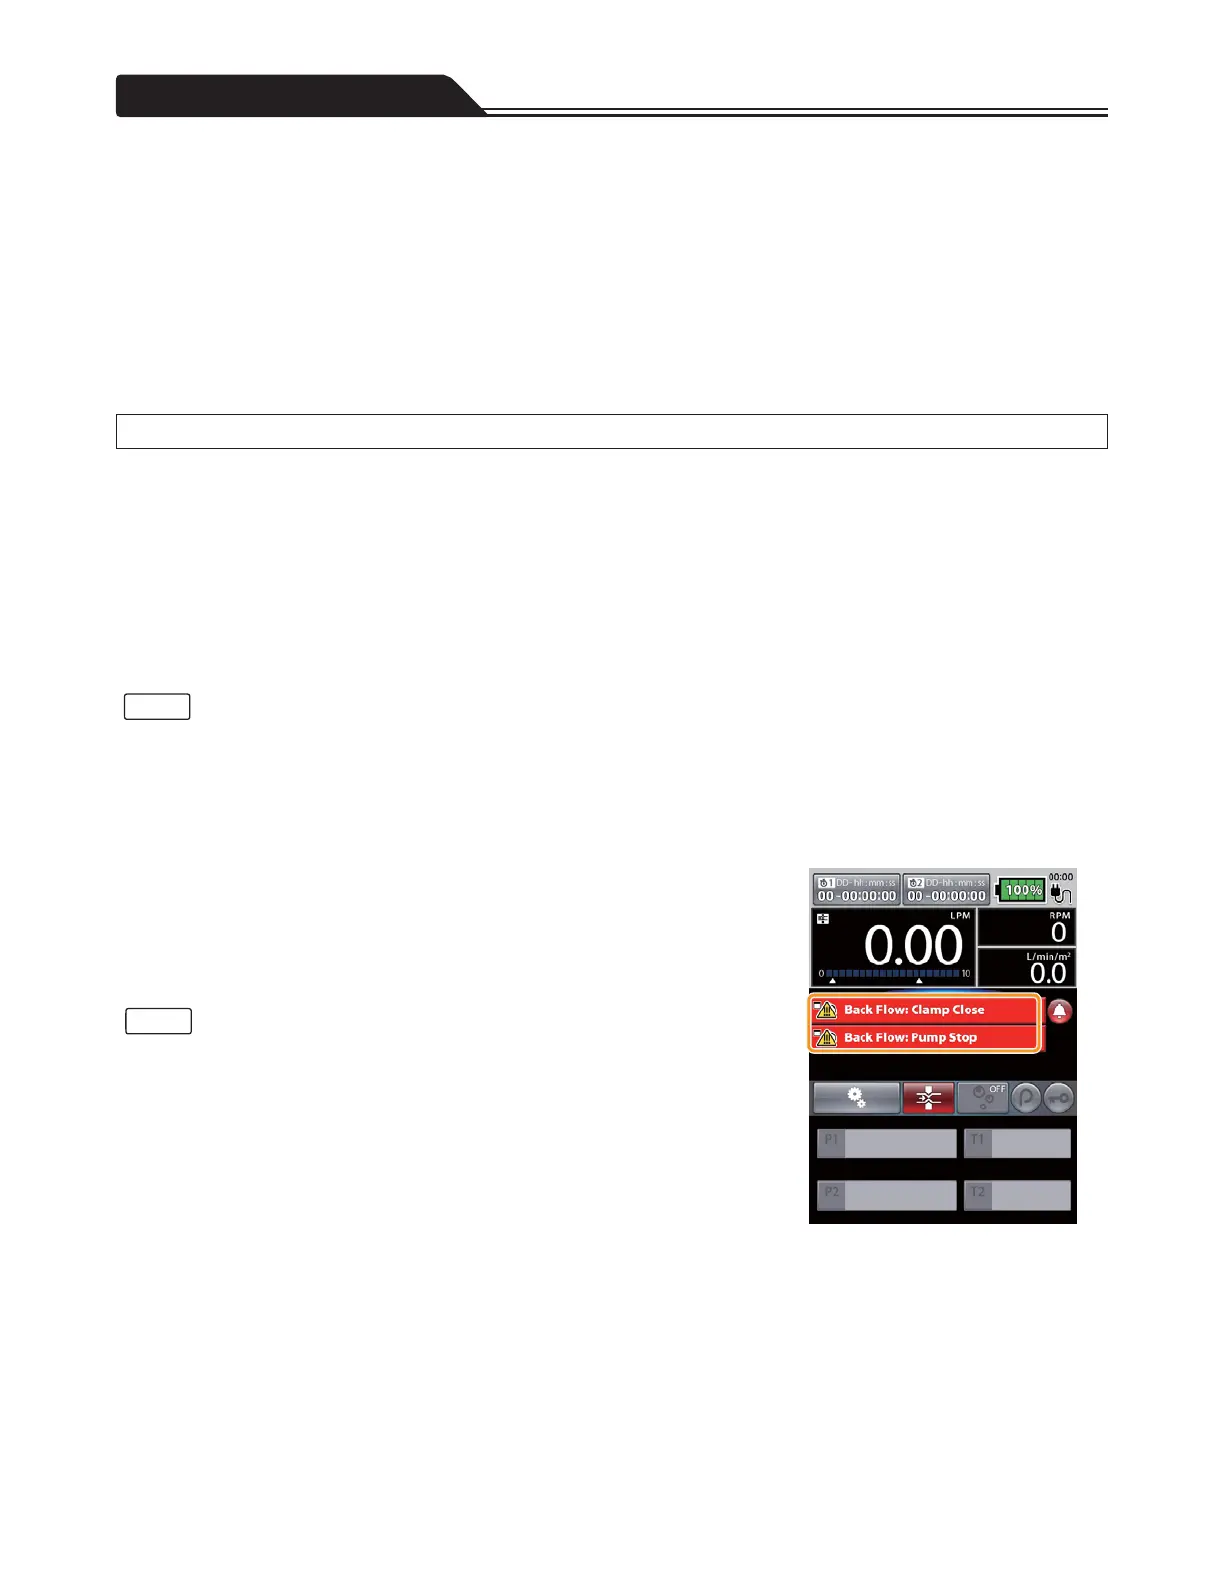
1. When the Back Flow Alarm is issued, the Fast Clamp is
closed (up position) and the Drive Motor stops.
The status lamp starts to flash in red and the alarm sounds, while “Back Flow:
Clamp Close” and “Back Flow: Pump Stop” are displayed on the message
area. (Figure 2-8)
• If the Fast Clamp is not ready to work (conditions such as “Clamp Not Ready” or
“Clamp Closed”), the Drive Motor will not stop even when the system issues the
alarm.
• After the Fast Clamp is closed by the activated safety connection, if the pump
starts without the Fast Clamp being opened but by opening the lid, the massage
“Back Flow: Clamp Close” will remain on the screen. The message is cleared
when the Fast Clamp is opened by following Step 3.
• After the Fast Clamp is closed by the activated safety connection, if the pump
starts without the Fast Clamp being opened but by opening the lid and an
air bubble is again detected while the message “Back Flow: Clamp Close” is
displayed, the Drive Motor will stop and the message “Clamp Occlusion Error” will
be displayed.
Figure 2-8
70
Notes
d
When the safety connection of the Back Flow Alarm is set to “Clamp+Pump stop”
Note