Thaw, vortex, and centrifuge a calibration plate
1.
Remove the calibration plate from the freezer, then thaw the plate in its
packaging. Keep plates protected from light until you perform the calibration.
• Thaw each plate for 30 minutes.
• Use each plate within 2 hours of thawing.
IMPORTANT! Do not remove the plate from its packaging until you are ready to
use it. The uorescent dyes in the wells of calibration plates are photosensitive.
Prolonged exposure to light can diminish the uorescence of the dyes.
2.
While wearing powder-free gloves, remove the calibration plate from its
packaging and retain the packaging. Do not remove the optical lm.
3.
Vortex the plate for 5 seconds, then centrifuge at 750–1,000 × g for 2 minutes.
4.
Conrm that the liquid in each well is at the boom of the well and free of
bubbles. If it is not, centrifuge the plate again.
IMPORTANT! Keep the boom of the plate clean. Fluids and other contaminants
on the boom of the plate can contaminate the sample block and cause an
abnormally high background signal.
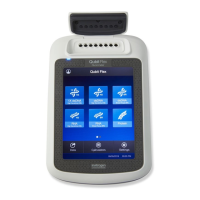
1.
In the home screen, select a calibration to perform.
Calibration Touch
ROI/Uniformity
[1]
Settings4Maintenance and Service4Calibrations4ROI and
Uniformity
Background
[2]
Settings4Maintenance and
Service4Calibrations4Custom4Background
Dye Settings4Maintenance and Service4Calibrations4Dye
[1]
Automatically followed by Background calibration.
[2]
Initiate via this route if performing Background calibration only.
2.
Follow the instructions on the screen to start the calibration.
Note: Dye calibration only: Select the Dye Plate to run, then touch Next.
3.
Load the plate into the instrument.
4.
Touch Start.
Perform
calibrations
Chapter 5 Calibrate and verify instrument performance
Perform ROI/uniformity, background, and dye calibrations
5
QuantStudio
™
1 Real-Time PCR System Installation, Use, and Maintenance Guide
53