IMPORTANT! Use these cleaning procedures only in conjunction with the complete
decontamination procedure (see “Decontaminate the sample block“ on page 71).
• Rinse the sample block with deionized water.
a.
Pipet a small volume of deionized water into each contaminated well.
b.
In each well, pipet the water up and down several times to rinse the well.
c.
Pipet the water to a waste beaker.
d.
Use a coon swab to scrub inside of each contaminated well.
e.
Use a lint-free cloth to absorb the excess deionized water.
• Clean the sample block with 95% ethanol.
a.
Pipet a small volume of 95% ethanol solution into each contaminated well.
b.
In each well, pipet the solution up and down several times to rinse the well.
c.
Pipet the ethanol solution to a waste beaker.
IMPORTANT! Always use deionized water to rinse wells after cleaning with
bleach or ethanol solution.
• Clean the sample block with 10% bleach.
a.
Pipet a small volume of 10% bleach solution into each contaminated well.
b.
In each well, pipet the solution up and down several times to rinse the well.
c.
Pipet the bleach solution to a waste beaker.
IMPORTANT! Always use deionized water to rinse wells after cleaning with
bleach or ethanol solution.
Replace the instrument fuses
CAUTION! FIRE HAZARD. For continued protection against the risk of re,
replace fuses only with listed and certied fuses of the same type and rating as
those currently in the instrument.
• Fuses (2) – 10A, Time-Lag T, 250VAC, 5 × 20mm
• Safety glasses
• Powder-free gloves
• Screwdriver, athead
Detailed
procedures for
cleaning the
sample block
Materials required
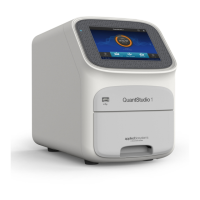
Chapter 6 Maintain the instrument
Replace the instrument fuses
6
QuantStudio
™
1 Real-Time PCR System Installation, Use, and Maintenance Guide
73