5.
Connect your instrument as required by your network conguration (see
“Supported options for instrument and computer connections“ on page 16 and
“Instrument and computer connections“ on page 78).
• Connect an Ethernet cable to the Ethernet port on the back panel of the
instrument, then connect the cable to a computer or a networking port.
or
• Connect wirelessly via the wireless adapter.
Note: Do not connect the High Power USB WiFi Module (Cat. No. A26774) to
the instrument if it is connected to a network by an Ethernet cable. Conguring
the instrument for both wired and wireless connection can interfere with
instrument operation.
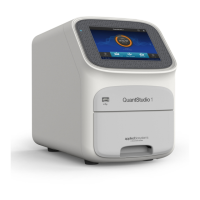
Power on and follow the startup wizard
1.
Power on the instrument.
2.
Follow the startup wizard through the following tasks:
• Select the language for the instrument.
• Accept the license agreement.
• Select a Wired or Wireless networking option, as needed for your
conguration (see “Supported options for instrument and computer
connections“ on page 16).
• Congure the instrument date and time.
• Create an administrator instrument prole.
Note: You can perform any of the steps above at a later time if you do not have
the information needed to complete the startup screens. See Chapter 3,
“Congure the instrument and manage instrument proles“.
IMPORTANT! Before using the instrument for the rst time, we recommend that you
perform instrument verication using RNase P plates (see “Perform instrument
verication using RNase P plates“ on page 57).
Connect the instrument and the computer directly or to a LAN
This section describes direct wired connection of the computer provided by Thermo
Fisher Scientic to the instrument or to a LAN.
Do not connect a customer-provided computer to the instrument.
1.
Connect an Ethernet cable from the instrument or a LAN to the computer.
2.
Power on the computer, then log in using a Windows
™
Administrator account.
3.
In the Windows
™
desktop, right-click My Network Places4Properties.
4.
Right-click Local Area Connection, then select Properties.
Appendix A
Install and connect the instrument to a network
Power on and follow the startup wizard
A
80
QuantStudio
™
1 Real-Time PCR System Installation, Use, and Maintenance Guide