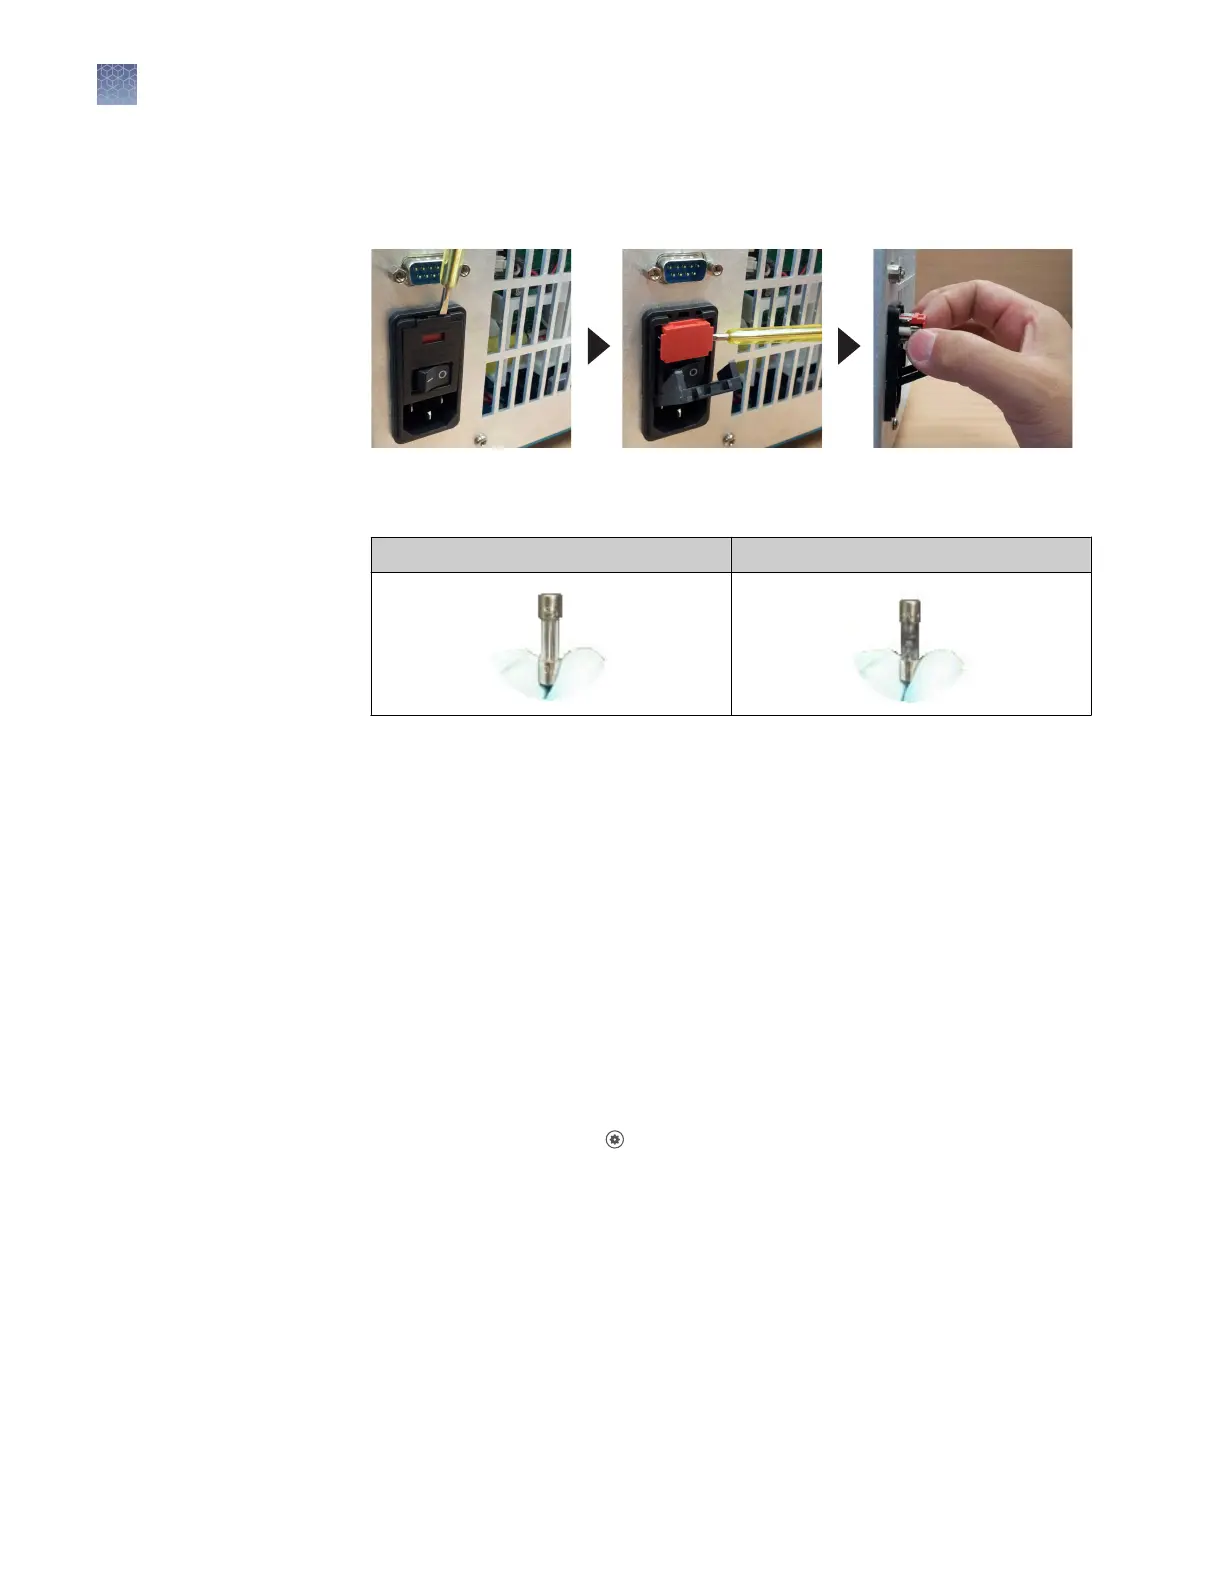
1.
Power o and unplug the instrument, then allow it to cool for 15 minutes.
2.
Using a at-head screwdriver, unscrew and remove the fuse holder.
3.
Remove each fuse from its fuse holder and inspect it for damage. Carbon
typically coats the inside of failed fuses.
Good Failed
4.
Replace each failed fuse.
Note: The voltage and amperage ratings are on the fuse holder.
5.
Install the fuse holder back into the instrument.
6.
Plug in, then power on the instrument.
The installation is successful if the instrument powers on.
Note: Fuse failure can result from uctuations in the supplied power to the system.
To prevent further failures, consider installing an electrical protective device, such as a
UPS or a surge protector. If issues with the fuse persist, contact Support.
Prepare the instrument to store, move, or ship
1.
In the home screen, touch
Seings4Maintenance and Service4Ship Prep
Mode4Next.
2.
Open the instrument drawer.
3.
Load the packing plate or an empty plate, then close the drawer.
4.
Touch Lock Block.
5.
Power o the instrument using the power switch on the back of the instrument.
The instrument is now ready to store, move, or ship.
Replace the fuses
Chapter 6 Maintain the instrument
Prepare the instrument to store, move, or ship
6
74
QuantStudio
™
1 Real-Time PCR System Installation, Use, and Maintenance Guide