Configuration Guide 784
Configuring SNMP & RMON Configuration Example
6.2 Configuration Scheme
1) Set a limit on the rate of the specified ports, and then enable SNMP on Switch A.
Configure SNMP and Notification, and enable Trap notifications on the ports. Switch
A can then send notifications to the NMS when the actual rate exceeds the preset
threshold.
2) After SNMP and Notification configurations, you need to create Statistic entries on the
ports to monitor the real-time transmitting and receiving of packets and create History
entries to regularly collect and save related data. Create two Event entries: one is the
notify type used to notify the NMS, the other is the log type used to record related
events. In addition, create an Alarm entry to monitor BPackets (Broadcast Packets), set
the rising threshold and falling threshold, and bind the rising event to the notify event
entry, and the falling event to the log event entry.
Demonstrated with T1500-28PCT, this chapter provides configuration procedures in two
ways: using the GUI and using the CLI.
6.3 Using the GUI
Configuring Rate Limit on ports
Configure the rate limit on required ports. For detailed configuration, please refer to
Configuring QoS
.
Configuring SNMP
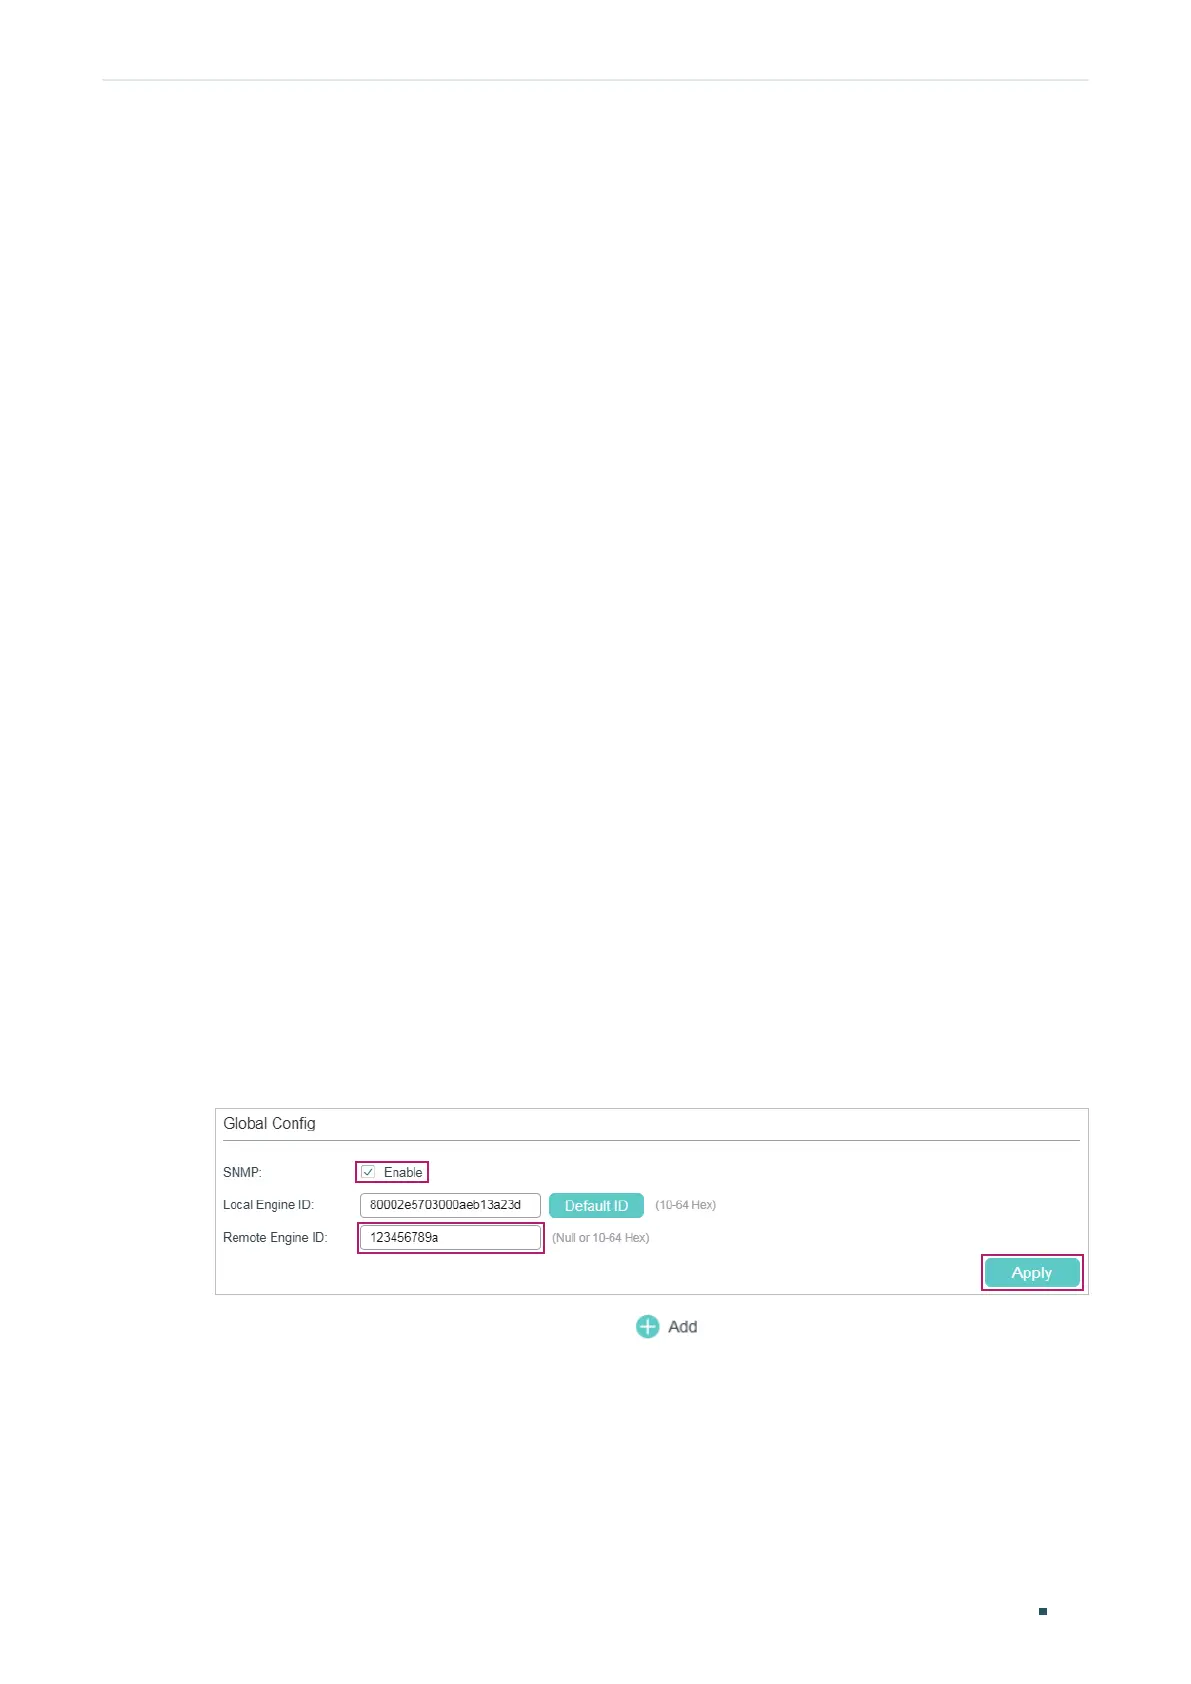
1) Choose MAINTENANCE > SNMP > Global Config to load the following page. In the
Global Config section, enable SNMP, and set the Remote Engine ID as 123456789a.
Click Apply.
Figure 6-2 Enabling SNMP
2) In the SNMP View Config section, click
to load the following page. Name the
SNMP view as View, set the view type as Include, and set MIB Object ID as 1 (which
means all functions). Click Create.
 Loading...