6 Measurement Workflows
Checking a grade/elevation
Measure a surface point at a location where you want to view and record the difference in elevation
between the design surface and the actual ground.
1. If not in Measure mode, tap the Home button and then tap Measure.
2. Tap Measure to record a surface point and the cut/fill value at that location.
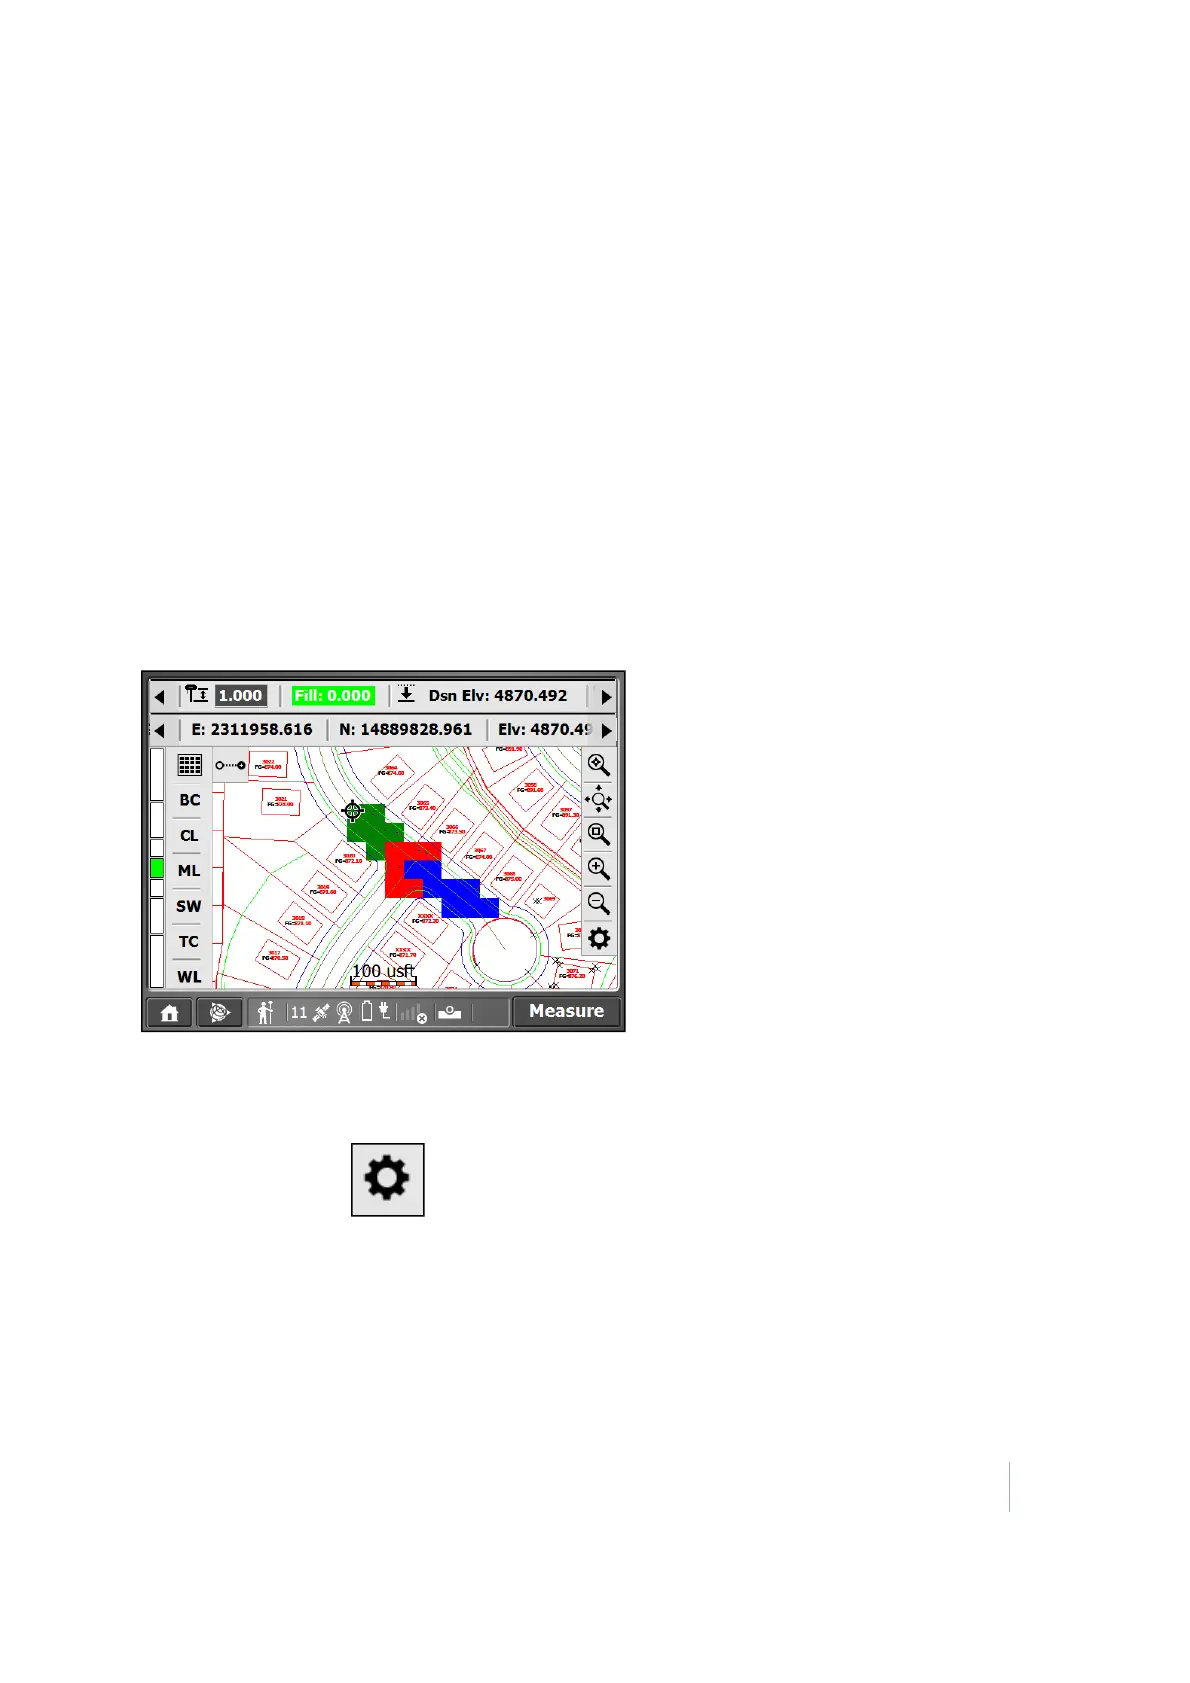
The software draws a box of the size that you specify around every recorded point so you can easily
view where data is missing.
As you move around, the values in the boxes at the top of the screen update.
Once a point is recorded, a colored box appears around it, showing it as in tolerance (green), cut
required (red), or fill required (blue).
To change the cut/fill tolerances:
1. Tap the Trimble icon menu and then tap Settings / Measure Settings.
2. Enter the required tolerances and then tap Accept.
Tip – If a gray box appears, tap the zoom window icon and draw a box around the area of the gray box. Gray
boxes appear when the map is zoomed out too far to see the colored boxes at the specified resolution.
If no boxes appear, tap from the toolbar on the right. Ensure that the Coverage Grid check
box and the Cut/Fill option are selected. You can also change the grid size.
Trimble SCS900 Site Controller Software User Guide 47