Maintenance2722−2/A1
Winterthur Gas & Diesel Ltd.
2/ 7
2. Preparation
WARNING
Fire Hazard. Do not use
welding or grinding equip-
ment near the work area.
WARNING
Health Hazard. Calibration
fluid is harmful to your
health.
1) Read and follow the instruction manual
of the test bench manufacturer.
2) Make sure that the work station is
clean.
3) Use a brass wire brush to remove
combustion particles from the external
parts of the nozzle.
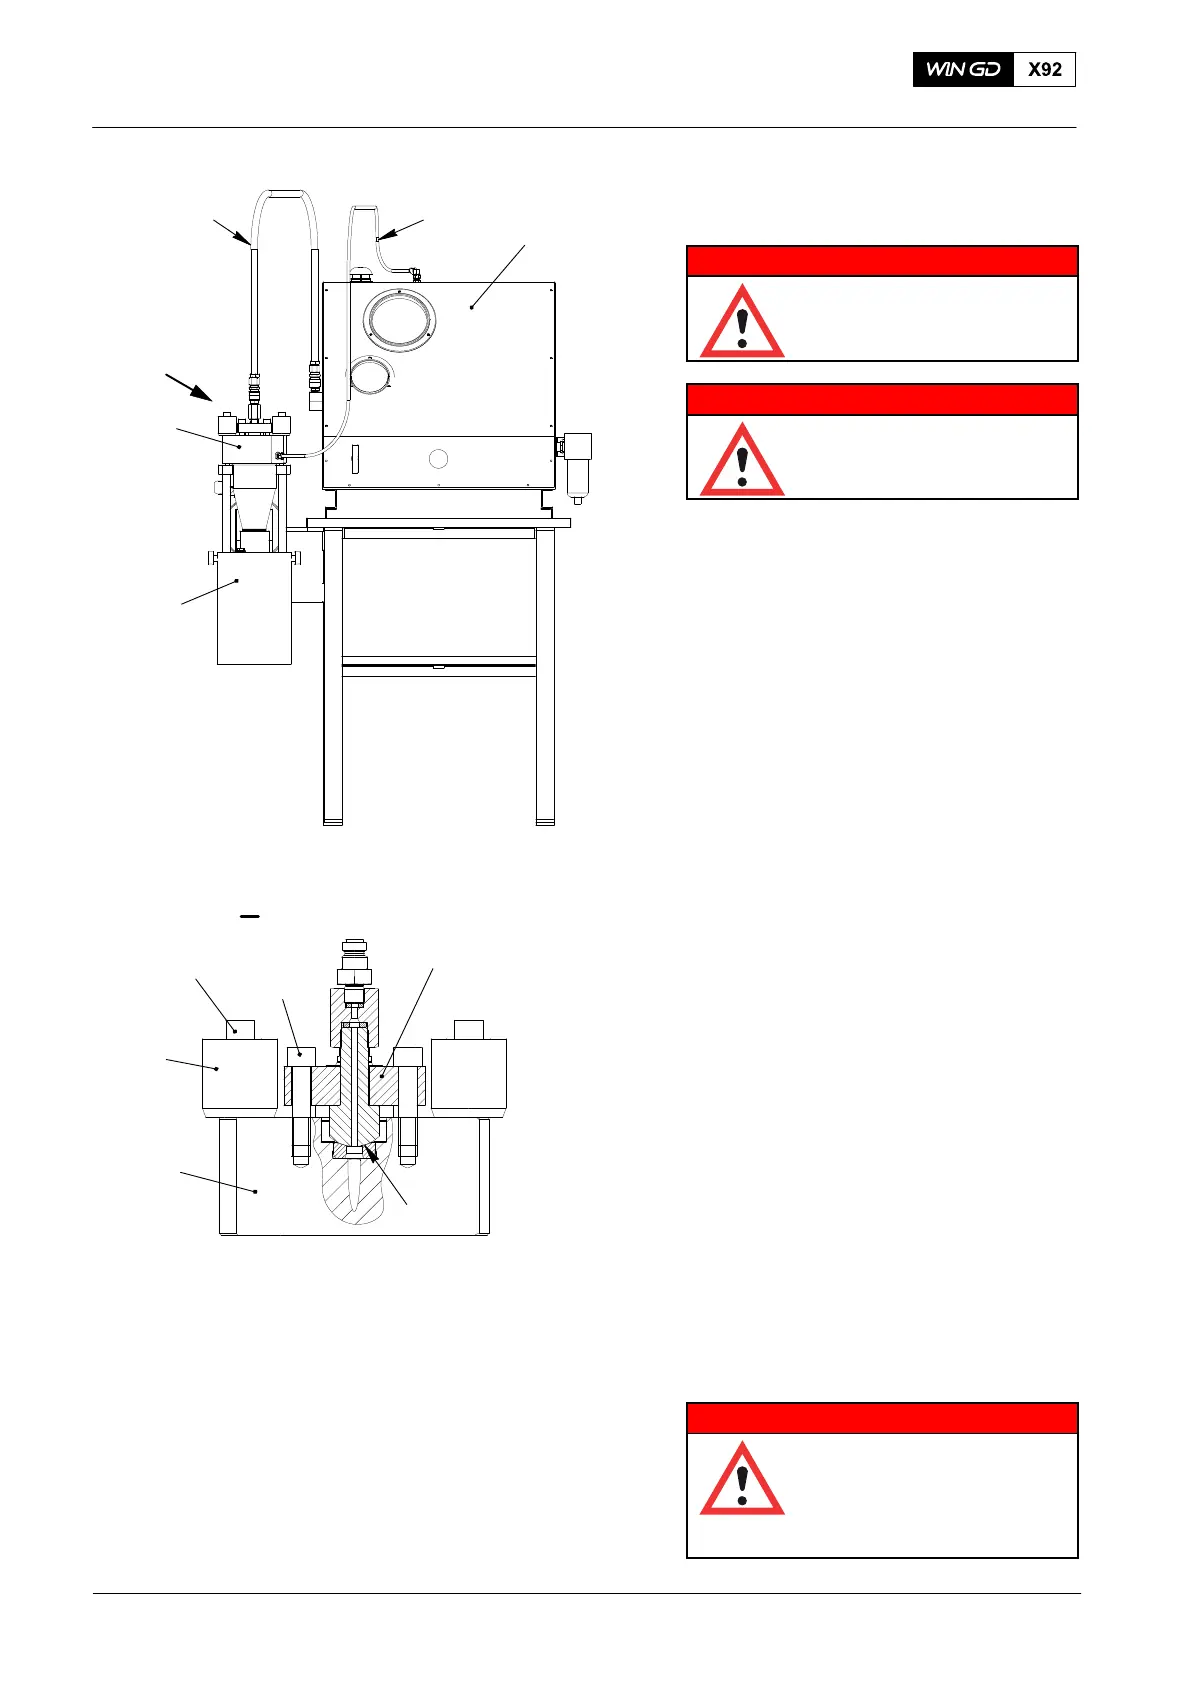
4) Put the injection valve (1) in position in
the valve holder 94273. Make sure that
the injection valve points down.
5) Attach the injection valve to the valve
holder and tighten the Allen bolts (2)
with the spring cages (3) in position.
6) Clean the sealing faces (SF) of the
injection valve and connecting piece
94272B.
7) Install the connecting piece 94272B to
the injection valve. Tighten the four
bolts (5) equally.
8) Connect HP hose 94272E and leakage
oil hose 94272D to the injection valve
(1).
3. Procedure
3.1 Checks
1) Start the test bench.
2) At regular intervals, use a master
pressure gauge to do checks of the
pressure gauges on the test bench. If
necessary, adjust the pressure gauges.
WARNING
Injury Hazard. Do not put
your fingers near the holes
in the nozzle tip. Fuel can
go through your skin and
cause injury or death.
2015
Injection Valve: Disassemble, Checks, Assemble Injection Valve with FAST
94272
1
94273
I
94272E
94272B
I
WCH02951
1
3
2
Fig. 1
94272D
5
SF