Maintenance2751−2/A1
Winterthur Gas & Diesel Ltd.
6/ 7
12) Lift and carefully lower the top housing
(3) on to the bottom housing (2).
13) Put oil on to the threads of the elastic
studs (20).
14) Put the six nuts (21) on to the elastic
studs (20).
15) Torque the nuts (21) equally to 435Nm
in a diagonal sequence.
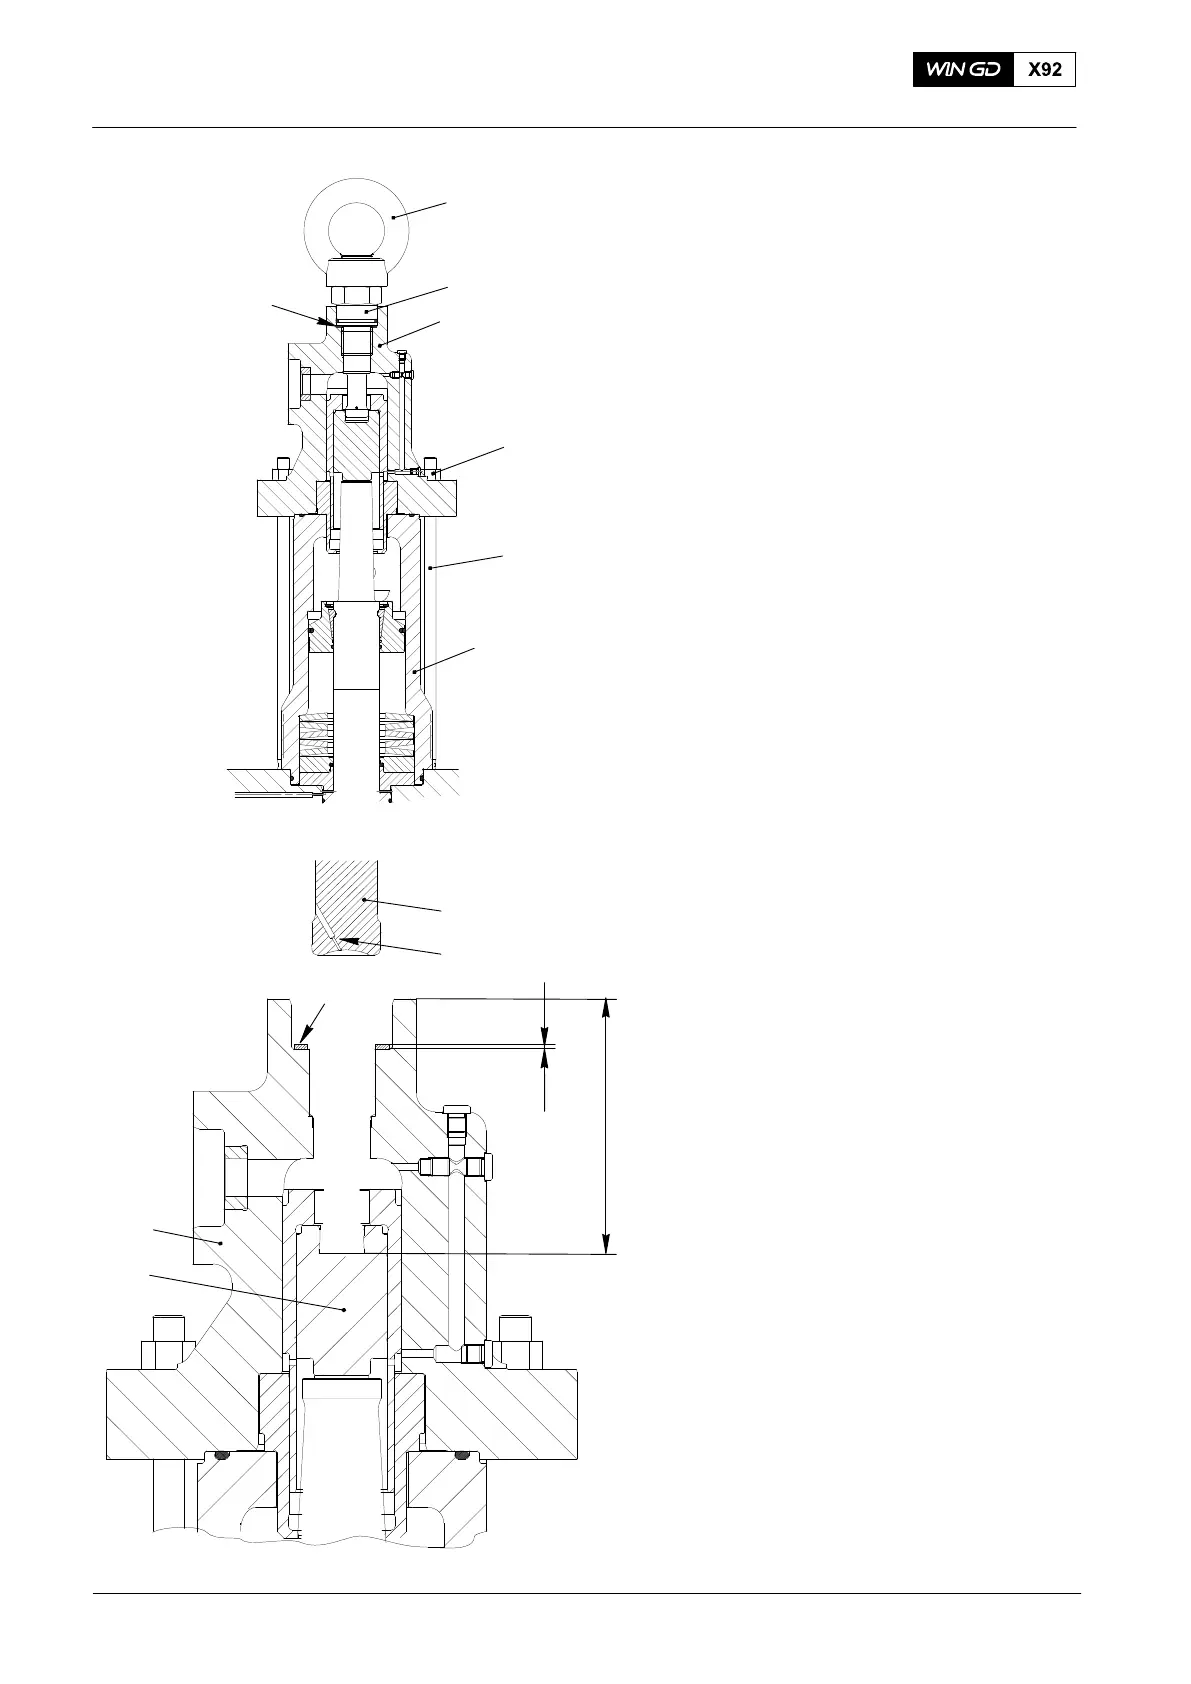
3.4 Damper setting
You set the damper (25, Fig. 7) only after you
replace a valve spindle or valve seat, or after
one of the seating faces is ground.
1) Remove the damper (25).
2) Make sure that the bores (4) in the
damper are clear.
3) Make sure that the exhaust valve is
closed.
4) Use a feeler gauge to make sure there
is no clearance between the valve plate
and valve seat.
5) Use a depth gauge to measure the
height H between the top and bottom of
the bore in the top housing.
6) Make sure that the distance H is
228.7 ±0.5 mm.
Note: For example, if the measured
distance H is 227 mm, you must install one
shim. Each shim (26) has a thickness of
1.0 mm.
7) Install the correct quantity of shims to
get the correct distance H.
8) Install the damper (25, Fig. 6).
9) Apply Loctite 271 to the threads of the
eye nut (19).
10) Install the eye nut (19).
2018−02
Exhaust Valve: Disassemble and Assemble
20
21
26
19
3
WCH02968
T
5
3
25
25
4
Fig. 6
Fig. 7
H
2
26