Maintenance2751−3/A1
Winterthur Gas & Diesel Ltd.
2/ 5
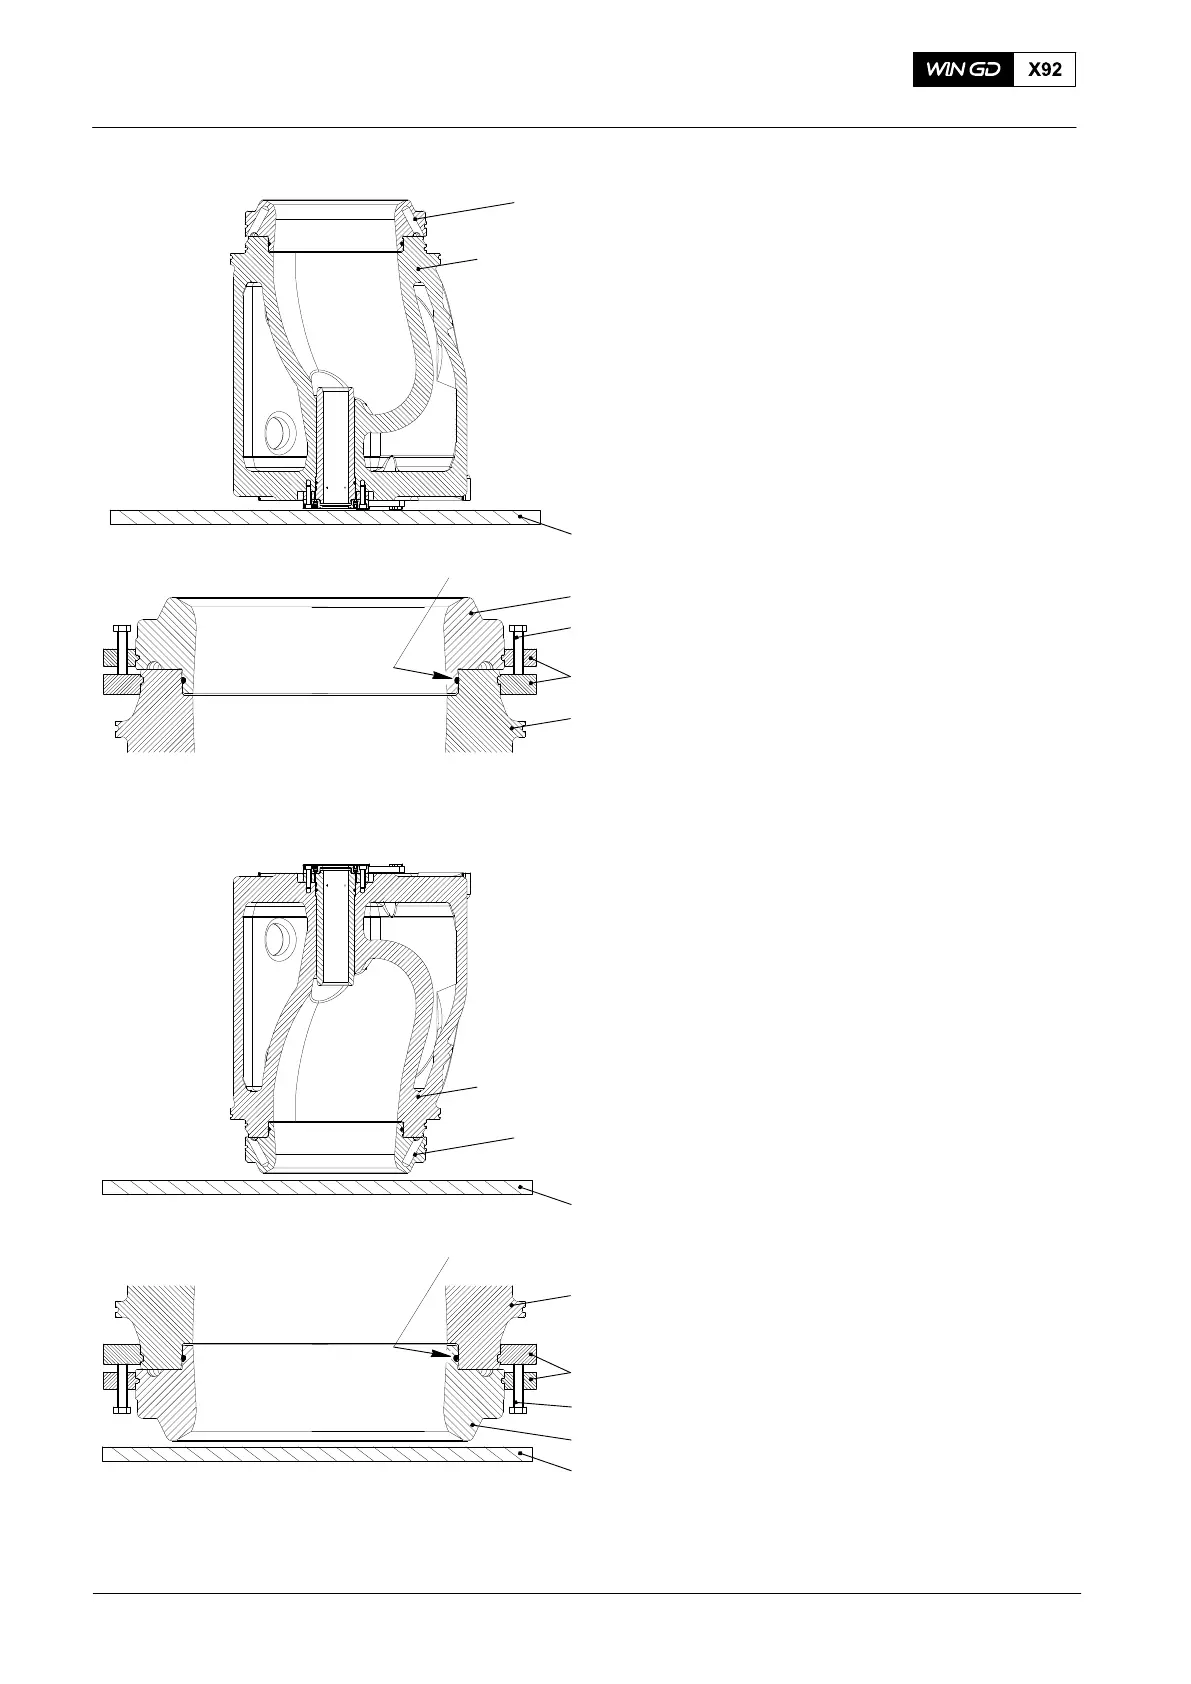
3. Valve seat − removal
2) Mark the position of the valve seat in
the valve cage before you start the
removal procedure.
3.1 Recommended procedure
1) Turn the valve cage until the valve seat
points up (see Fig.1).
2) Carefully put the valve cage on to an
applicable wooden underlay.
3) Install the top two halves of the
dismantling device 94261 into the
groove of the valve seat (1).
4) Install the bottom two halves of the
dismantling device 94261 into the
groove of the valve cage (2).
5) Turn the four jack screws (4) equally to
push out the valve seat from the valve
cage (2).
6) Remove and discard the O-ring (3).
7) Remove two opposite jack screws and
install two M16 Eye bolts instead.
8) Lift the valve seat with two ropes and
shackles through the eye bolts.
3.2 Alternative procedure
1) Use the crane and lift the valve cage
(2) with two M24 eye bolts, see
2751−2, chapter 2. Put a wooden
underlay (5) under it, see Fig. 2.
2) Install the top two halves of the tool
(94261) into the groove of the valve
cage (2).
3) Install the bottom two halves of the tool
(94261) into the groove of the valve
seat (1).
Note: The valve seat weighs 135 kg. Be
careful when you do the step
below.
4) Carefully turn the four jack screws (4)
equally until the valve seat (1) falls out
of the valve cage (2).
5) Lift and move the valve cage (2) away
from the valve seat (1).
6) Remove and discard the O-ring (3).
2015
Valve Seat − Replace / Grind
94261
2
1
017.038/08
4
94261
2
1
4
5
5
1
2
5
2
1
WCH02362
WCH02362
3
3
Fig. 1
Fig. 2