Maintenance
3403−4/A1
Winterthur Gas & Diesel Ltd.
1/ 2
Top Surface − Check
Tools:
1 Feeler gauge 94122
1 Template 94366
1 Template 94366A
1. General 1..........................................................
2. Procedure − Piston Removed 1......................................
3. Procedure − Piston Installed 2.......................................
1. General
Each time you remove a piston, you must do a check of the top surface of the piston
head for damage (burn scars).
The causes of burn scars are as follows:
D Poor combustion
D Worn nozzles in the fuel injector
D Heavy local carbon particles on top of the piston head etc.
Note: You can also do this check with the piston installed.
2. Procedure − Piston
Removed
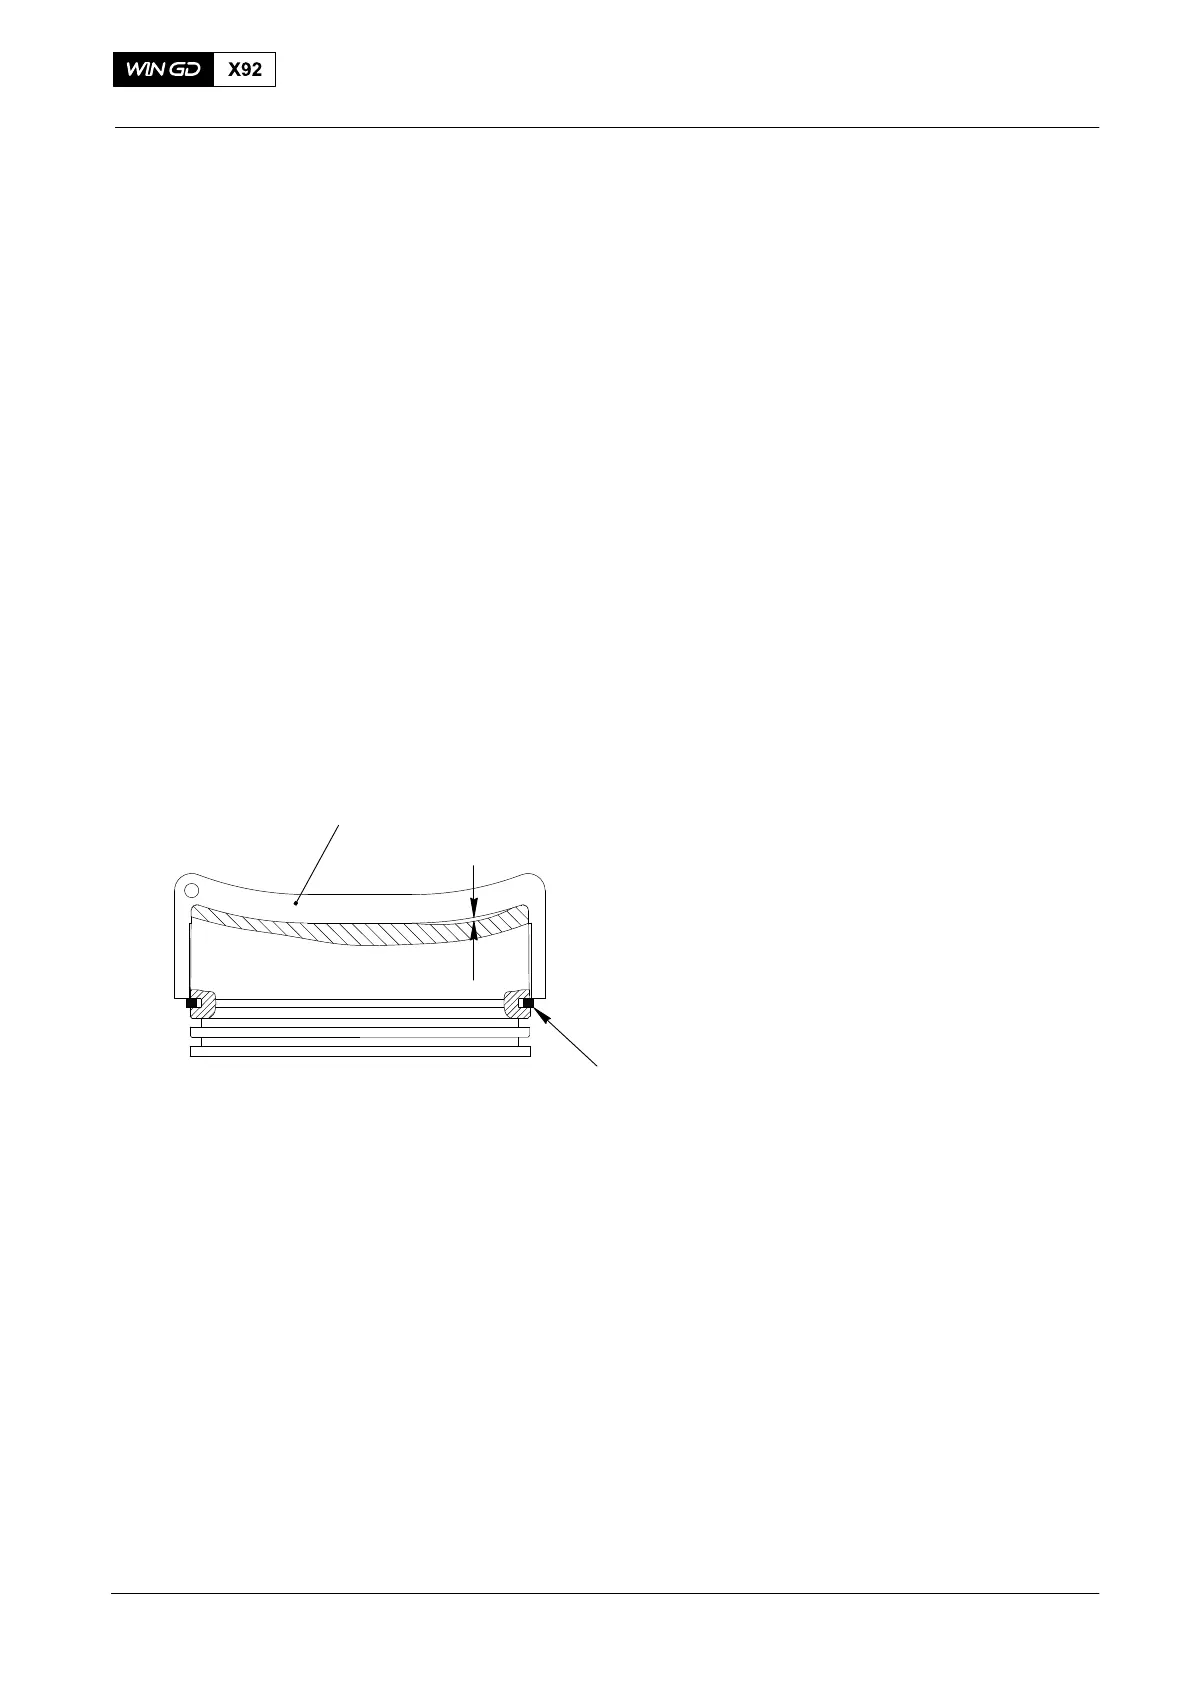
1) Put the template (94366, Fig. 1) in
position on the top piston ring (1).
2) Turn the template (94366) around the
axis of the piston head.
3) Use the feeler gauge (94122) to
measure the depth of the burn scar(s).
4) Remove the template (94366).
Note: You can also use a depth gage to
measure the depth of the burn
scar(s).
5) If the burn scars are less than 10 mm,
do step a) and step b):
a) Use an applicable tool to grind the
burn scars.
b) Use emery paper to make sharp
edges smooth.
6) If the burn scars are more than 10 mm
deep, do step a) to step c):
a) Remove the piston head (see
3403−3, paragraph 1 and
paragraph 2).
b) Use surface welding to repair the
piston head to its original
thickness.
c) Assemble the piston (see 3403−3,
paragraph 3).
Note: Before you start the engine, find
the cause of the burn scars.
Piston
2015
10 mm
WCH02678
94366
Fig. 1
1