February 2013
4-249
ColorQube® 9303 Family
REP 62.5
Repairs/Adjustments
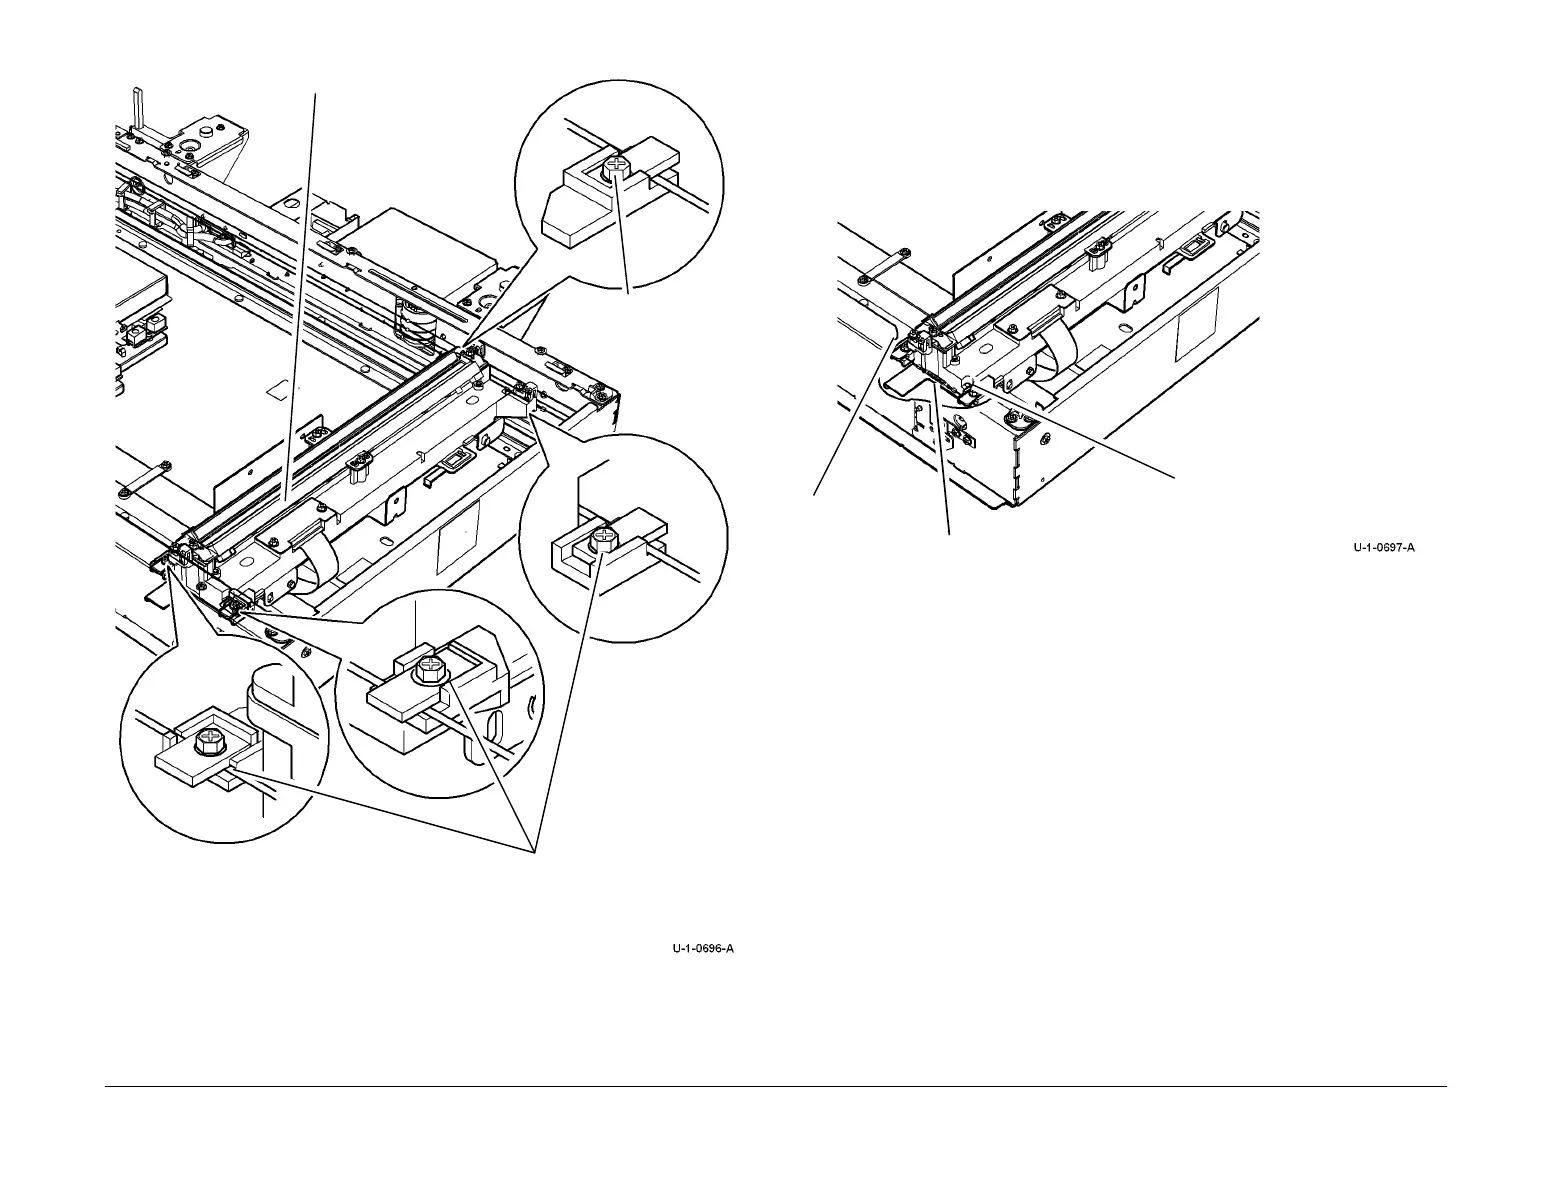
Figure 1 Carriage removal
Replacement
1. Insert the scan carriage ribbon cable through the securing clamp and the square hole.
2. Figure 2. Place the scan carriage assembly centrally over the springs on the scan cables.
Slide the scan cables under the fixing tabs.
NOTE: Observe the spring position between the fixing tabs on the scan carriage assem-
bly.
Figure 2 Alignment of the scan carriage
3. Reconnect the scan carriage ribbon cable.
4. Reinstall the PJ cover.
5. Reconnect the exposure lamp ribbon cable. Ensure that the metal connections face
towards the PWB. Secure the cable clamps.
6. Close the exposure lamp ribbon harness securing clip.
7. Perform ADJ 62.2 Scan Carriage Adjustment.
8. Perform ADJ 62.1 Optics Cleaning Procedure.
9. The replacement procedure is the reverse of the removal procedure.
2
Loosen 1 screw
then slide out
the cable.
Remove the PJ cover (2
screws) and disconnect the
scan carriage ribbon cable.
4
Remove the scan carriage.
3
Loosen 3 screws, then slide
out the cables.
Spring position.
Fixing tab.
Fixing tab.
 Loading...


