February 2013
4-13
ColorQube® 9303 Family
REP 1.6
Repairs/Adjustments
REP 1.6 AMP CT Connectors
Removal
WARNING
Switch off the electricity to the machine. Refer to GP 14. Disconnect the power cord
from the customer supply while performing tasks that do not need electricity. Electricity
can cause death or injury. Moving parts can cause injury.
CAUTION
Amp CT connectors use in-line adaptors to connect housings together. Ensure that the correct
adaptor is used for each in-line connection. Do not attempt to disassemble or repair the in-line
adaptors.
NOTE: There are two types of CT connector: insulation displacement connector (IDC) or crimp
terminal. Repairing crimp terminal CT connectors is performed by installing individual replace
-
ment terminals with flying leads, connected to the existing wiring with connector splicing blocks
(removal steps 2 and 3). Repairing IDC connectors is performed by installing a complete
replacement housing with wires already fitted, connected to the existing wiring with connector
splicing blocks (removal steps 4 and 5). The replacement procedure is only applicable to crimp
terminal connectors.
1. Identify the terminal type. Go to step 2 for a housing containing crimp terminals, or go to
step 4 for a housing containing insulation displacement (IDC) terminals.
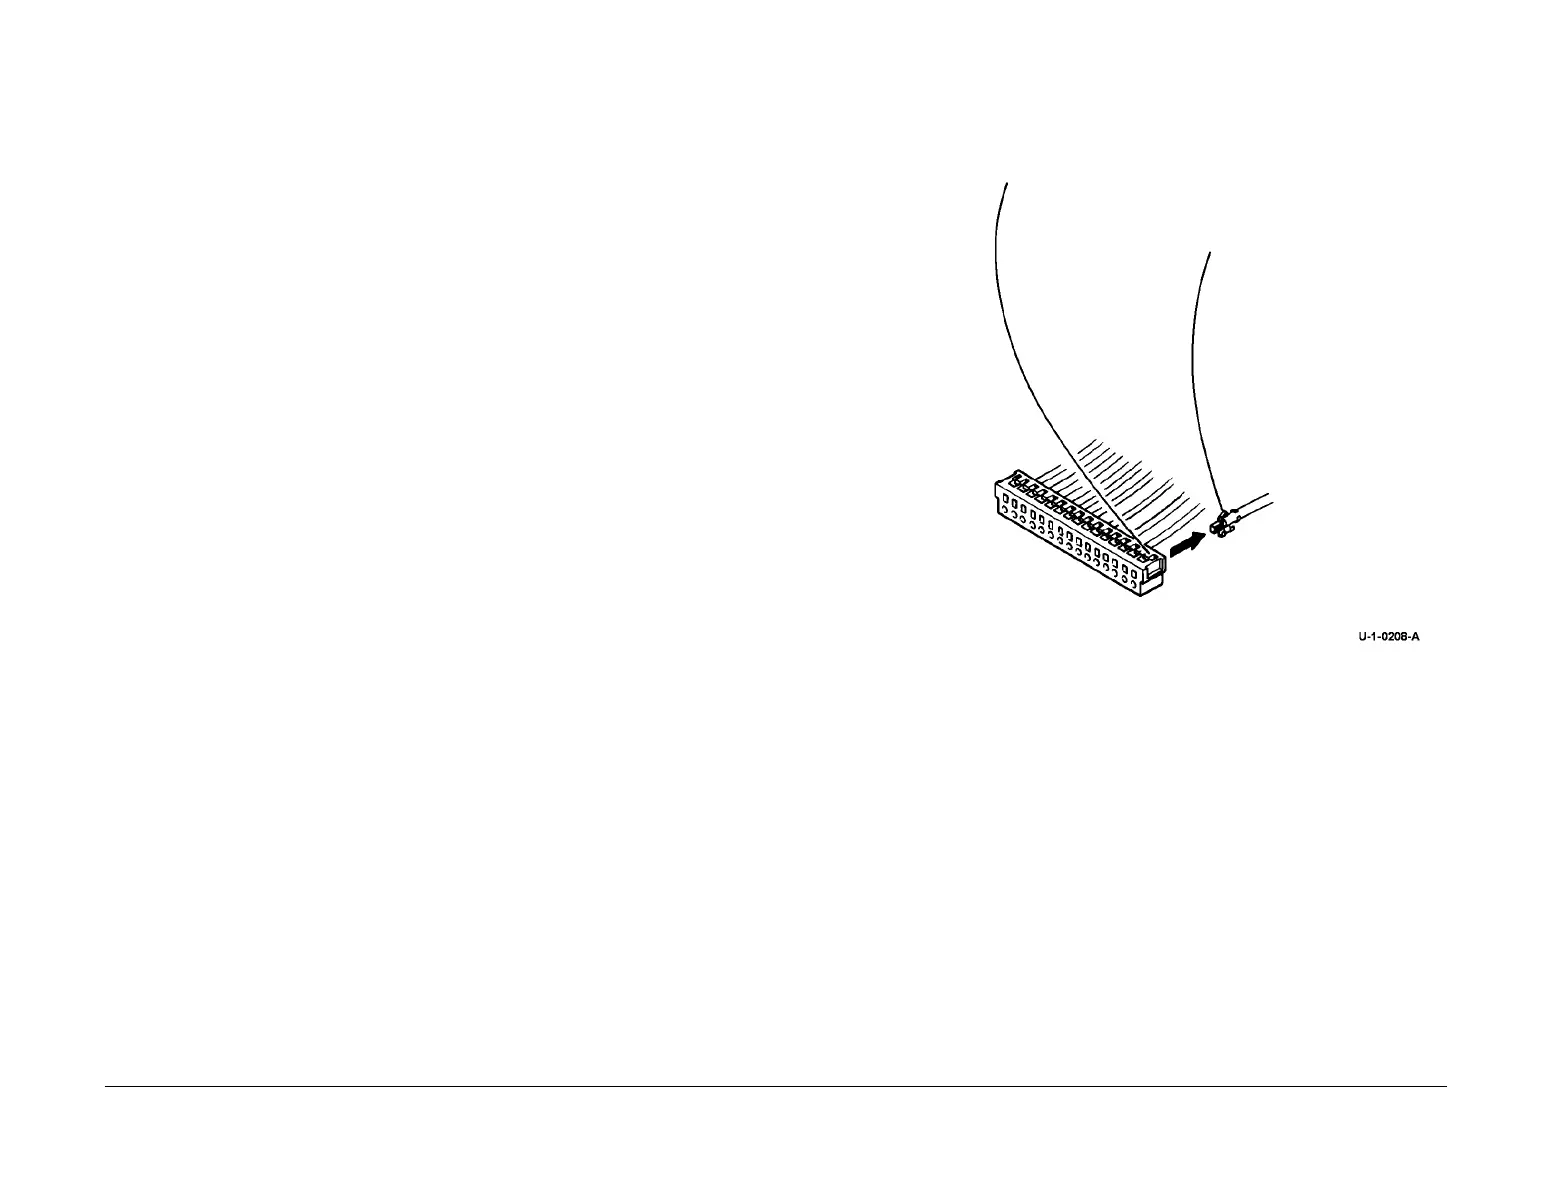
2. Figure 1. Remove the damaged crimp terminal from the connector housing.
Figure 1 Terminal removal.
3. Cut the damaged crimp terminal off of the wire.
4. IDC housings are repaired by installing a complete replacement housing with wires
already fitted, These are connected with connector splicing blocks to the existing wiring.
Select the correct replacement connector.
5. Cut one wire from the faulty connector and then reconnect the wire to the appropriate fly-
ing lead on the replacement connector. Repeat this process for each wire in turn, until the
faulty connector has been fully disconnected and the replacement connector installed in
its place.
Replacement
1. Insert the replacement crimp terminal with flying lead into the connector housing.
2. Use a connector splicing block to connect the flying lead to the original wire.
1
Raise the plastic tab with a suitable tool, to release the
terminal
2
Remove the terminal
from the housing
 Loading...


