February 2013
4-338
ColorQube® 9303 Family
REP 91.12, REP 91.13
Repairs/Adjustments
2. Insert the 2 tabs on the filter into the black housing. Apply a slight downward force on the
filter while sliding the filter into the housing. Ensure there is no gap between the rear of
the cone and the front of the housing, refer to Figure 2. Check that the filter is securely
held in the housing.
3. If the umbilical snap feature breaks off during replacement of the filter, use the replace-
ment clip included with the replacement filter. If necessary, remove the cap from the filter,
Figure 2.
Figure 2 Replacement
4. Run the relevant diagnostic routines, refer to GP 37 Post Part Replacement Routines.
REP 91.13 Stitch / Roll Motor
Parts List on PL 91.20
Removal
WARNING
Switch off the electricity to the machine. Refer to GP 14. Disconnect the power cord
from the customer supply while performing tasks that do not need electricity. Electricity
can cause death or injury. Moving parts can cause injury.
WARNING
Take care during this procedure. Sharp edges may be present that can cause injury.
1. Move the marking unit into the service position, GP 6.
2. If the roll or stitch motor is to be removed form the lower carriage assembly, also move the
lower printhead carriage into the maintenance position, GP 6.
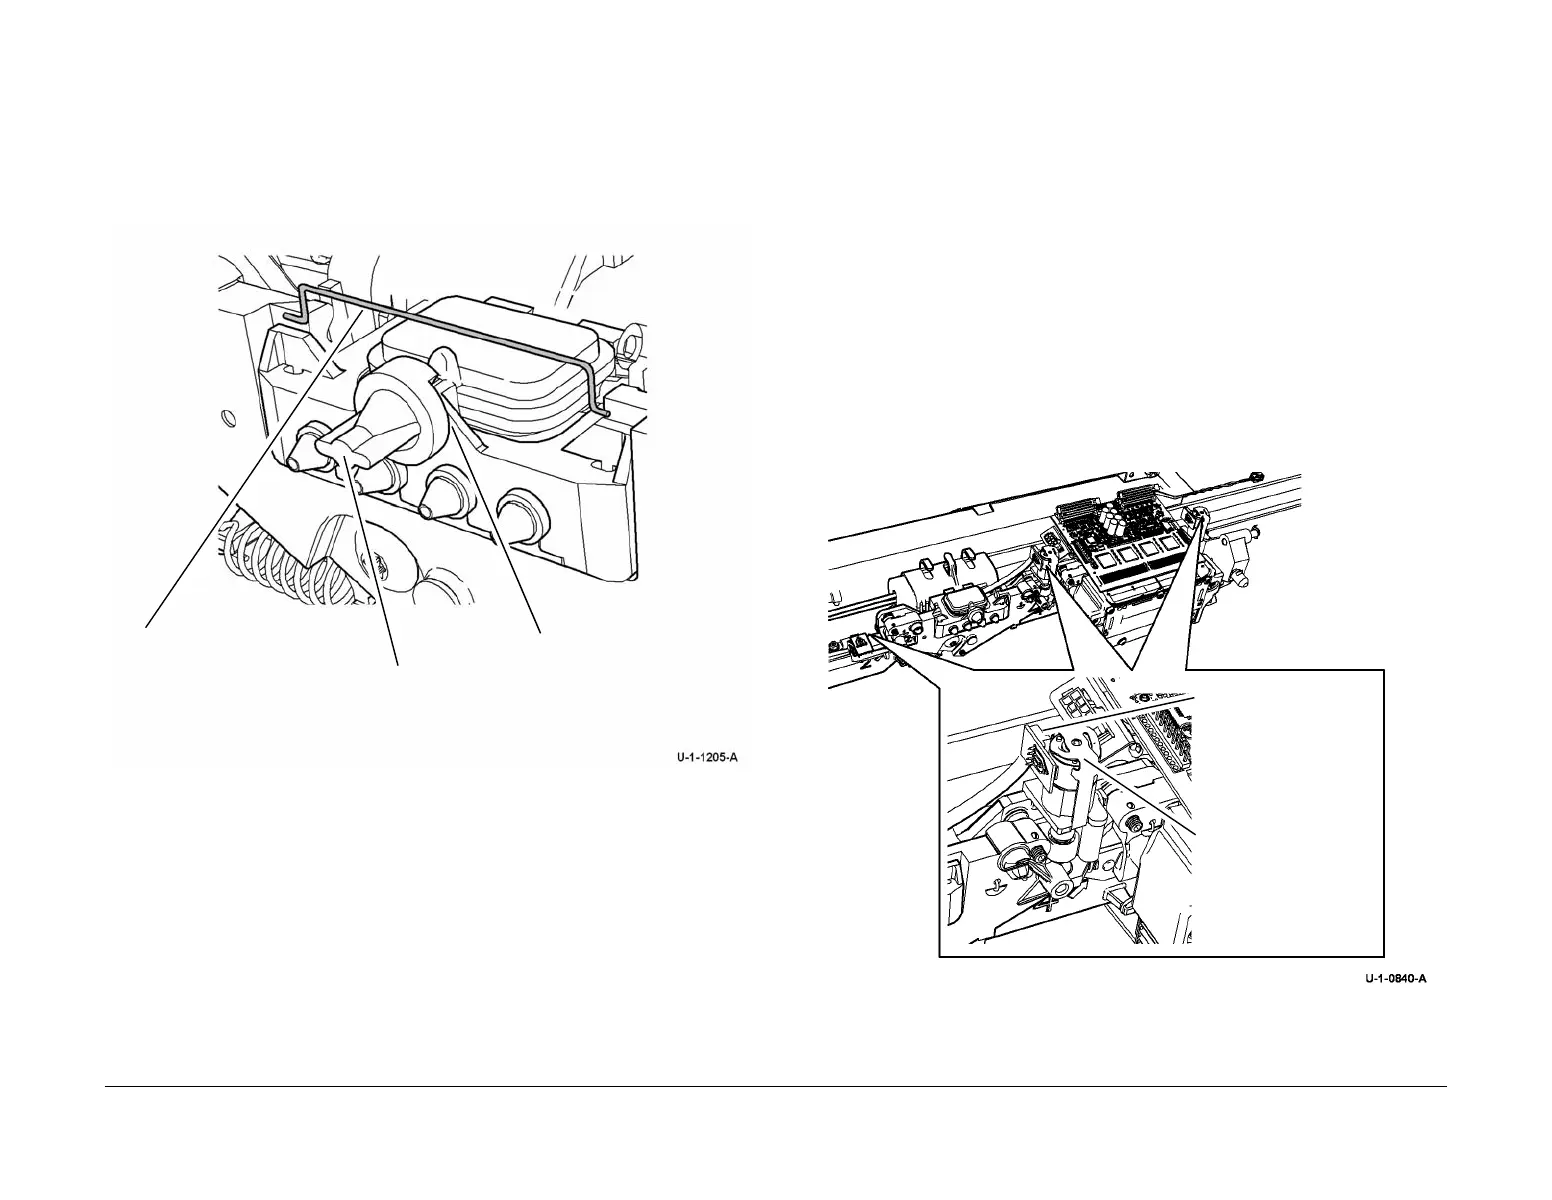
3. Remove the relevant stitch adjust or roll adjust motor, Figure 1.
NOTE: The procedure for removing each motor is the same. The removal of printhead 2
roll adjust motor is shown in Figure 1. For clarity, printhead 2 is not shown.
Figure 1 Stitch / roll motor removal
Replacement
1. Replacement is the reverse of the removal procedure.
Cap
1
Ensure the rear of the cone
is against the front of the
housing.
Clip
1
Disconnect the harness.
2
Remove the retaining
clip, then remove the
stitch / roll motor.
 Loading...


