February 2013
4-379
ColorQube® 9303 Family
REP 91.32, REP 91.33
Repairs/Adjustments
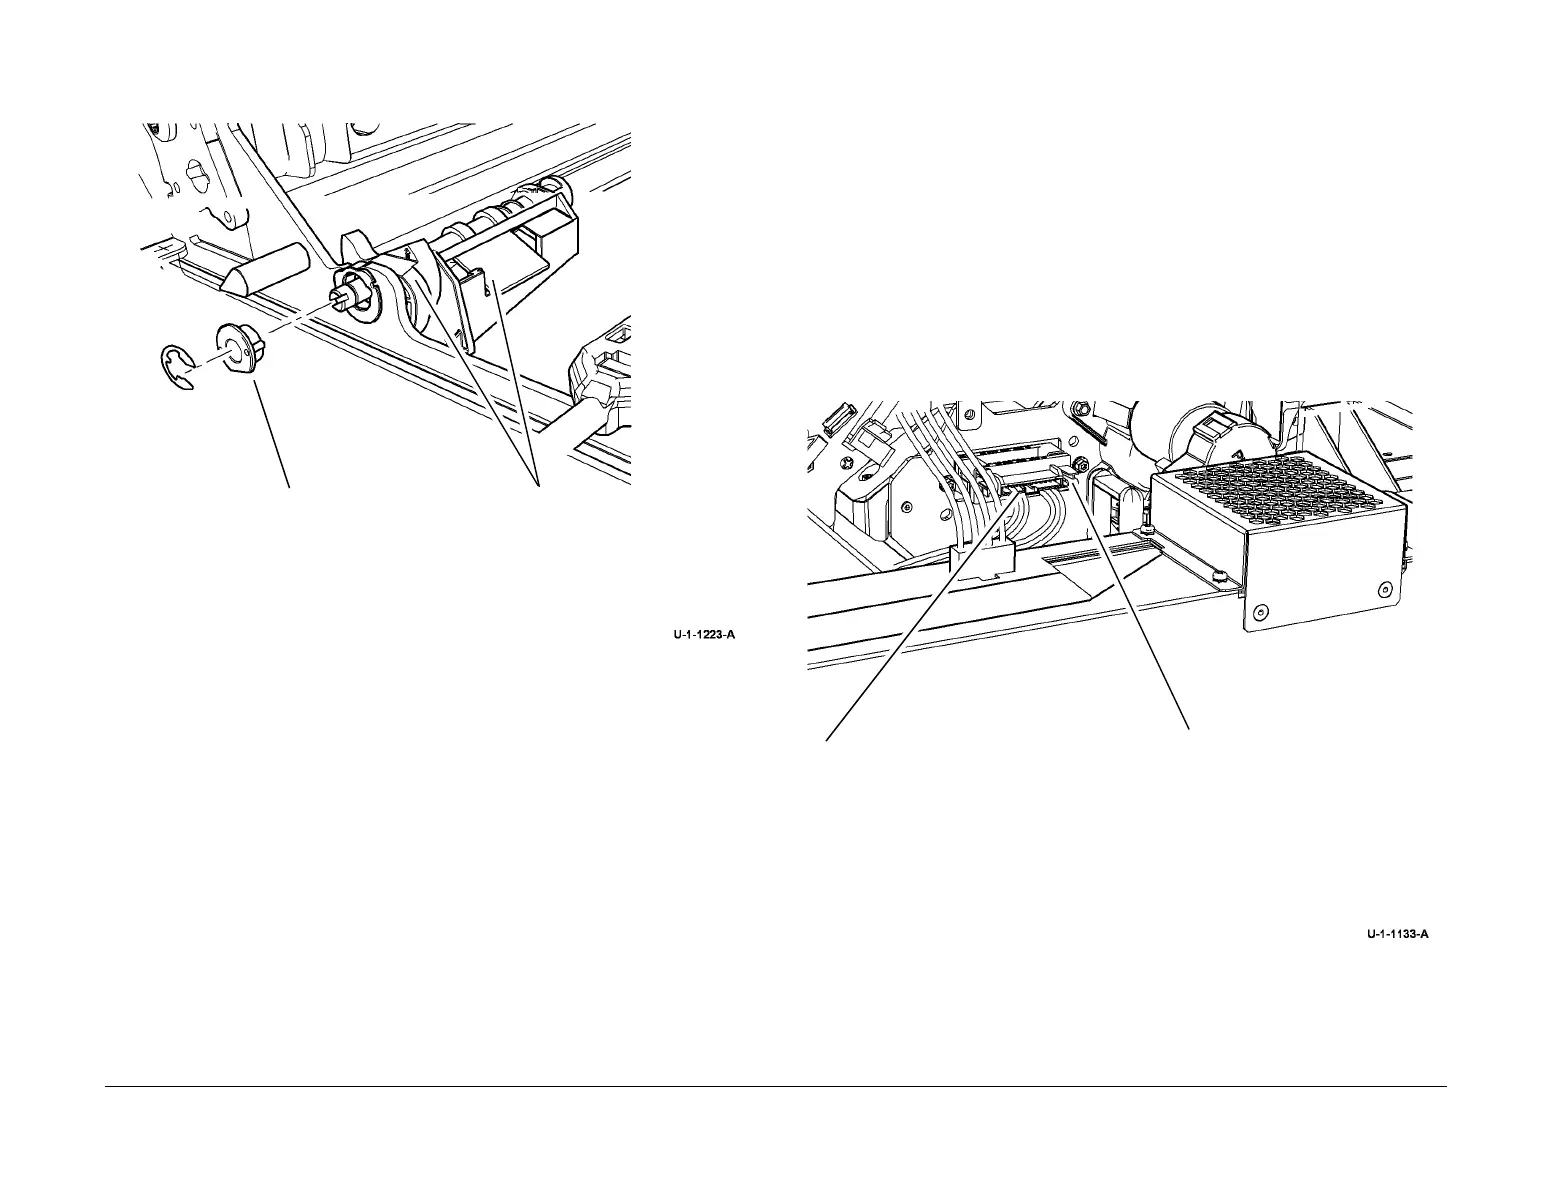
5. Ensure the camshaft is seated correctly and that the cam lock is engaged, Figure 4.
Figure 4 Cam lock check
REP 91.33 Cleaning Unit Plug Connector
Parts List on PL 94.10
Removal
WARNING
Switch off the electricity to the machine. Refer to GP 14. Disconnect the power cord
from the customer supply while performing tasks that do not need electricity. Electricity
can cause death or injury. Moving parts can cause injury.
WARNING
Take care during this procedure. Sharp edges may be present that can cause injury.
1. Remove the rear cover, PL 81.10 Item 1.
2. Remove the cleaning unit, refer to REP 94.1.
3. Remove the drum drive motor and belt, REP 91.24.
4. Remove the cleaning unit plug connector, Figure 1.
Figure 1 Plug connector removal
Replacement
Replacement is the reverse of the removal procedure.
1
Ensure the cam lock is
engaged (Fully forward) and
that the cam is in the correct
position as shown.
2
Replace the bearing and e-
clip.
1
Disconnect the harness.
2
Squeeze the tabs on either
side of the connector and
push the connector towards
the machine. The connector
will fall into the cleaning unit
area, accessible front the
front of the machine.
 Loading...


