February 2013
4-254
ColorQube® 9303 Family
REP 62.7
Repairs/Adjustments
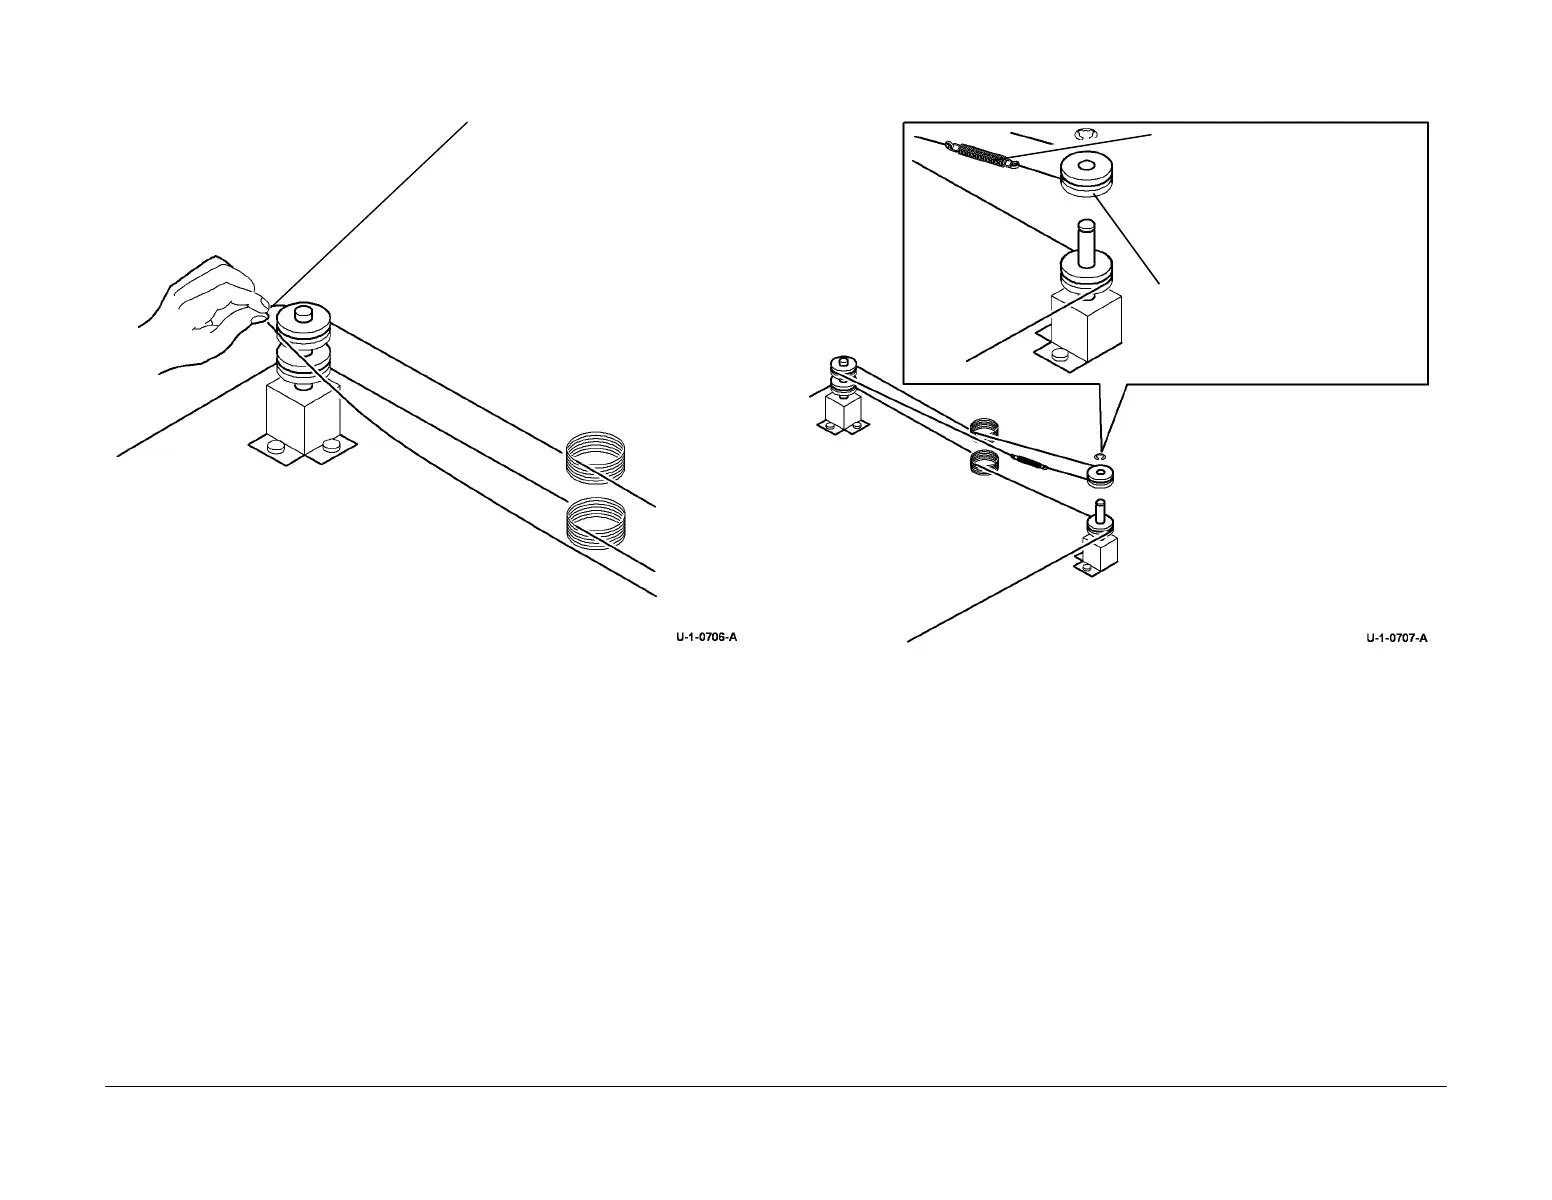
7. Figure 7. Prepare to install the upper scan cable on the pulleys.
Figure 7 Installation of the upper scan cable
8. Figure 8. Install the upper scan cable.
Figure 8 Installation of the upper scan cable
9. Remove the adhesive tape used to secure the anchor balls in the anchor points.
10. Reinstall the scan carriage, REP 62.5.
11. Perform ADJ 62.2 scan carriage assembly.
12. Reinstall the CVT glass and document glass, REP 62.3.
13. Reinstall the scanner top cover, REP 62.2.
14. Reinstall the scan motor cover, (2 screws).
15. Reinstall the scanner module, REP 62.1.
16. Reinstall the DADH, REP 5.19.
1
Install the cable around the left
rear, upper pulley.
2
Attach the spring to the cable.
5
Reinstall the circlip.
1
Lift off the right, rear
upper pulley (1 circlip).
3
Place the cable round the pulley.
4
Install the pulley on to the shaft.
 Loading...


