February 2013
4-414
ColorQube® 9303 Family
ADJ 12.12-171
Repairs/Adjustments
Adjustment
WARNING
Ensure that the electricity to the machine is switched off while performing tasks that do
not need electricity. Refer to GP 14. Disconnect the power cord. Electricity can cause
death or injury. Moving parts can cause injury.
1. Perform the adjustments that follow as necessary to meet with the customer C fold and Z
fold requirements, Figure 2.
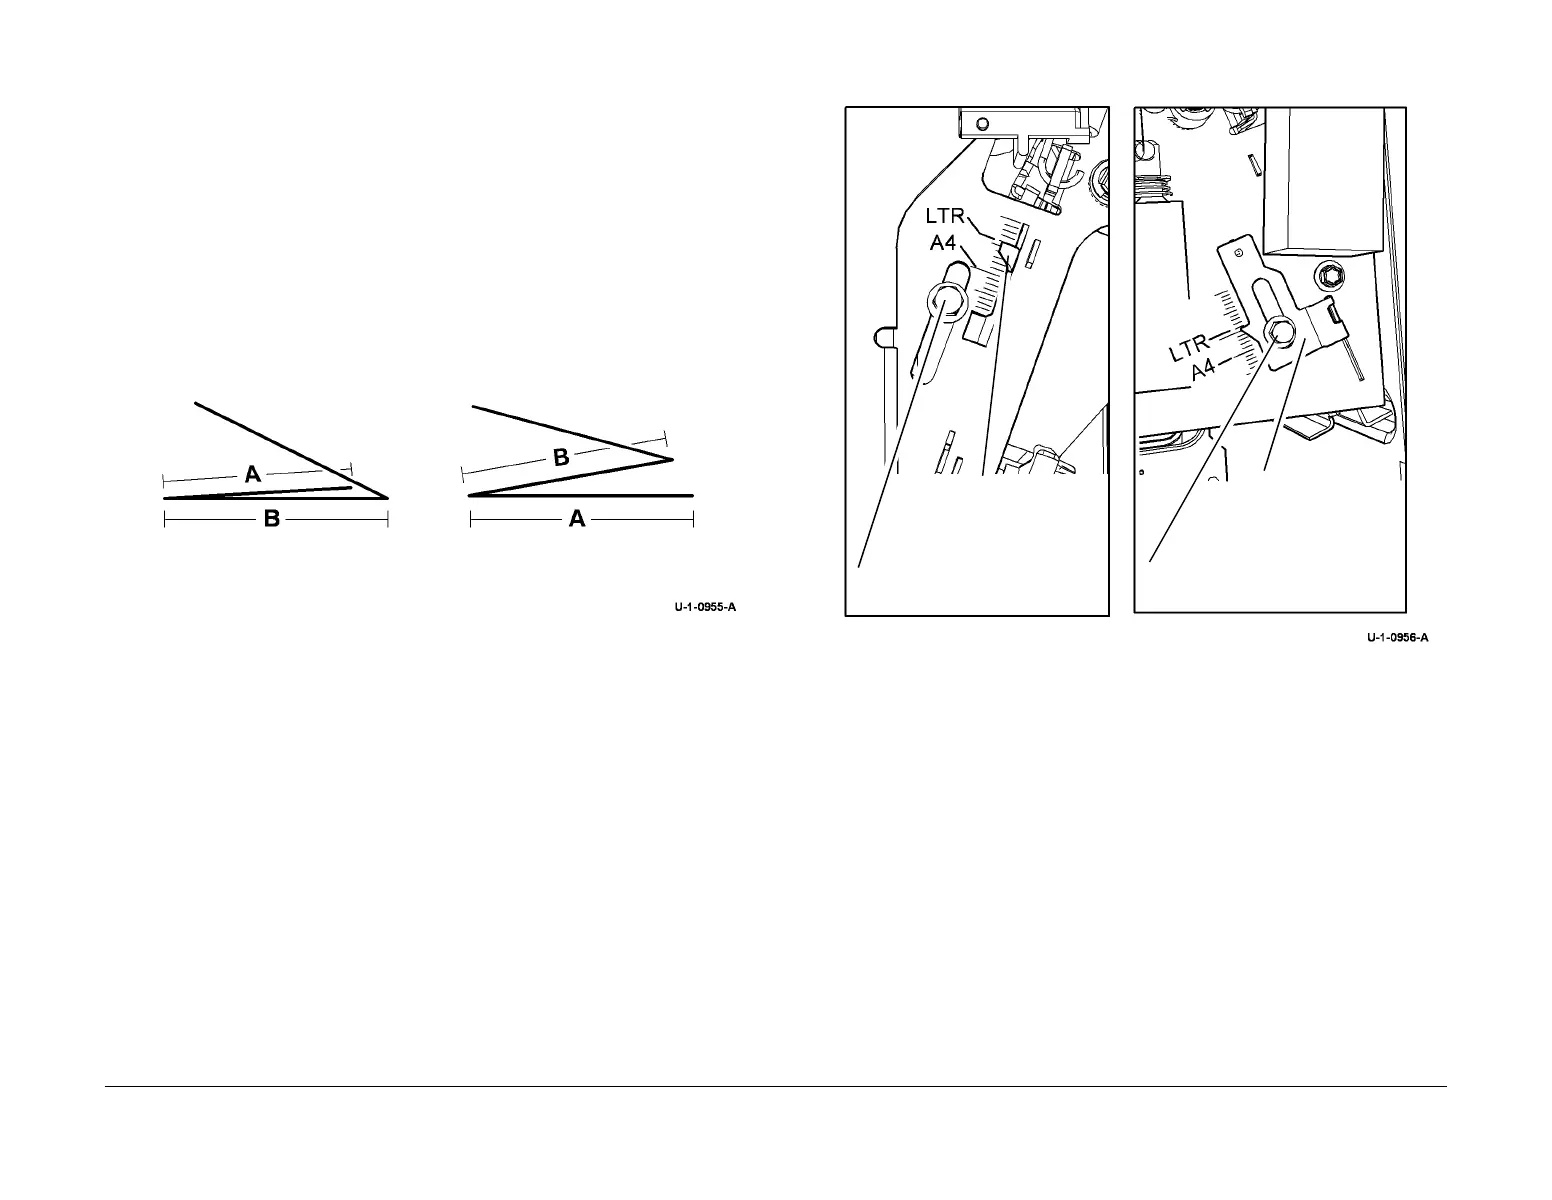
Figure 2 C folded and Z folded output copy profiles
NOTE: Figure 2. Shows the orientation of a C and Z folded copy on the tri-folder output tray, as
viewed from the front of the machine.
A Folds
Figure 2. The folds marked A are created within the booklet maker module. The length of the A
fold is determined by the NVM values in dC131. An increase to the NVM value by 30 will
decrease the A fold by 1 mm. A decrease to the NVM value by 30 will increase the A fold by 1
mm.
•Use dC131 code 12-009 to make adjustments to C folded copies.
•Use dC131 code 12-010 to make adjustments to Z folded copies.
B Folds
Figure 2. The folds marked B are created within the tri-folder module. The length of the B fold is
determined by the position of the paper setting adjusters. If necessary remove the front door,
PL 12.200 Item 2, front cover PL 12.200 Item 12 and the rear cover PL 12.200 Item 3, then
reposition the paper setting adjusters. Figure 3. An adjustment of 1 graduation on the paper
size adjuster scale will adjust the position of fold B by 1 mm.
• Raise the paper setting adjusters to decrease fold B.
• Lower the paper setting adjusters to increase fold B.
Figure 3 Set the paper size adjusters.
C Fold profile Z Fold profile
1
Loosen the screw.
2.
Move the adjuster
3
Fasten the screw.
1
Loosen the screw.
2
Move the adjuster.
3
Fasten the screw.
 Loading...


