February 2013
4-7
ColorQube® 9303 Family
REP 1.2
Repairs/Adjustments
Figure 3 Crimping the terminal.
3. Insert the wire fully into the terminal so that the stripped portion of the wire is within the
inner grip of the terminal. Close the crimp tool fully to make the crimp.
4. Figure 4. Insert the crimped terminal into the appropriate position of the crimp tool and
close the crimp tool, to fasten the insulation of the wire in the outer grip of the terminal.
Figure 4 Crimping the insulation grip.
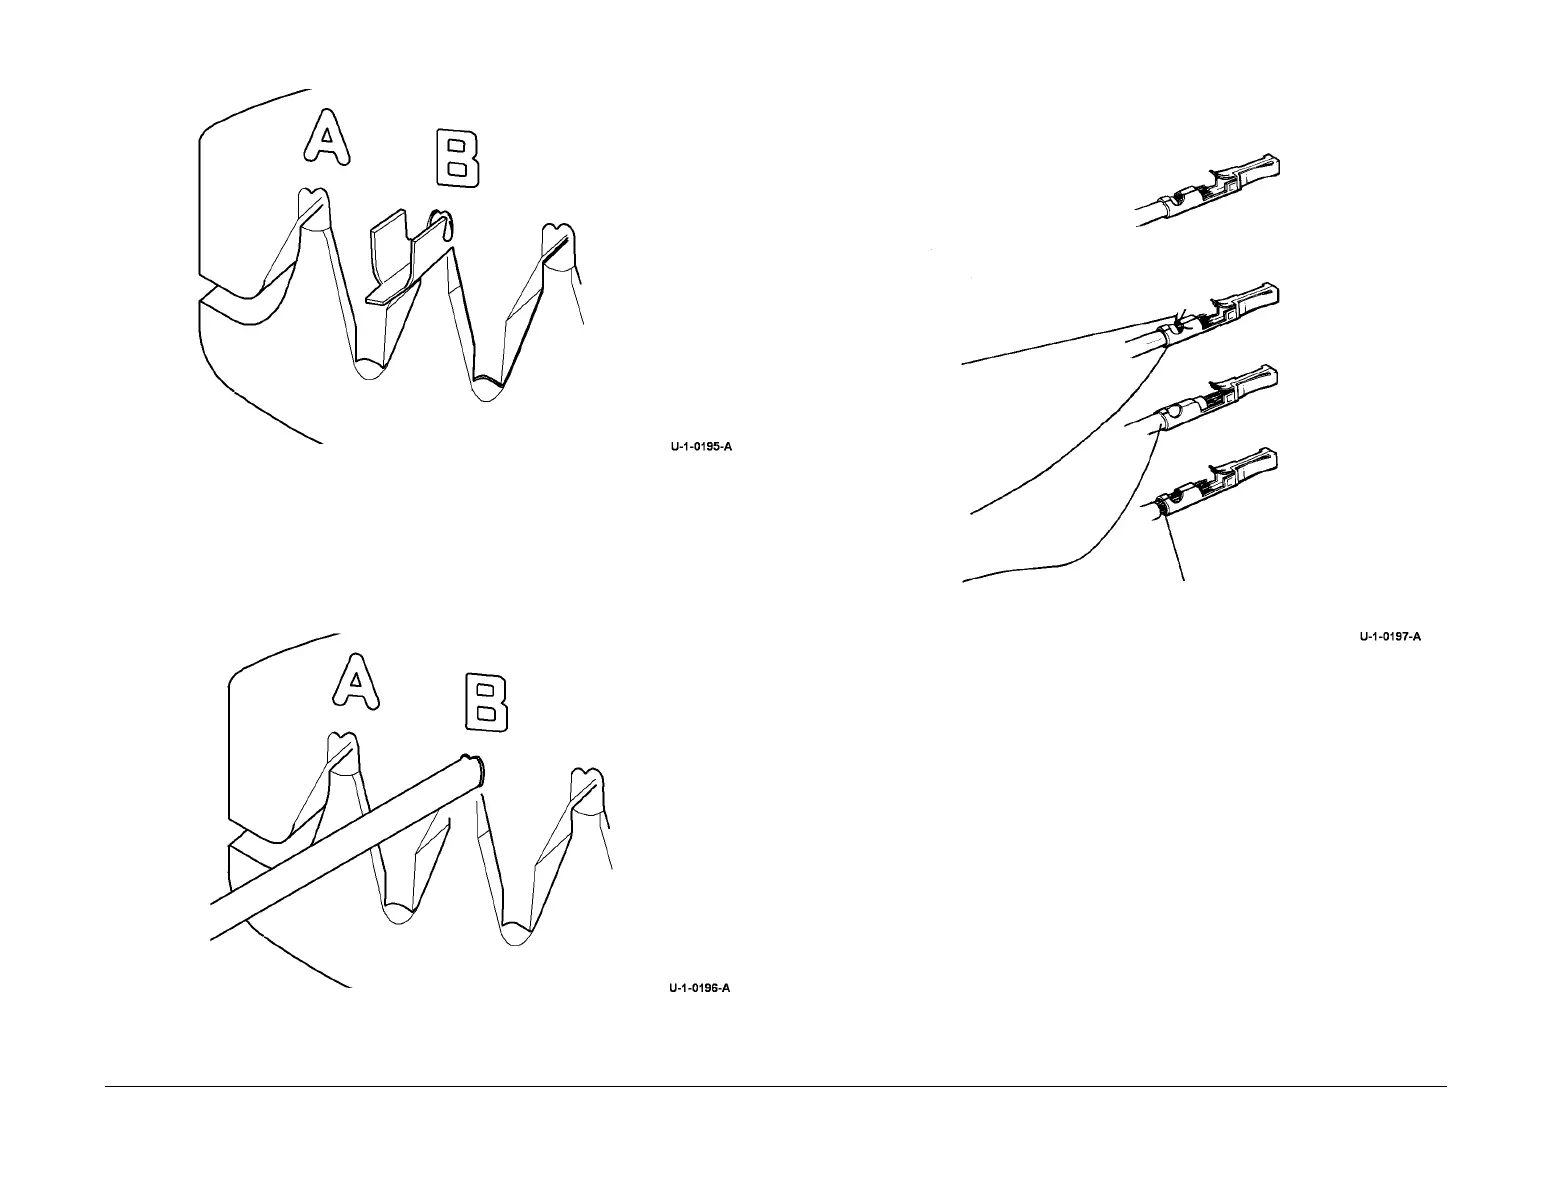
5. Figure 5. Check that the crimp is correctly made.
Figure 5 Inspecting the finished crimp.
6. Insert the replacement terminal into the connector housing.
7. If the repair was carried out on a double row connector that was disassembled, push both
connectors into the housing taking care that the “A” connector is fitted on the fastener
side.
Correct
Incorrect
Loose strands of wire
Crimp loose
Insulation in the crimp
Wire exposed
 Loading...


