February 2013
4-45
ColorQube® 9303 Family
REP 5.7
Repairs/Adjustments
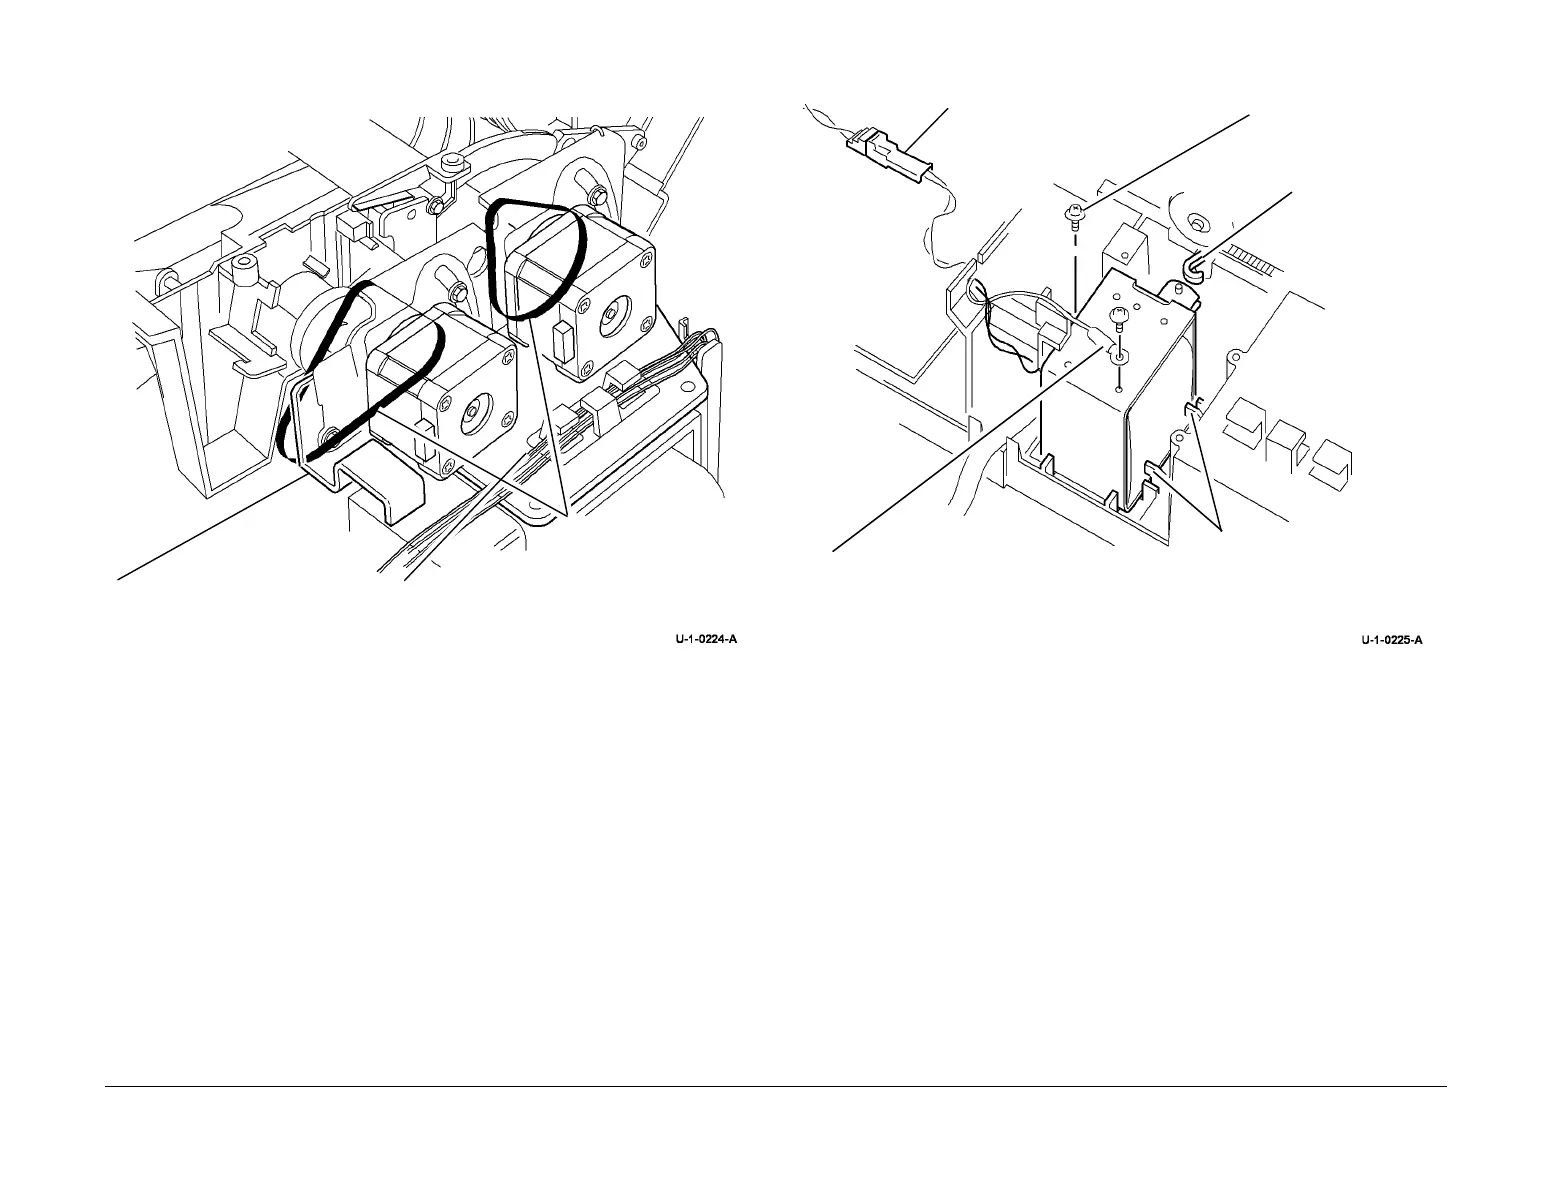
3. Remove the drive assembly, Figure 2.
Figure 2 Drives assembly
4. Remove the duplex solenoid, Figure 3.
Figure 3 Duplex solenoid
Replacement
CAUTION
The screw that attaches the ground harness to the duplex solenoid is shorter than the other
screws. Do not use the incorrect screw.
1. The replacement is the reverse of the removal procedure. Make sure that the wiring is not
caught below the drive assembly.
2. Perform the DADH motor adjustment, ADJ 5.1.
2
Release the harness.
1
Release the tension and
disengage the drive
belts.
3
Remove the drive assembly.
2
Remove the screw.
4
Disconnect the ground harness.
3
Disconnect PJ205.
5
Release the duplex sole-
noid from the clips.
1
Disconnect the
link arm.
 Loading...


