February 2013
4-108
ColorQube® 9303 Family
REP 12.7-110
Repairs/Adjustments
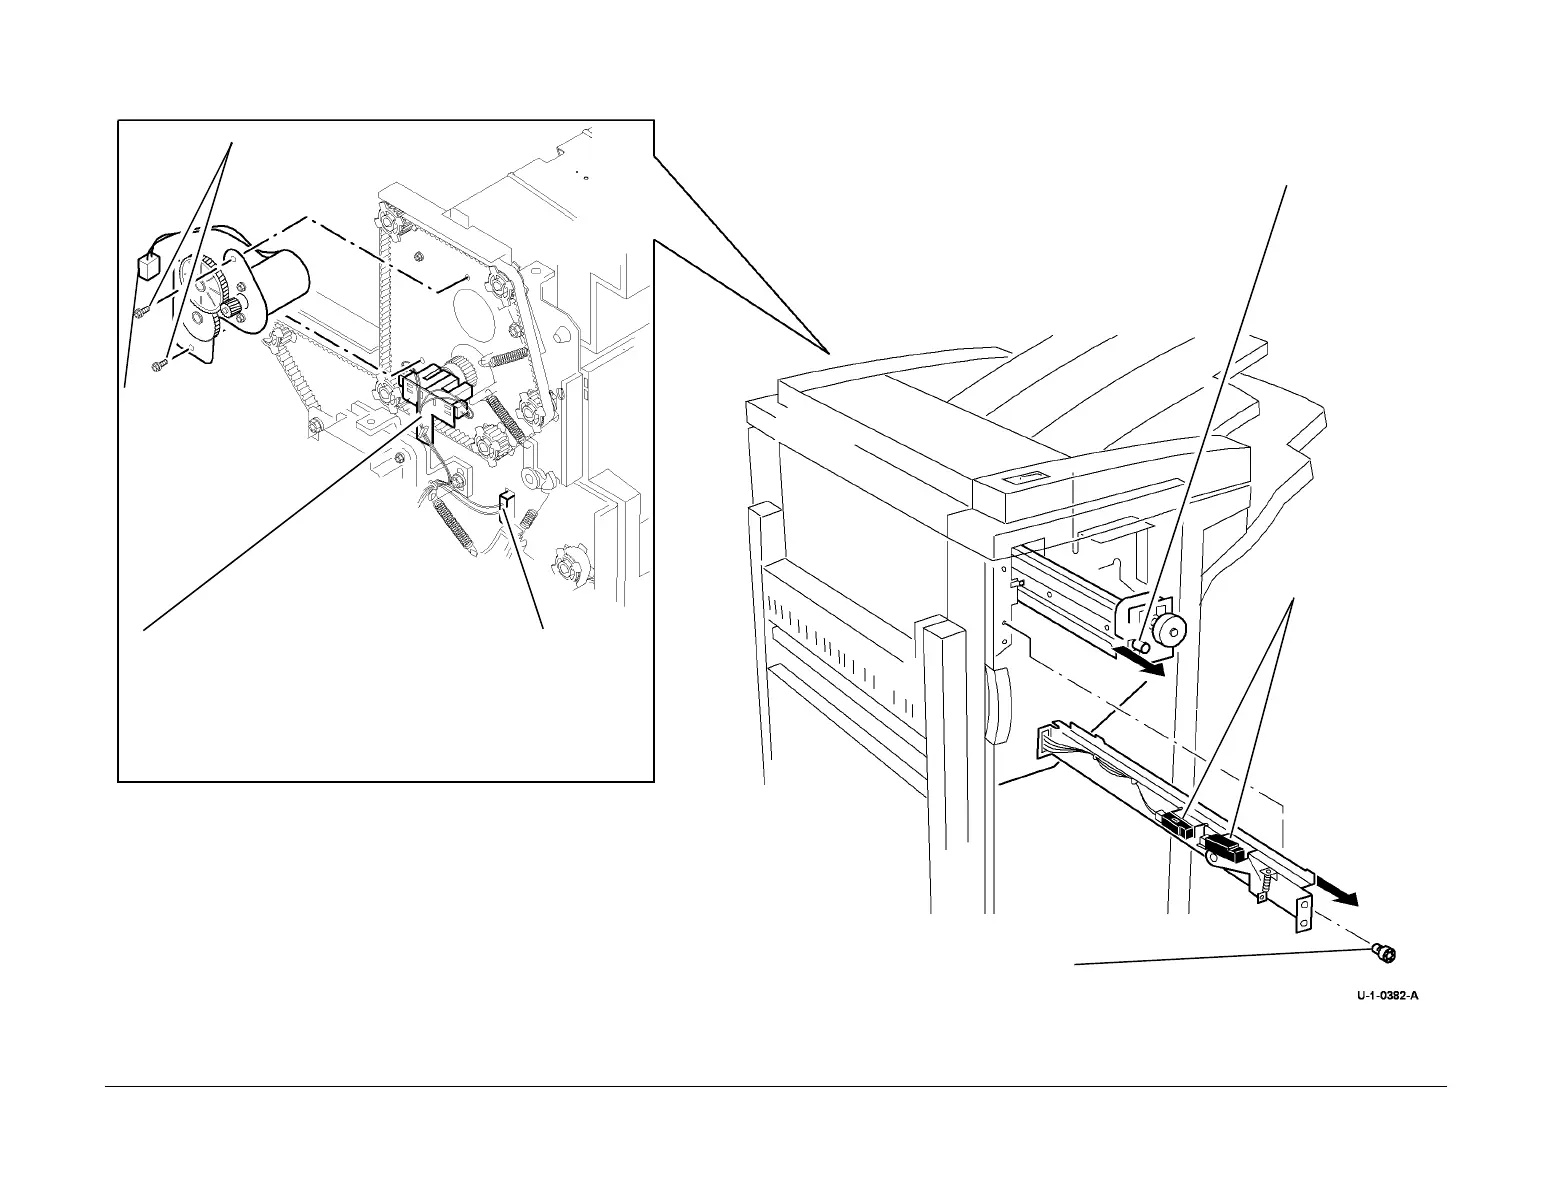
3. Remove the hole punch unit, motor assembly and sensors, Figure 1.
Figure 1 Hole punch unit, motor and sensors
4
Remove the screw securing the sensor bracket. Discon-
nect the harnesses and remove the bracket assembly.
Press the tabs together to remove the punch head
home and punch head present sensors.
3
Disconnect the
motor harness and
remove the hole
punch motor
assembly.
2
Remove 2 screws.
6
Remove screw and slide out the bracket.
5
Disconnect
the PJ.
7
Remove 2 screws,
remove sensors
and disconnect the
harnesses.
1
Remove the thumb
screw and slide out
the punch unit.
 Loading...


