February 2013
4-119
ColorQube® 9303 Family
REP 12.15-110
Repairs/Adjustments
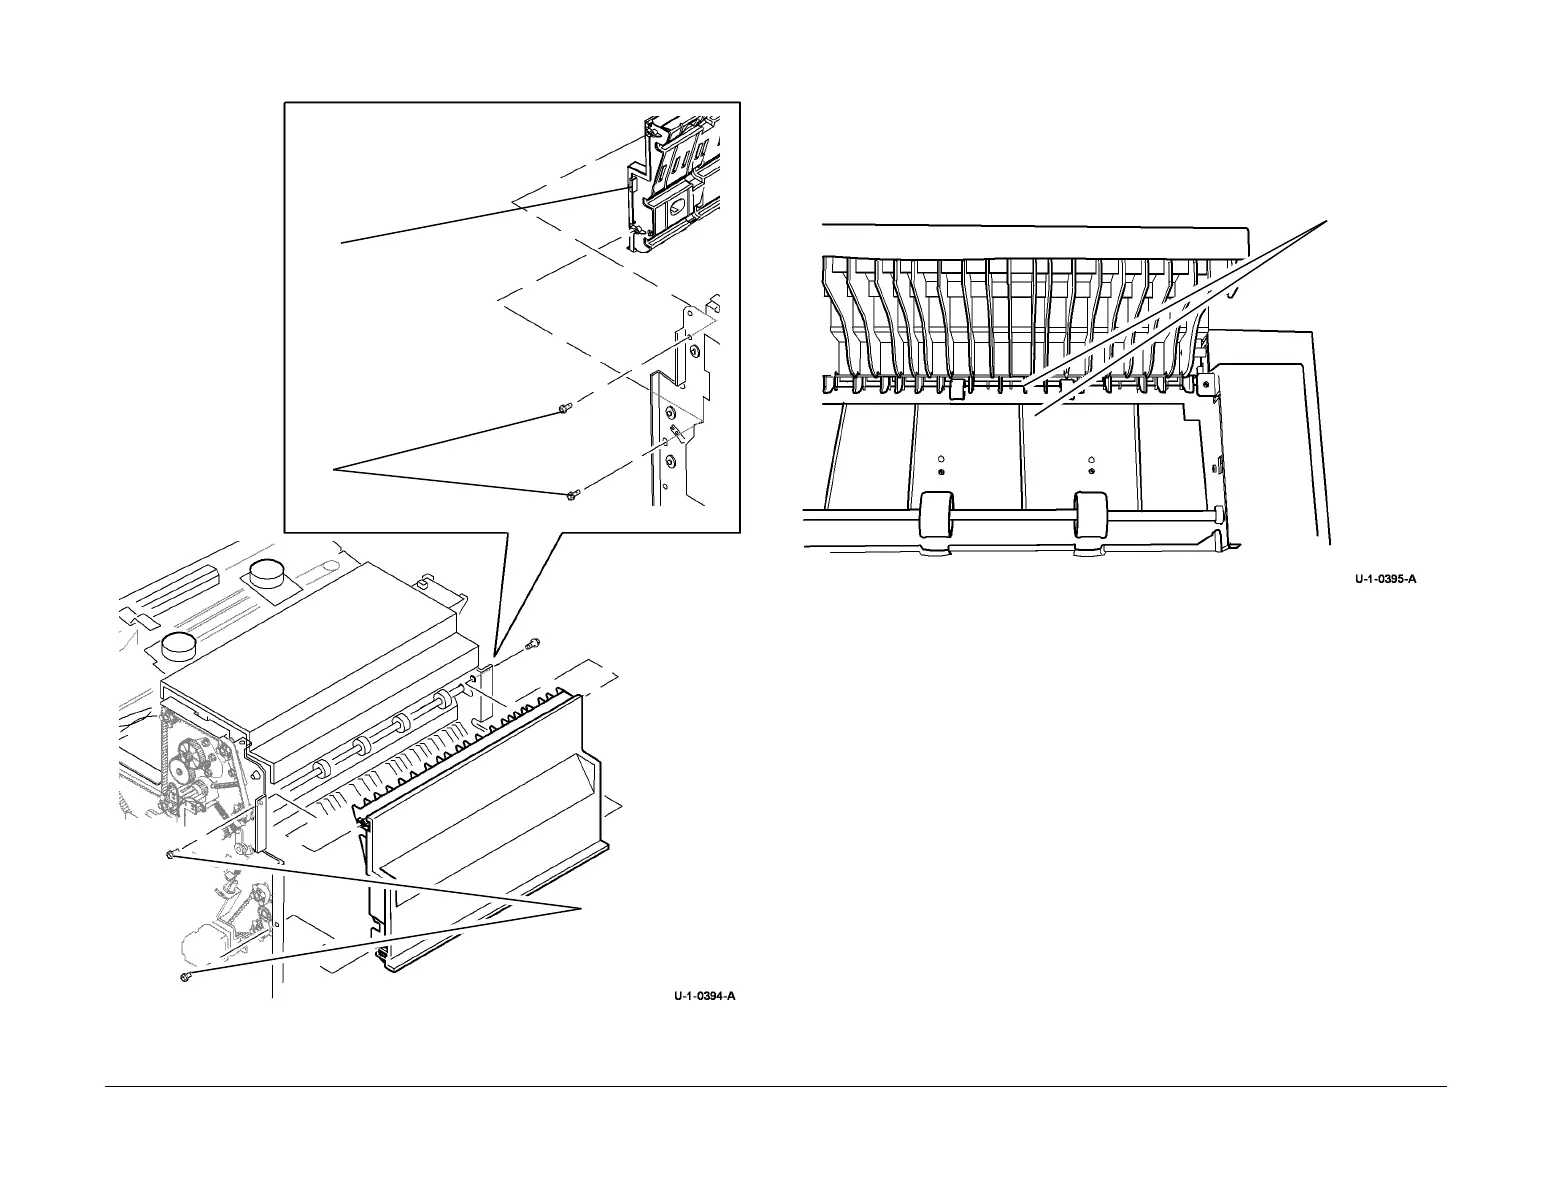
4. Figure 1, remove the entry guide cover.
Figure 1 Entry guide cover removal
Replacement
1. Bias the entry guide cover away from the paper guide when you tighten the screws.
2. The clearance between the entry guide cover and the paper guide must be a minimum of
1 mm. Refer to Figure 2.
NOTE: If the clearance is less than 1 mm, then install a new entry guide cover.
Figure 2 Entry guide cover clearance
3. Run copies through the output device, if possible use heavy weight paper or labels.
Check for marks on the print and for damage to the paper. If there are no marks or dam
-
age then install the covers.
1
Remove 2 screws.
2
Remove 2 screws.
3
Remove the entry
guide cover.
Check for a
minimum
clearance of
mm between
the entry
guide cover
and the pape
guide.
 Loading...


