62Y3A11
4-10
1
2
3
4
5
6
7
8
I
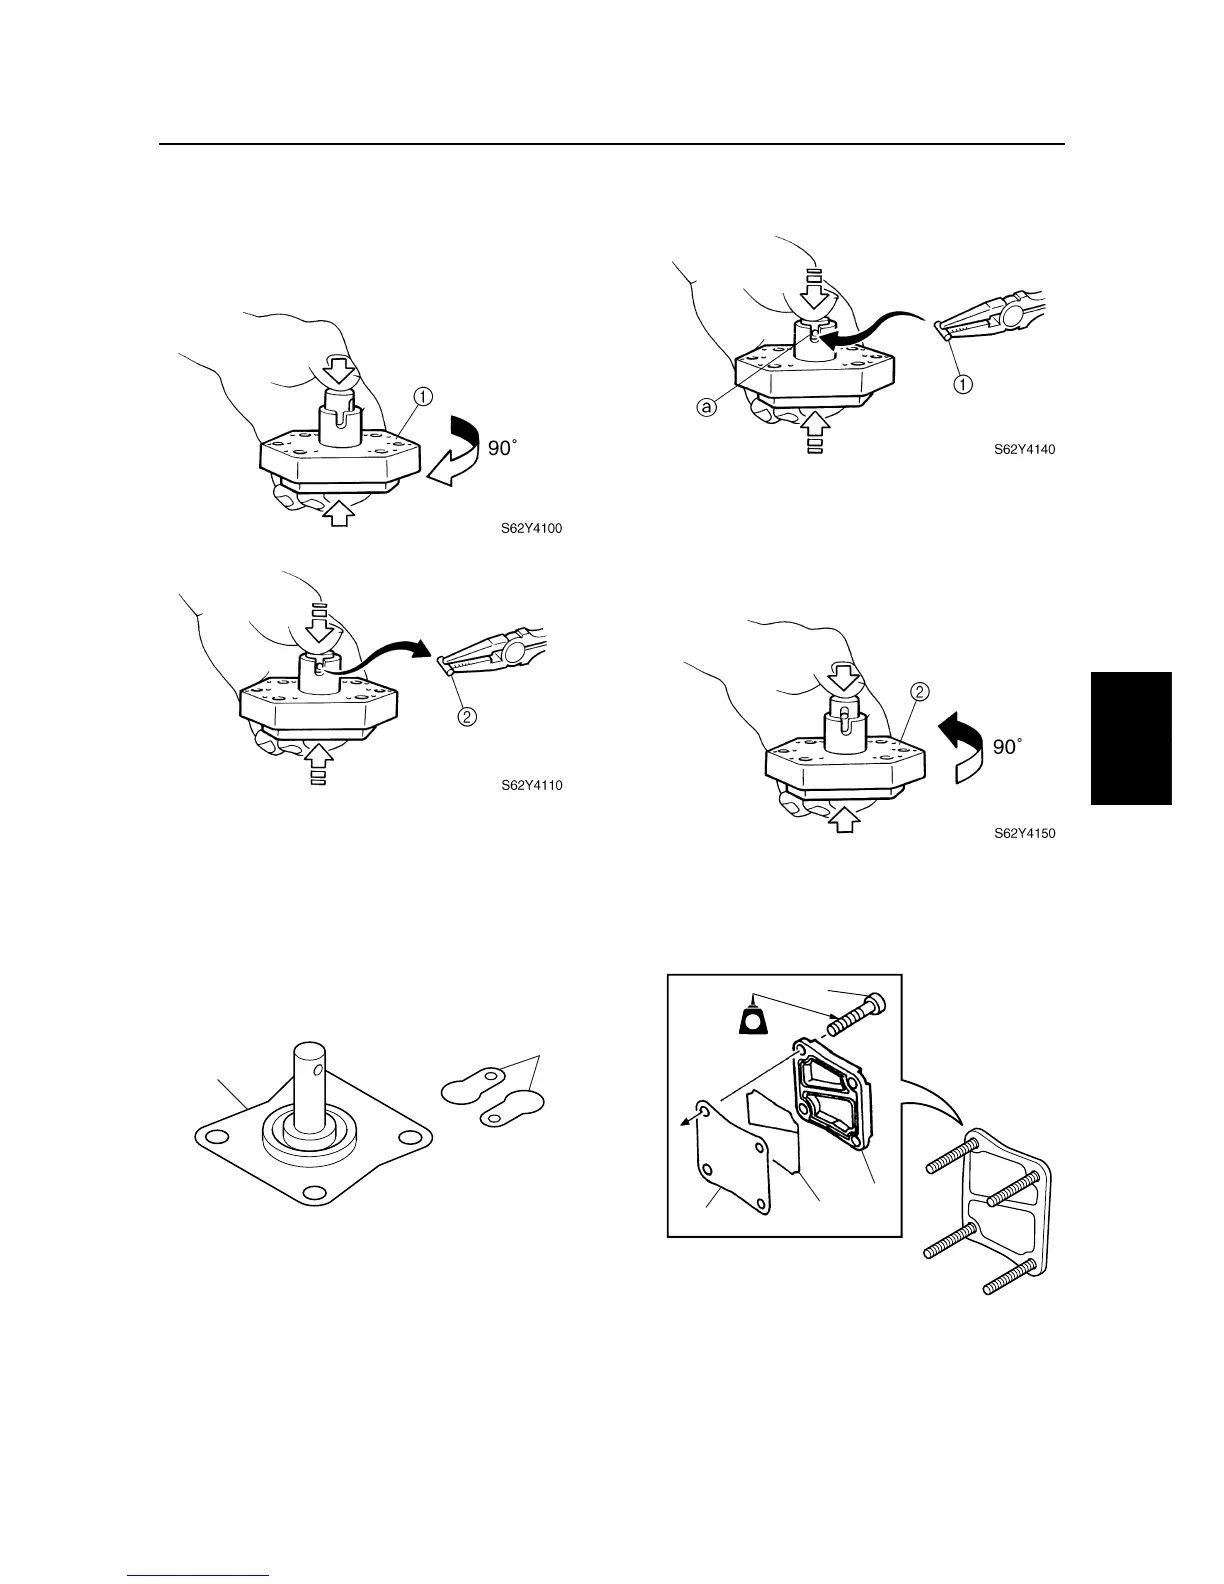
2. Push down on the plunger and the dia-
phragm, turn the fuel pump body 1
1
approximately 90° to a position where the
pin
2
can be removed easily, and then
remove the pin.
3. Slowly let up on the plunger and dia-
phragm, and then remove them.
Checking the diaphragm and valves
1. Check the diaphragm
1
for tears and the
valves
2
for cracks. Replace if neces-
sary.
Assembling the fuel pump
1. Align the plunger and diaphragm installa-
tion holes
a
, and then install the plunger
into the diaphragm.
2. Push down on the plunger and the dia-
phragm, and then install the pin
1
.
3. Turn the fuel pump body 1
2
approxi-
mately 90°, and then push down on the
plunger several times to make sure that
the pin does not come out.
4. Assemble the cover
3
, gasket
4
, and
seal
5
with the screws
6
, and then
install the fuel pump.
S62Y4120
1
2
S62Y4160
6
3
4
5
LT
LT
572
Fuel filter and fuel pump