BRKT
Bracket unit
7-69
62Y3A11
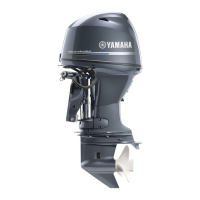
13. Install the trim cylinder end screw
N
, and
then tighten it to the specified torque.
CAUTION:
Do not damage the check valve
b
when
tightening the end screw.
Assembling the tilt cylinder
1. Install the valve seal
1
and the circlip
2
into the free piston
3
as shown.
2. Install the free piston into the trim cylin-
der
4
by installing the circlip
5
.
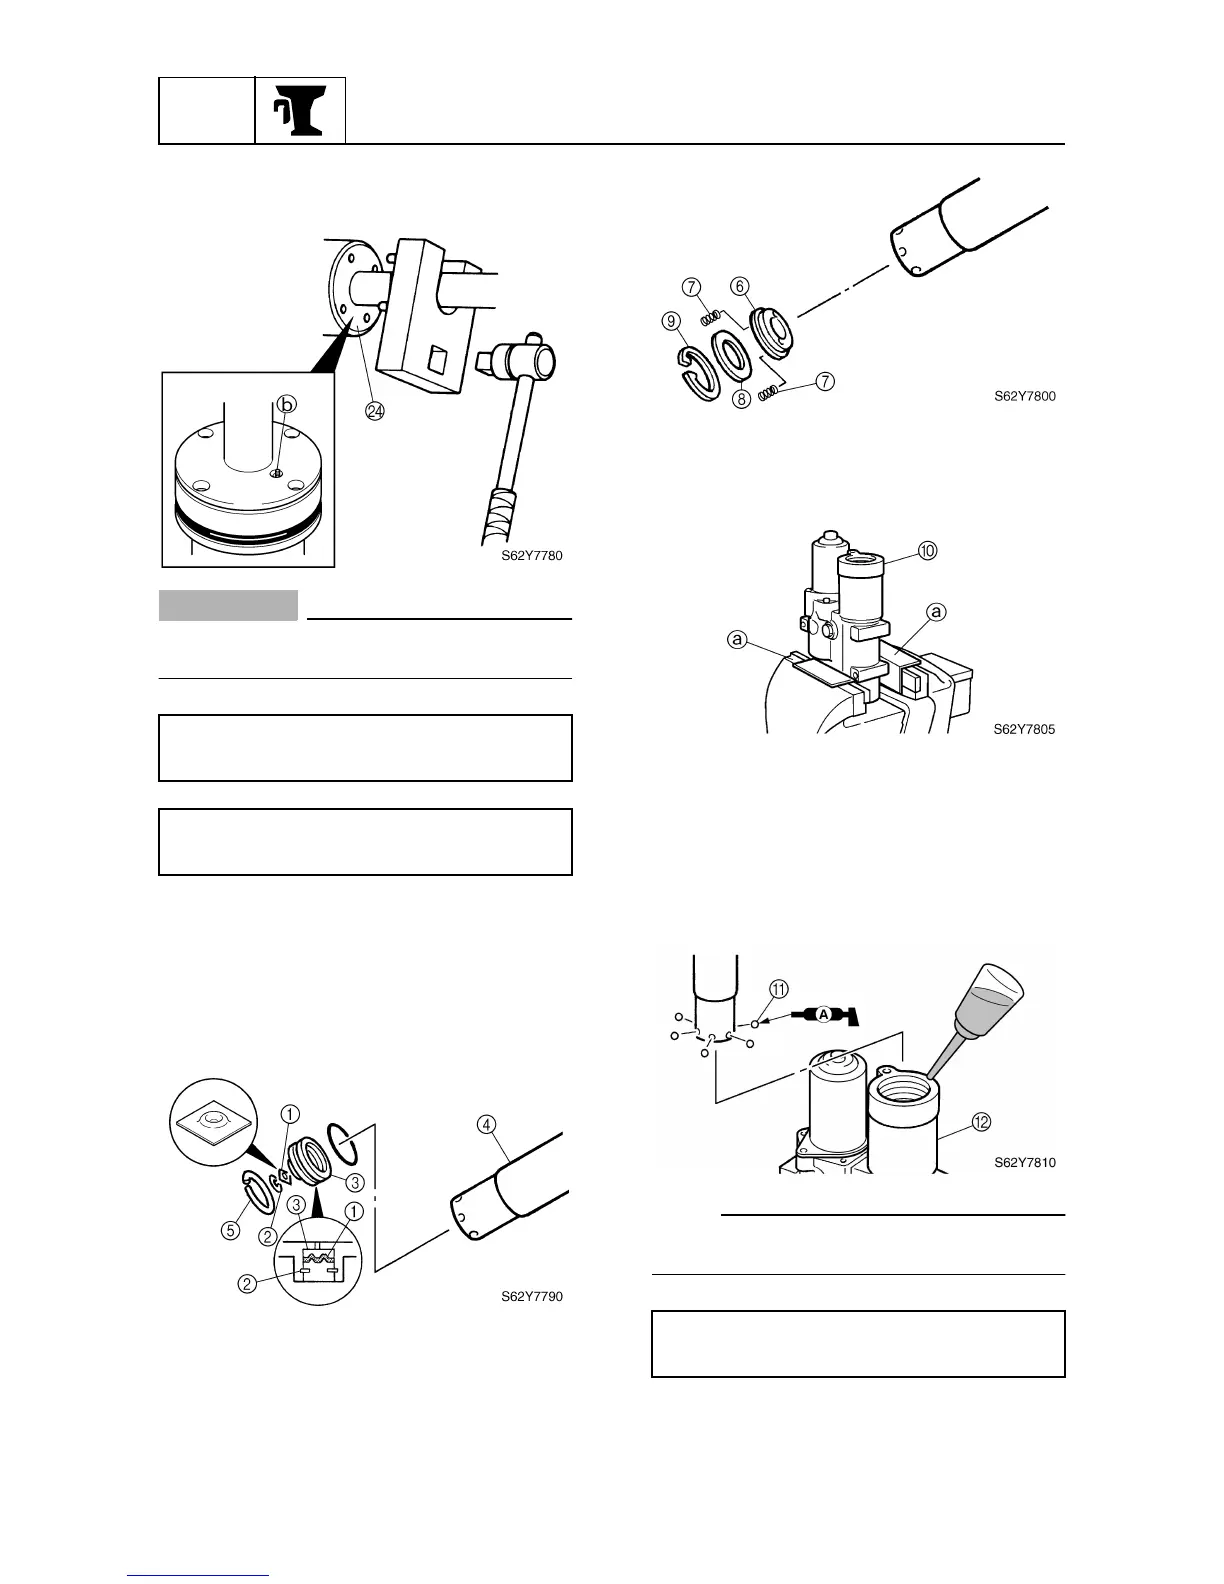
3. Install the trim cylinder base
6
, springs
7
, and plate
8
into the trim cylinder with
the circlip
9
.
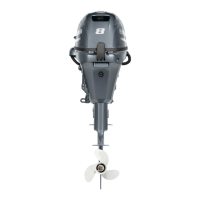
4. Hold the power trim
0
and in a vise
using aluminum plates
a
on both sides.
5. Add fluid of the recommended type to the
first level at the bottom of tilt cylinder.
6. Install the balls
A
into the trim cylinder,
and then insert the trim cylinder into the
tilt cylinder
B
.
NOTE:
Apply grease to the balls to prevent them
from falling out of the cylinder.
Trim and tilt cylinder wrench: YB-06175-2B
Cylinder-end screw wrench: 90890-06544
Trim cylinder end screw
N
:
80 N·m (8.0 kgf·m, 58 ft·lb)
Recommended power trim and tilt fluid:
ATF Dexron
II