POWR
Power unit
5-33
62Y3A11
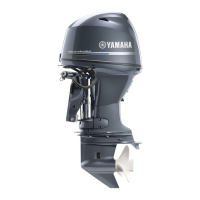
3. Check that the “” mark
c
on the retain-
ing plate is aligned with the “” mark
d
on the cylinder body.
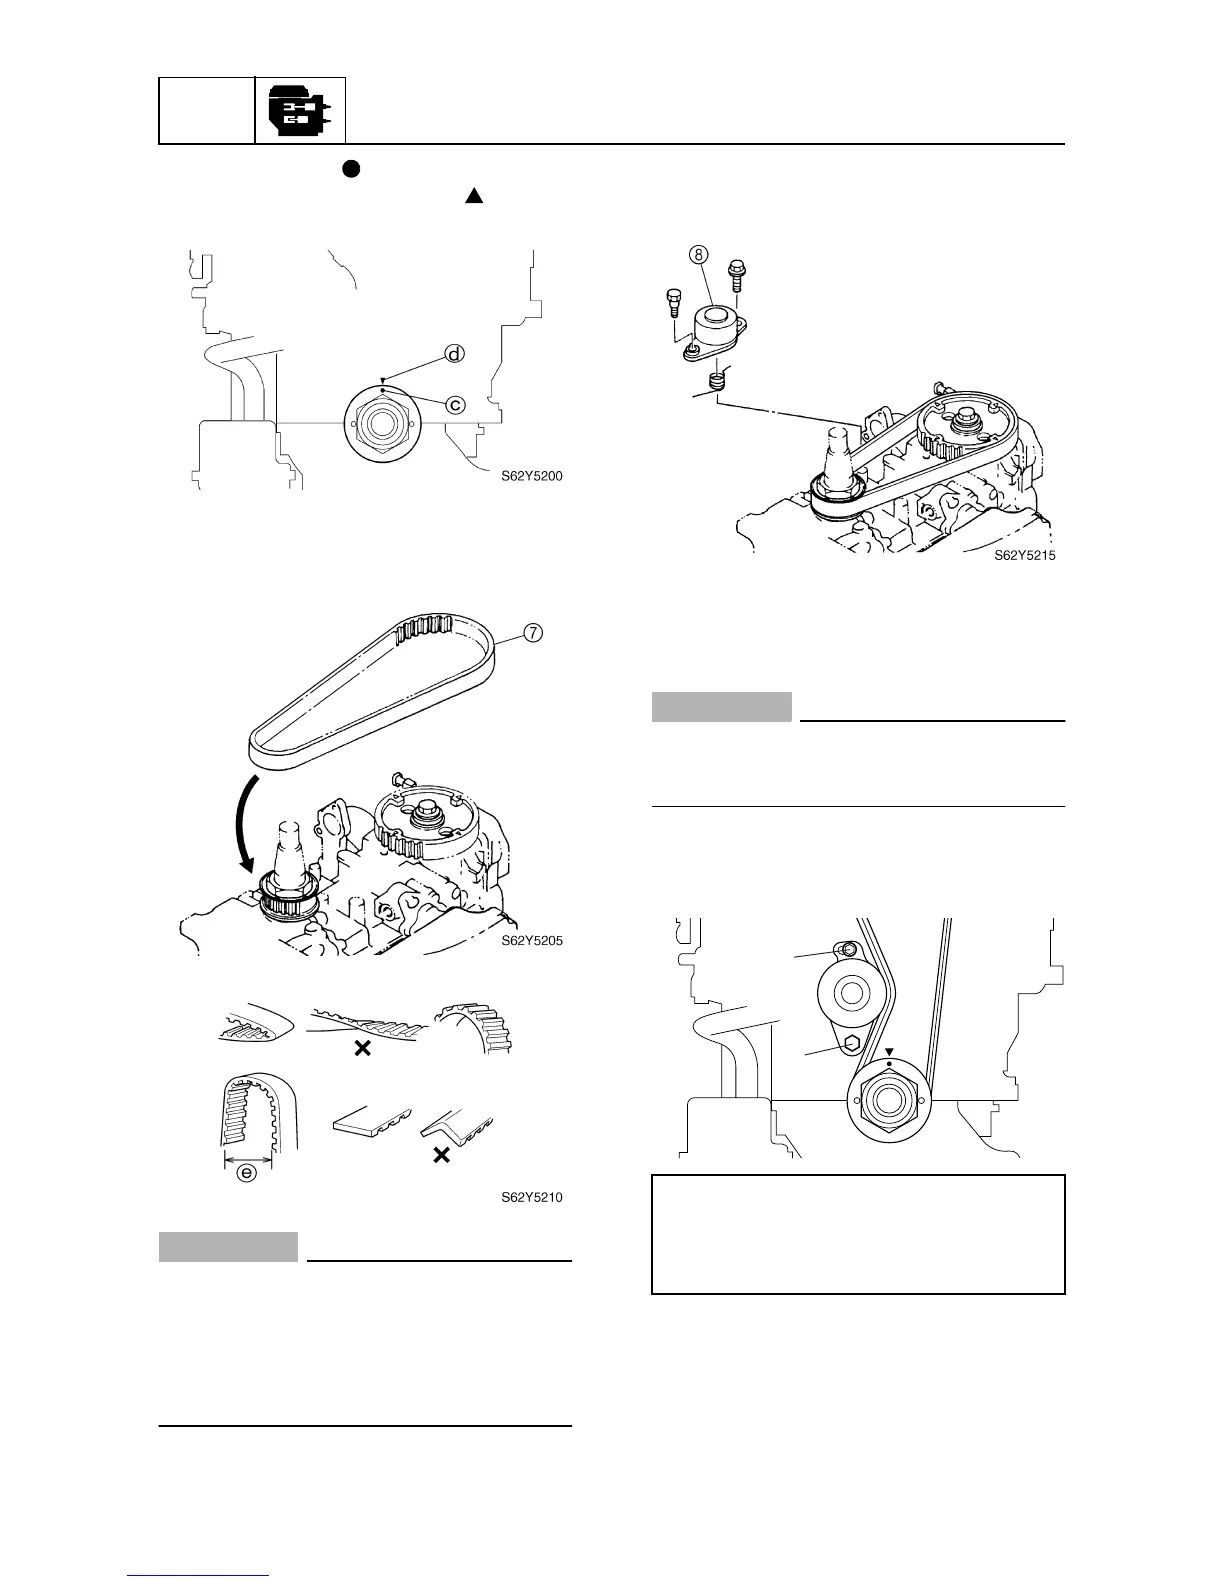
4. Install the new timing belt
7
from the
drive sprocket side with its part number
in the upright position.
CAUTION:
• Do not twist, turn inside out, or bend the
timing belt beyond the maximum limit of
25 mm (1.0 in)
e
, otherwise it may be
damaged.
• Do not get oil or grease on the timing
belt.
5. Install the tensioner
8
and bolts, and
then tighten the bolts finger tight.
6. Take up the timing belt slack by turning
the drive sprocket clockwise at least two
full turns.
CAUTION:
Do not turn the sprockets counterclock-
wise, otherwise the valve system may be
damaged.
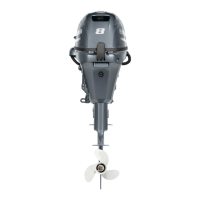
7. Tighten the tensioner bolts to the speci-
fied torque.
8. Turn the drive sprocket two turns, and
then check that the alignment marks are
aligned.
Tensioner bolt
9
:
8 N·m (0.8 kgf·m, 5.8 ft·lb)
Tensioner bolt (adjusting bolt)
0
:
25 N·m (2.5 kgf·m, 18 ft·lb)
S62Y5216
0
9